
This guide explains how to enable SeaTryon Virtual Try-On for an individual WooCommerce product. You will select the correct experience type, add a custom prompt only when needed, choose an optional try-on image, and configure variable products for reliable AI virtual try-on results.
Before you enable Virtual Try-On for a product
Make sure SeaTryon is activated, the store-level Enable Virtual Try-On setting is turned on, and an AI provider is connected. Product-level options will not create a working preview unless the global SeaTryon settings are configured first.
Step 1: Enable Virtual Try-On in the product settings
- In the WordPress dashboard, go to Products → All Products.
- First, set up a simple product (for example, set the title, description, product images, and price). You can refer to the official WooCommerce tutorial for setting up the product page.
- You can also edit a WooCommerce product that should offer virtual try-on or product placement.
- In the Product data panel, open the Advanced tab.
- Select Enable Virtual Try-On.
- Choose the most appropriate option from Experience Type. If the product does not match a listed category, choose Auto.
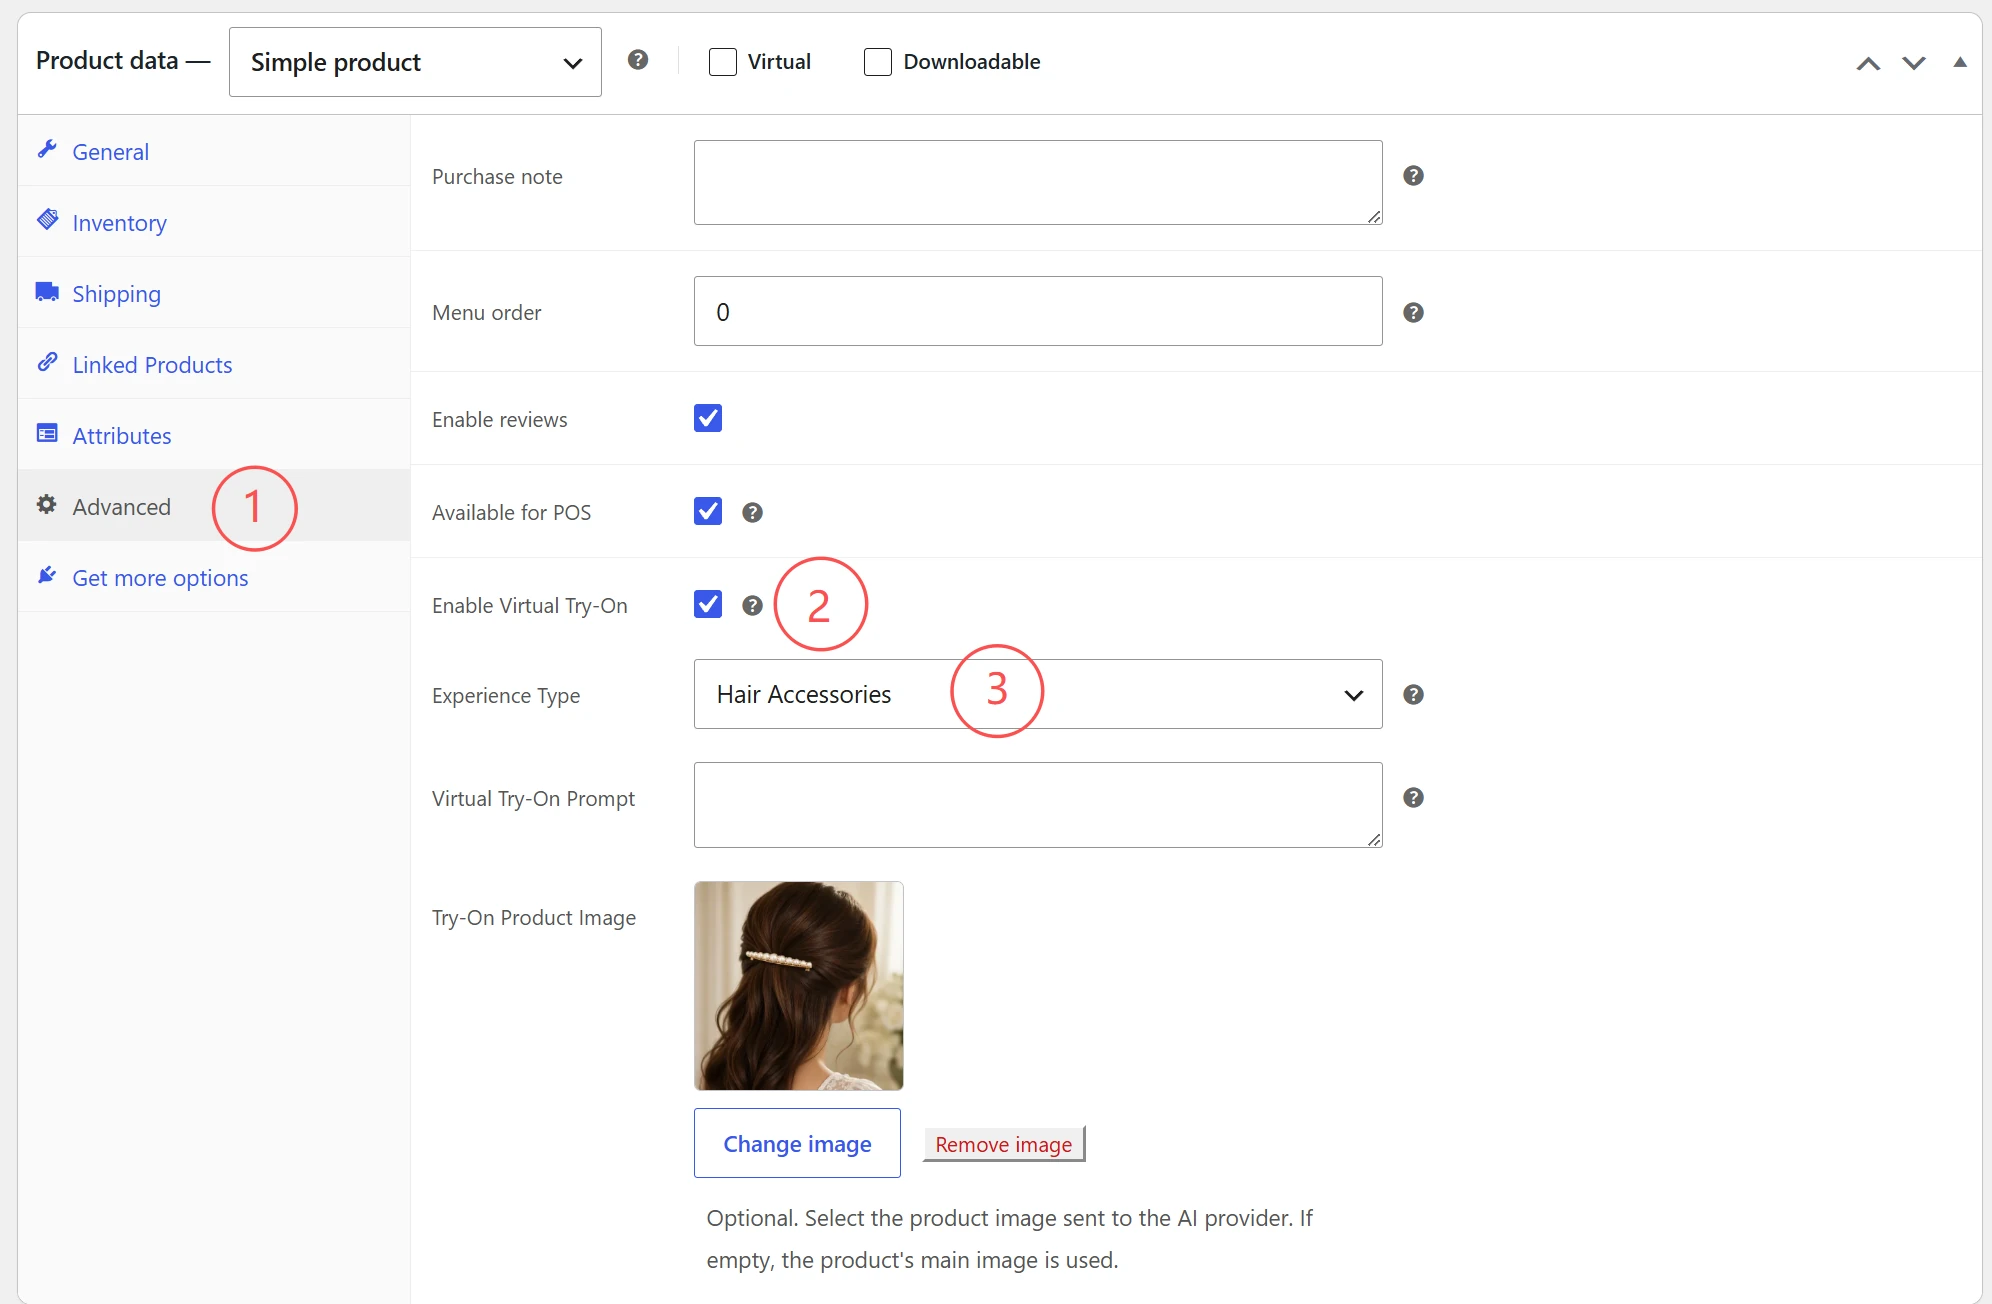
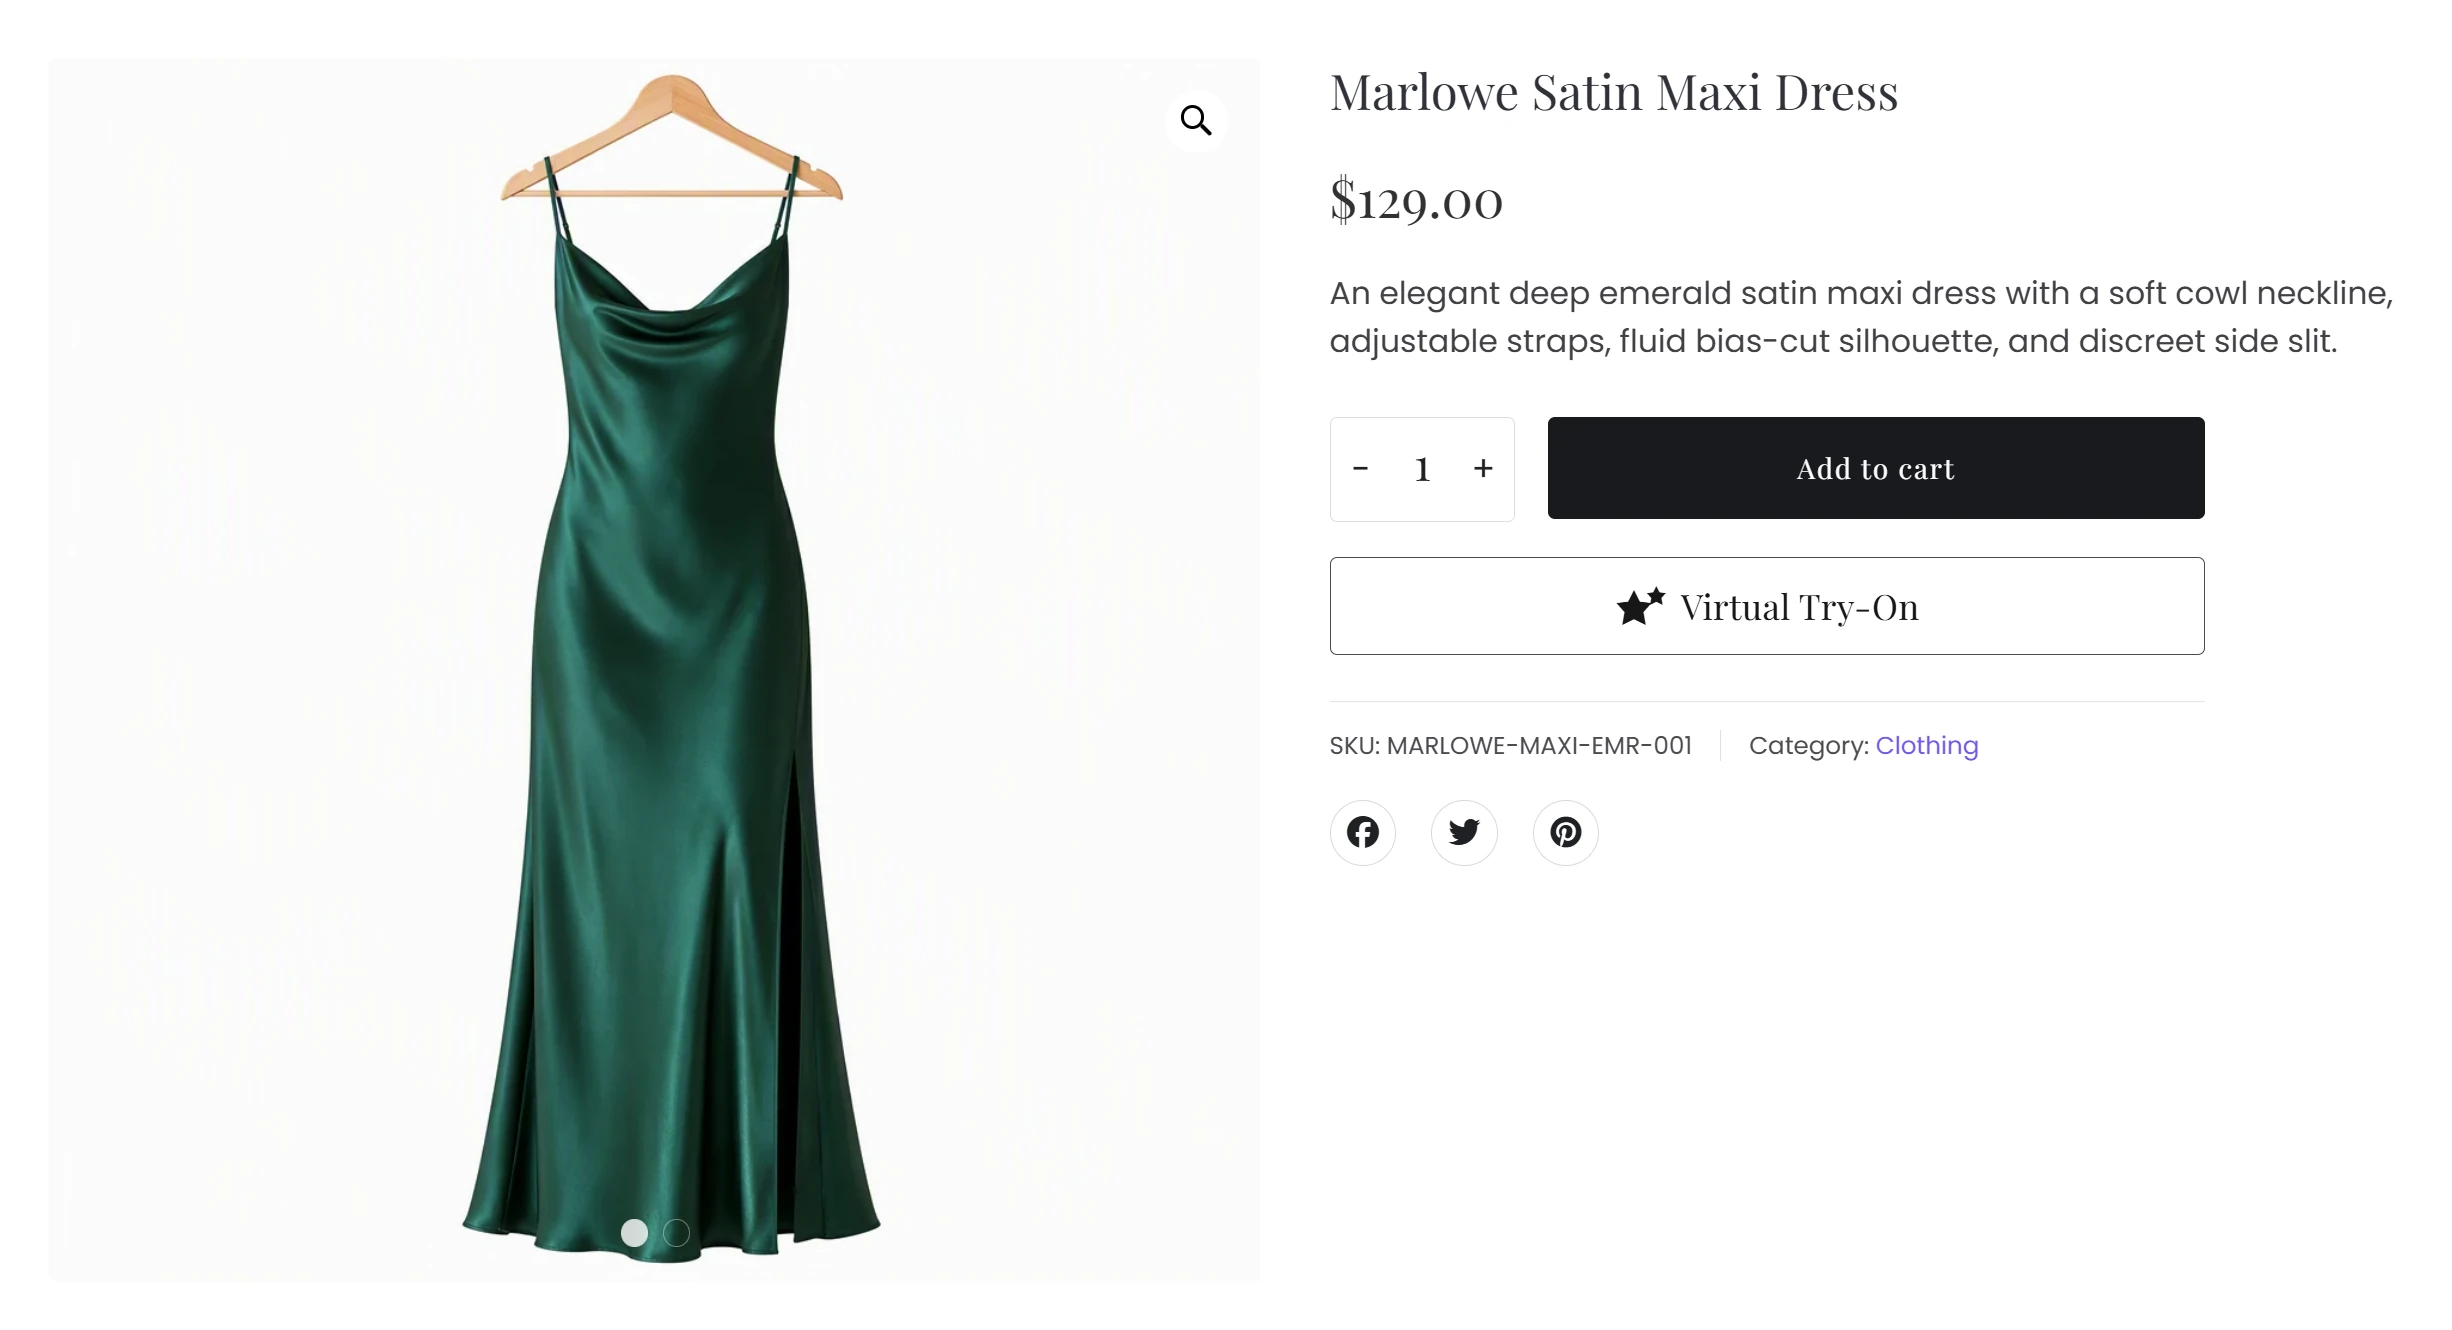
Click Update or Publish after completing the settings. The Virtual Try-On button will then appear on the product page.
Step 2: Decide whether a custom prompt is required
When you select a specific experience type, such as clothing, jewelry, glasses, wigs, or accessories, SeaTryon uses its built-in prompt for that category. In this case, leave Virtual Try-On Prompt empty.
A custom prompt is required when Experience Type is set to Auto. Keep the instruction short and describe the intended relationship between the product, the person, or the scene.
Prompt templates for Auto mode
- Wearable products:
Keep the product unchanged. Have the person wear the product naturally. - Furniture and non-wearable products:
Keep the product unchanged. Place the product naturally in the scene.
You may add a small amount of context—for example, where an accessory should be worn or where furniture should be placed—but avoid long, conflicting instructions. Always include the requirement to keep the product unchanged so the AI prioritizes product fidelity.

Step 3: Configure the optional Try-On Product Image
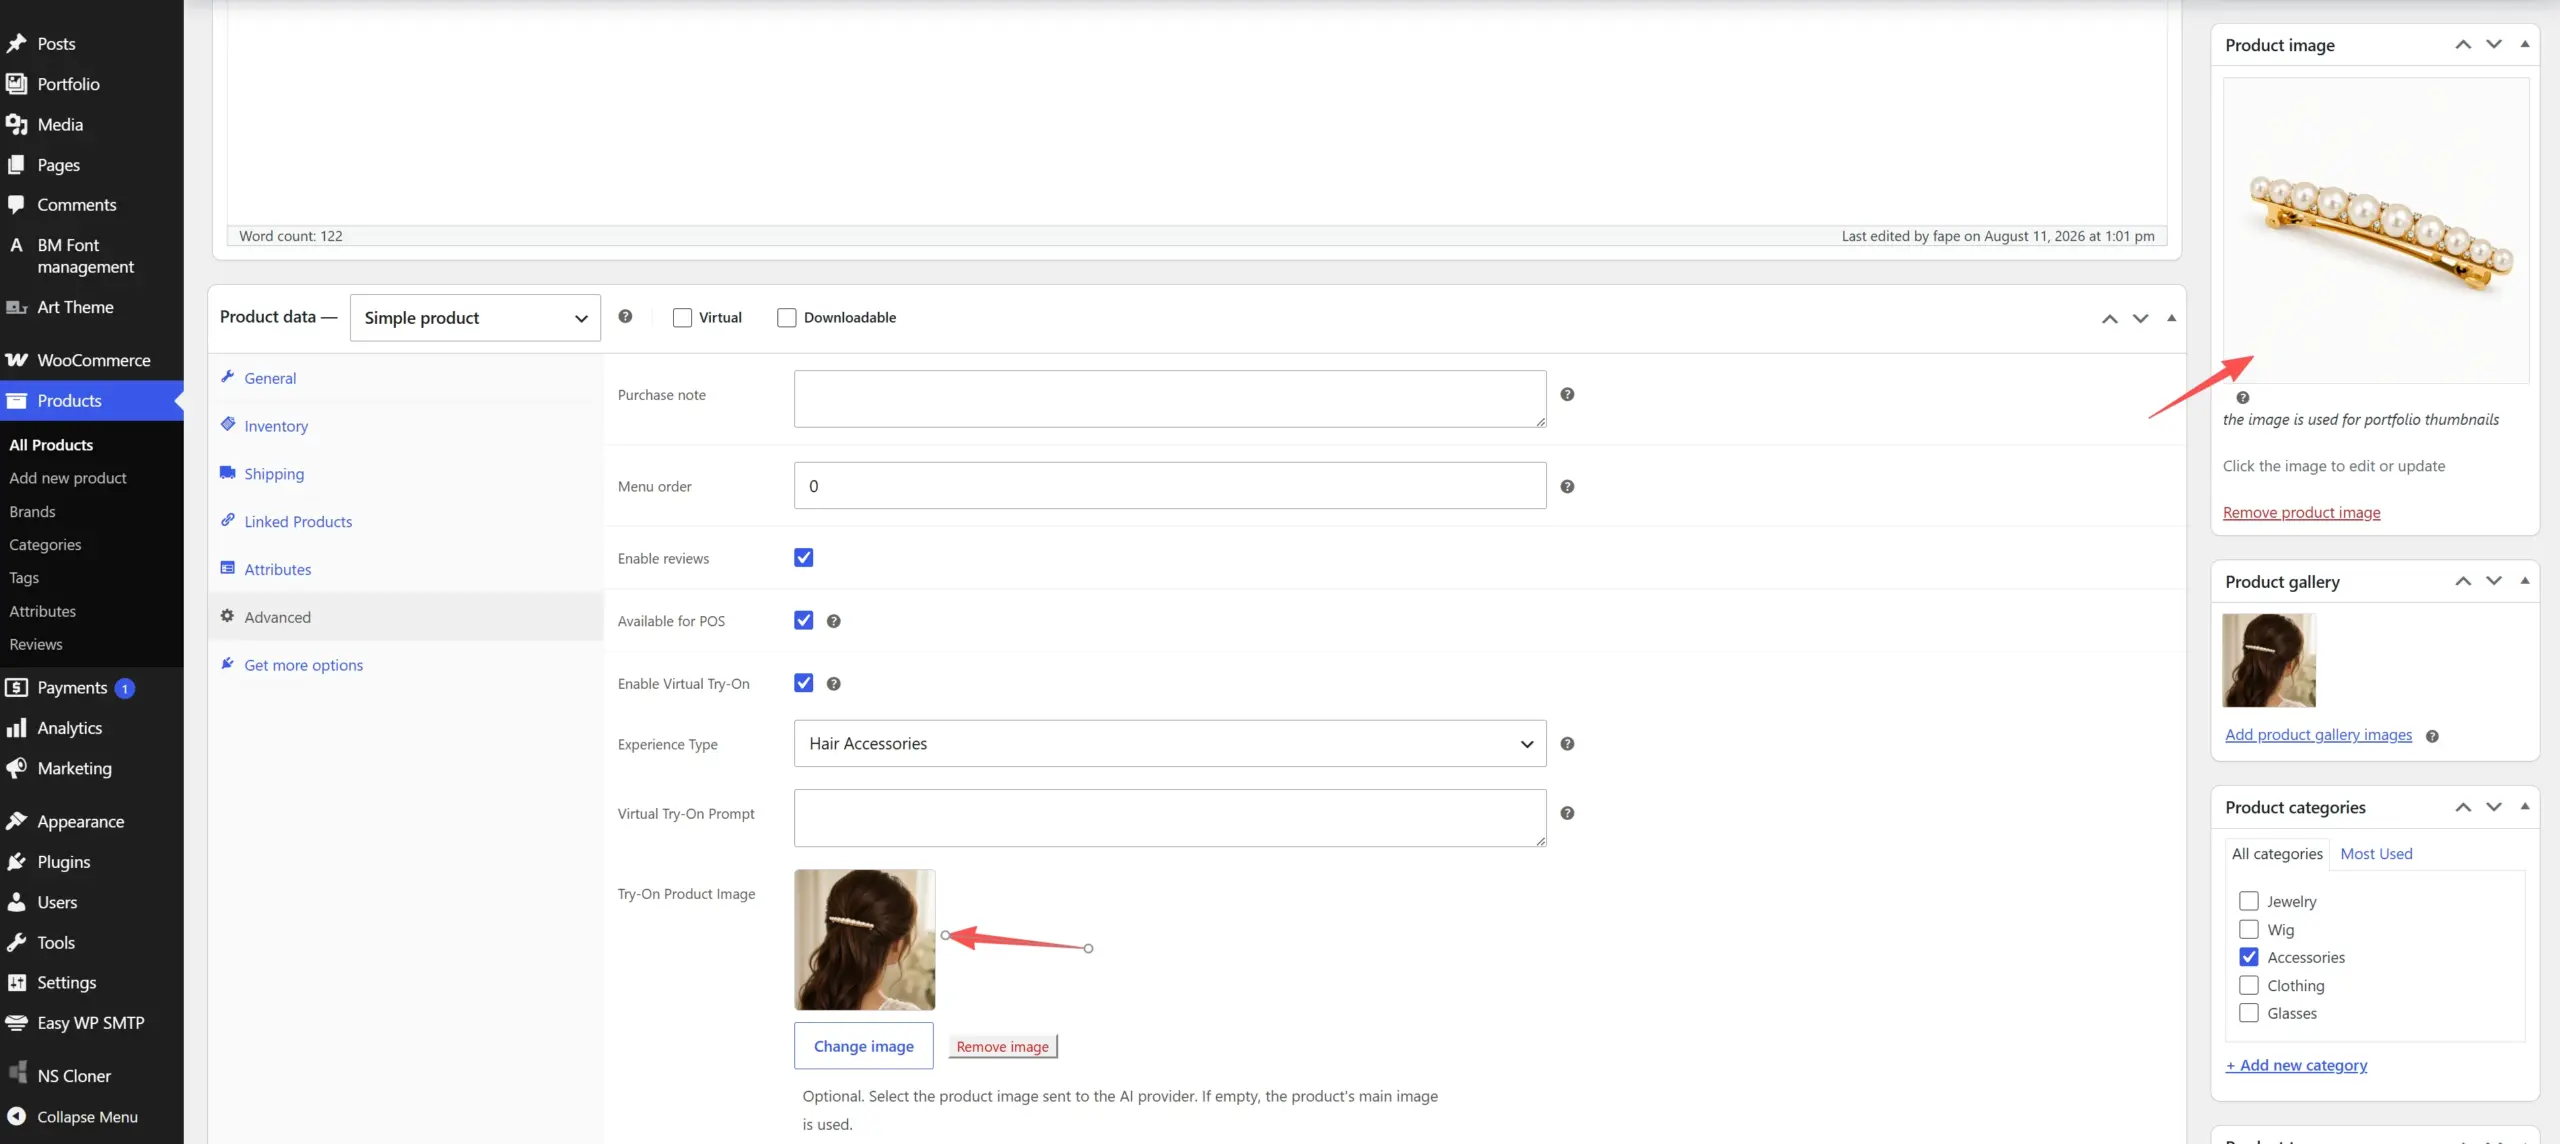
Try-On Product Image is optional for simple products. If you leave it empty, SeaTryon automatically sends the product’s main Product image to the AI provider.
For the best AI virtual try-on results, choose an image that shows the product being worn, used, or placed in context whenever possible. A pure white-background product image may not provide a reliable scale reference, so the generated item can appear too large or too small.
If your storefront requires a white-background main product image, keep that image as the WooCommerce Product image and assign a separate worn or in-context photo as the Try-On Product Image. For example, use a photo of a hair accessory on a person instead of relying only on an isolated product photo.
Step 4: Configure images for variable products
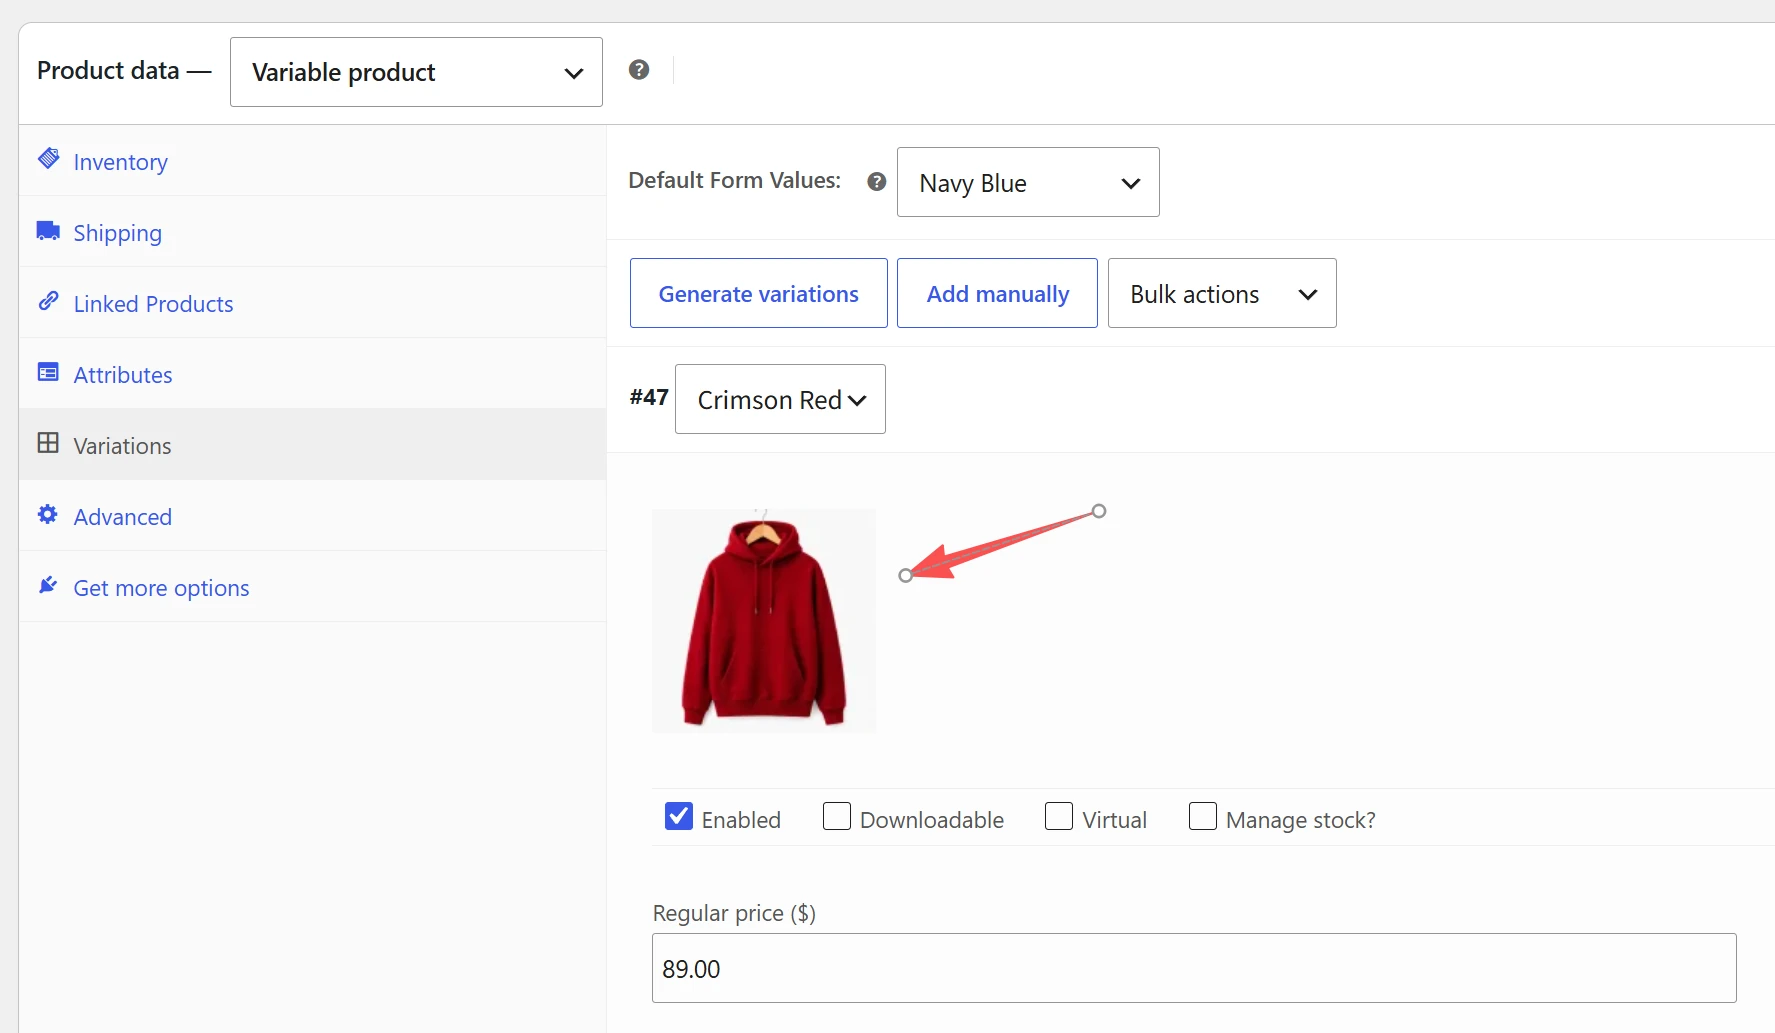
For a WooCommerce variable product, SeaTryon automatically uses the image assigned to the variation selected by the shopper. This ensures that the AI preview reflects the chosen color, style, or other visual option.
Do not set a Try-On Product Image for variable products. Instead, open Product data → Variations and assign an accurate image to every variation that customers can select. If a variation does not have its own image, verify the WooCommerce fallback image carefully because it may not match the selected option.
Final product setup checklist
- Virtual Try-On is enabled in the product’s Advanced settings.
- The closest matching Experience Type is selected, or Auto is used for an unlisted category.
- The prompt is empty for a predefined category and completed for Auto mode.
- A simple product uses a clear, correctly scaled main or Try-On Product Image.
- Every variable-product variation has the correct image, and Try-On Product Image is not set.
- The product has been updated and the Virtual Try-On button appears on the front end.