This guide explains how to configure Mail SMTP settings for user login emails. A reliable SMTP connection helps WordPress send login verification emails, password reset messages, registration emails, and other account-related notifications more consistently.
Open the Easy WP SMTP Settings Page

In the WordPress dashboard, open Easy WP SMTP and select Settings. This is where you choose the mailer and enter the SMTP connection details used by login-related emails.
Install Easy WP SMTP If Required
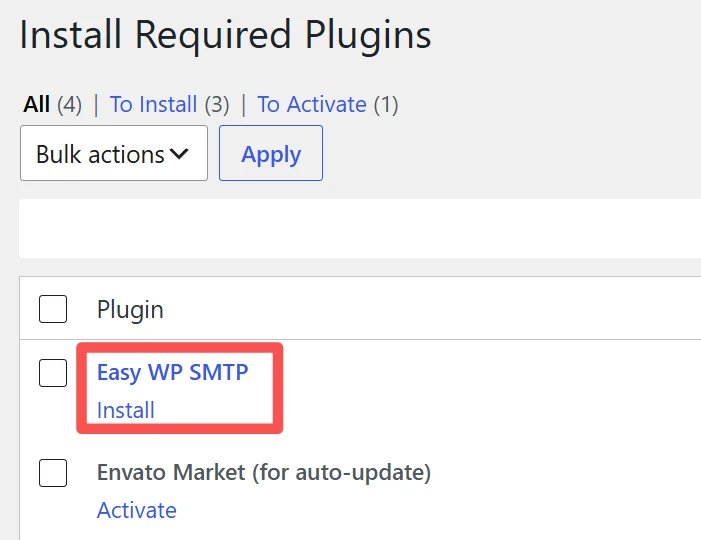
If Easy WP SMTP is not active yet, install it from the required plugins screen. After installation, activate the plugin so the SMTP settings become available in the dashboard.
Review the Mailer Settings Area
The Mailer Settings area controls how WordPress sends email. For login emails, this setting is important because the default PHP mail method may be blocked, filtered, or treated as untrusted by some mail providers.
Choose the Mailer Provider
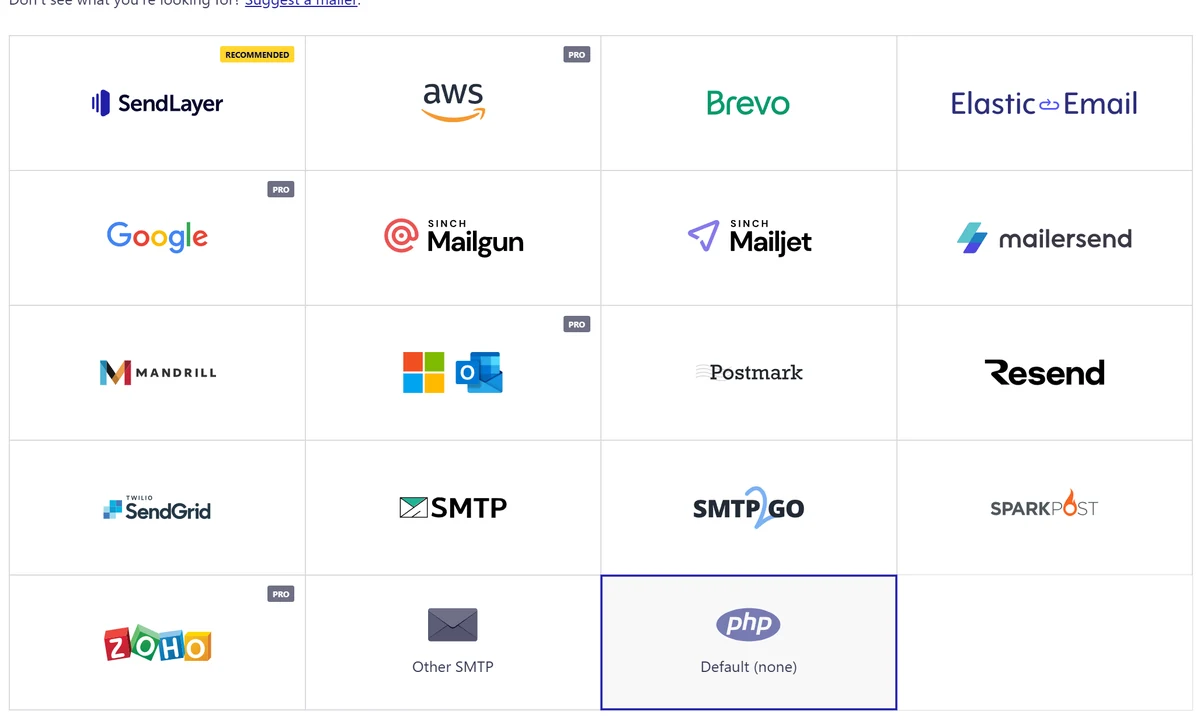
Select the mailer that matches your email provider. If your provider gives you SMTP host, port, username, and password details, Other SMTP is usually the most flexible option.
Avoid Default None for Login Emails
The Default (none) option uses the server’s default mail behavior. This may work on some hosting environments, but it does not improve deliverability and is not recommended when login emails must arrive reliably.
Check the Default Mailer Warning

When the default mailer is selected, Easy WP SMTP shows a warning that email deliverability will not be improved. For user login systems, switch to a real SMTP provider instead of leaving this default option enabled.
Select Other SMTP
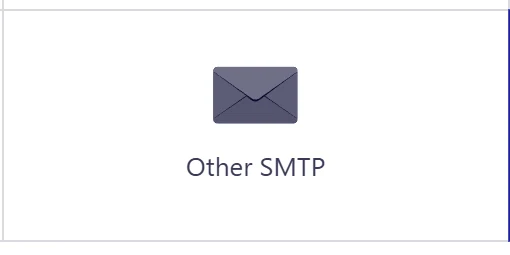
Select Other SMTP when you want to connect WordPress directly to an SMTP server. This is commonly used with business email accounts, hosting mailboxes, or third-party SMTP services.
Read the Other SMTP Notes

The Other SMTP section explains that you must enter the SMTP server details provided by your email service. Use the exact values from your provider to prevent login emails from failing.
Enter the SMTP Host

Enter your mail server address in the SMTP Host field. Common examples look like smtp.example.com, but the correct value depends on your email provider.
Choose the Type of Encryption

Select the encryption type required by your SMTP server. In most production setups, use TLS or SSL. Avoid None unless your provider explicitly requires it.
Enter the SMTP Port

Enter the port number supplied by your provider. Common values include 587 for TLS and 465 for SSL. The port must match the encryption type.
Keep Auto TLS Enabled When Supported

Auto TLS automatically uses TLS encryption if the SMTP server supports it. Keeping this option enabled is recommended for better security and safer login email delivery.
Enable SMTP Authentication

Enable SMTP Authentication if your mail server requires a username and password. Most SMTP providers require authentication before they allow WordPress to send login emails.
Enter the SMTP Username

Enter the SMTP username from your email provider. This is often the full email address used as the sender, such as support@example.com.
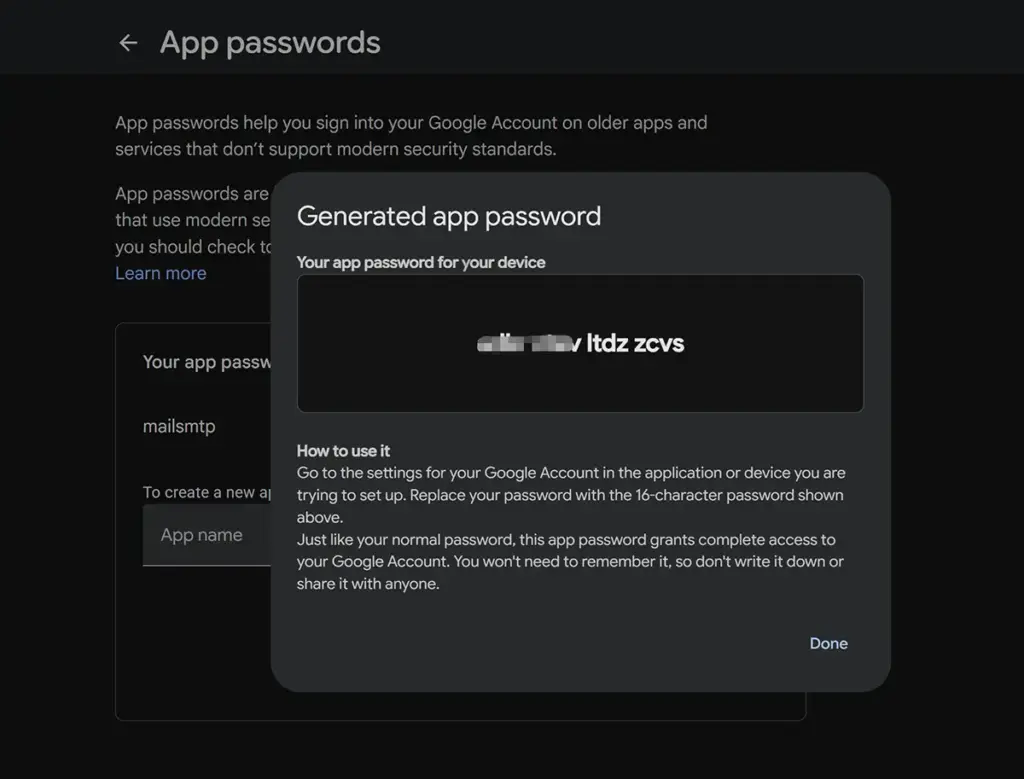
Enter the SMTP Password

Enter the SMTP password or app password provided by your email service. After saving, send a test email and then test the login flow to confirm that login emails arrive correctly.
For example
Using Google as an example to set up SMTP, you need to select “Other SMTP” with the following options:

To get the SMTP password(It is APP password instead of google account password), visit the page to create one: https://myaccount.google.com/apppasswords
The panel will show, enter a name and click Create.
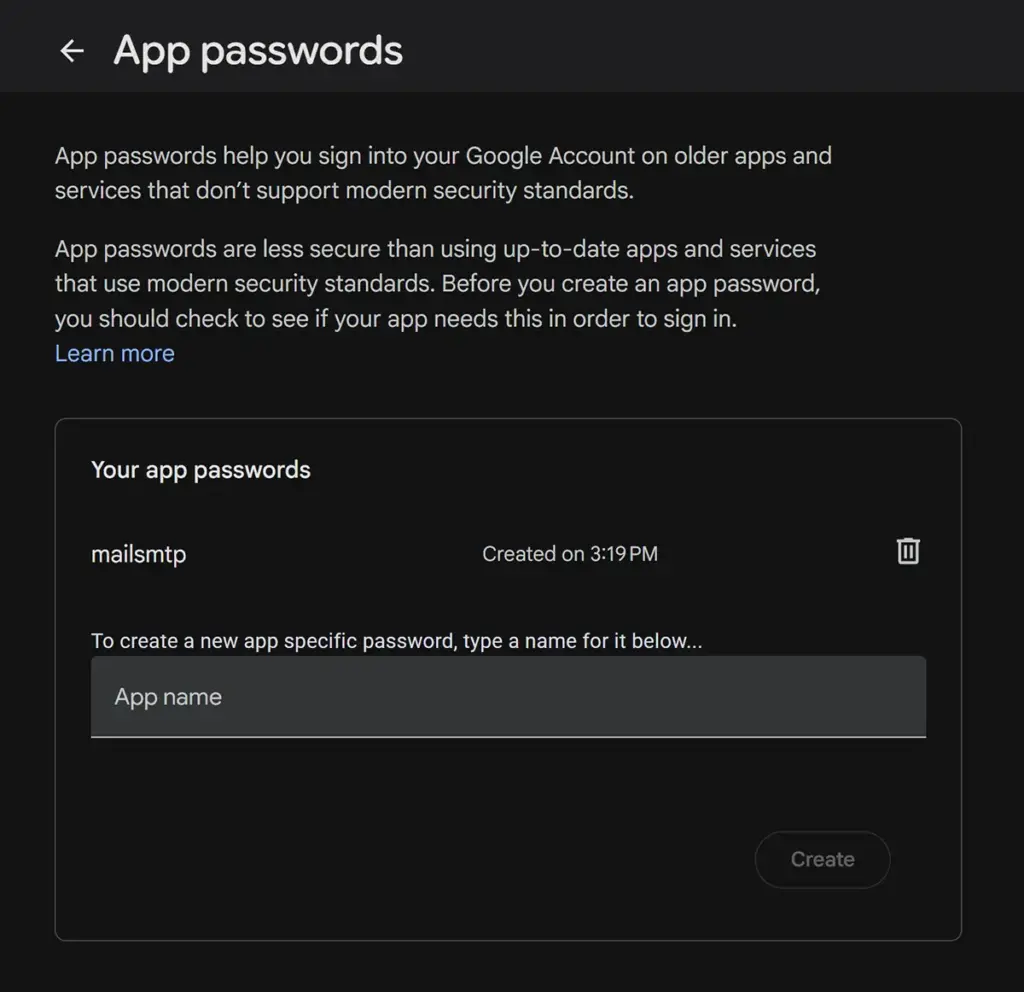
then the password will show: