
This guide explains how to enable SeaTryon’s WooCommerce AI virtual try-on feature and connect an AI provider. After completing these steps, SeaTryon can generate virtual try-on and product placement previews for products that you enable in your store.
Before you begin
- Install and activate WooCommerce and SeaTryon.
- Make sure your WordPress administrator account can manage WooCommerce settings.
- Keep the browser tab open while you create and copy your API key.
Step 1: Enable Virtual Try-On in WooCommerce
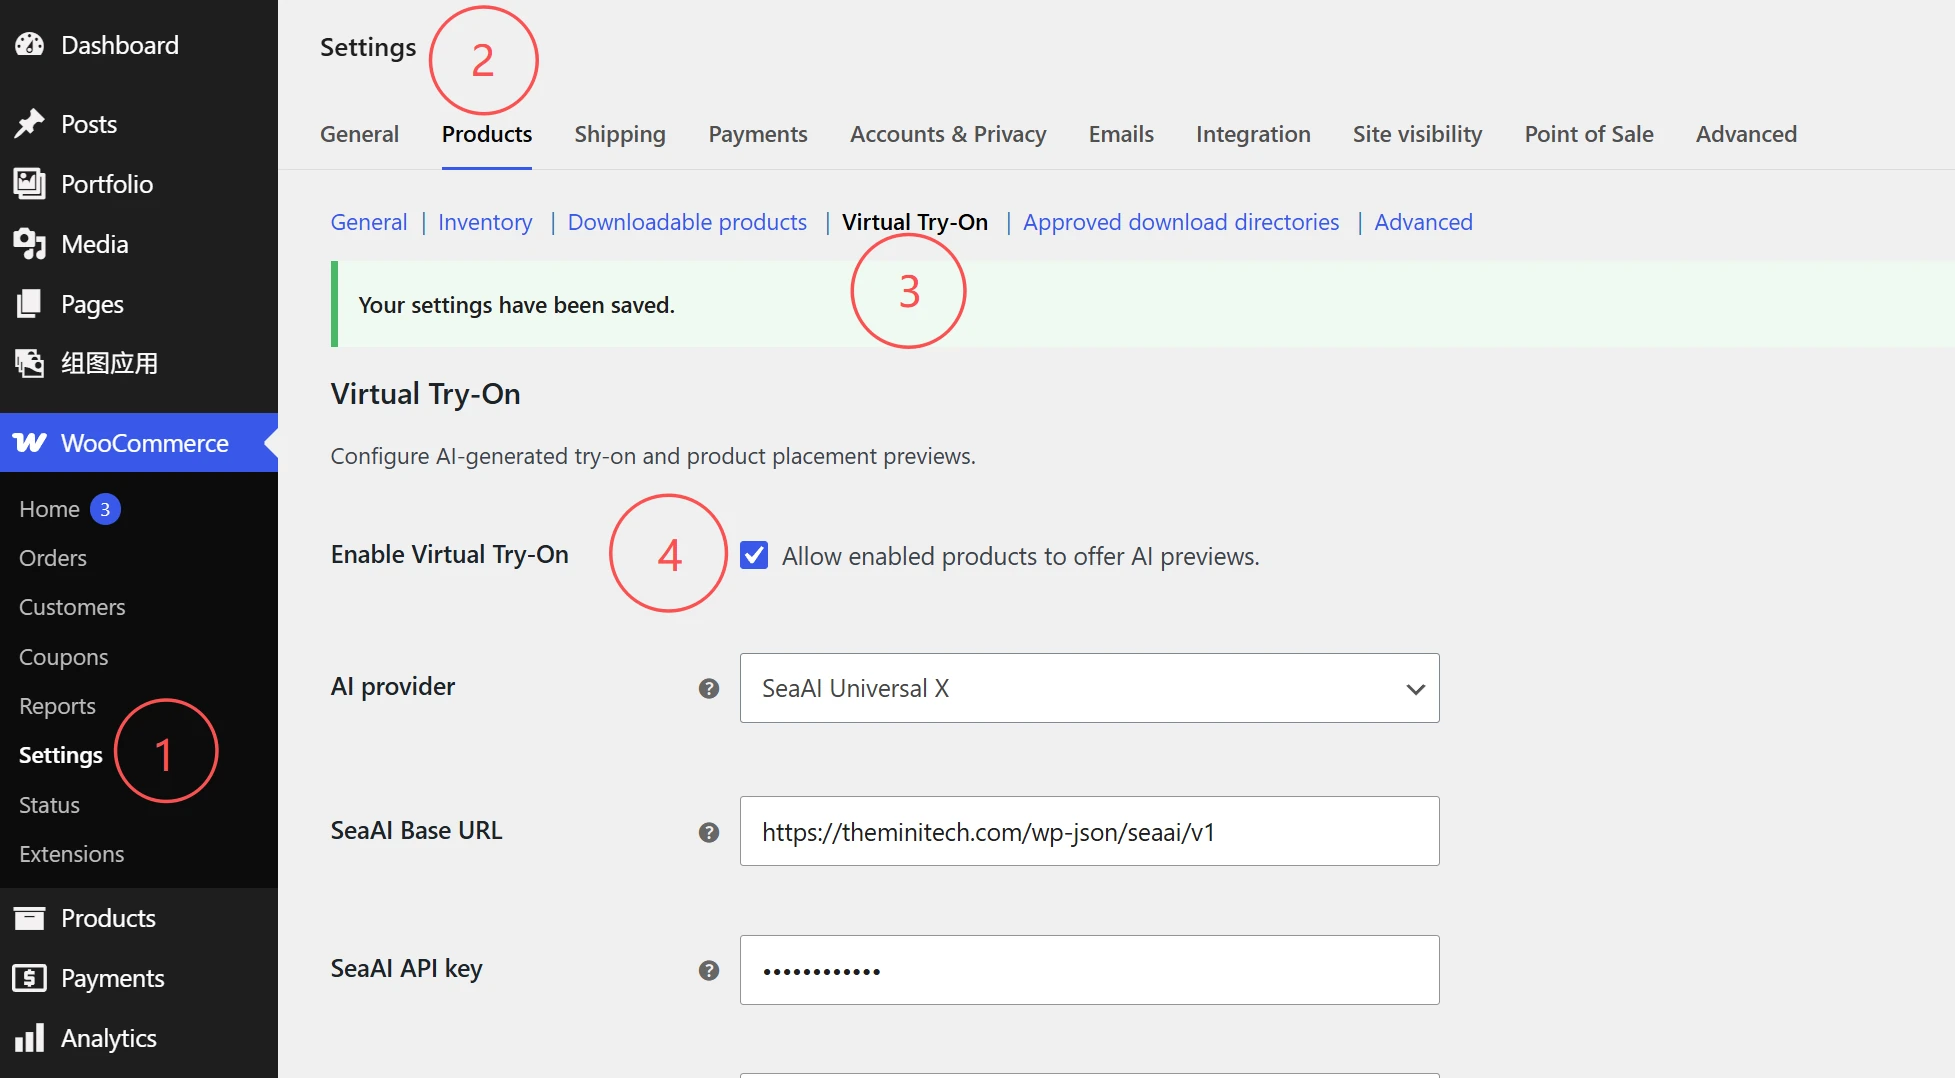
- Sign in to your WordPress admin dashboard.
- Go to WooCommerce → Settings.
- Open the Products tab, then select Virtual Try-On.
- Select the Enable Virtual Try-On checkbox.
- Keep this settings page open while you configure the AI provider.
Step 2: Choose an AI provider
SeaTryon provides two AI connection options:
- TheMiniTech: the recommended option for the setup described in this guide. In some versions of the SeaTryon interface, this provider may appear as SeaAI Universal X.
- OpenAI (Testing): an experimental integration intended for testing. Its availability or behavior may change while testing continues.
TheMiniTech is an AI-powered e-commerce image generation platform that also provides API access to our supported AI generation services.
You can create an account for free and get your own API key. New users receive 150 free credits, which is currently enough for 5 API generations.
At the moment, each API generation costs 30 credits,equivalent to approximately 0.05 USD. Credit usage is not permanently fixed and may be adjusted slightly in the future based on model and service costs.
There is no commitment required to get started. You can use your free credits to test the API first, and if you need more credits later, you can purchase them anytime on the TheMiniTech pricing page.
The remaining steps show how to connect SeaTryon to TheMiniTech.
Step 3: Register a TheMiniTech account
- Open the TheMiniTech registration page.
- Create an account and sign in.
- After signing in, open your TheMiniTech profile and API Key Management page.
Step 4: Create and copy your TheMiniTech API key
- In API Key Management, enter a recognizable name for the key, such as
SeaTryon Store. - Click Create Key.
- Click the newly created, masked API key to copy it.
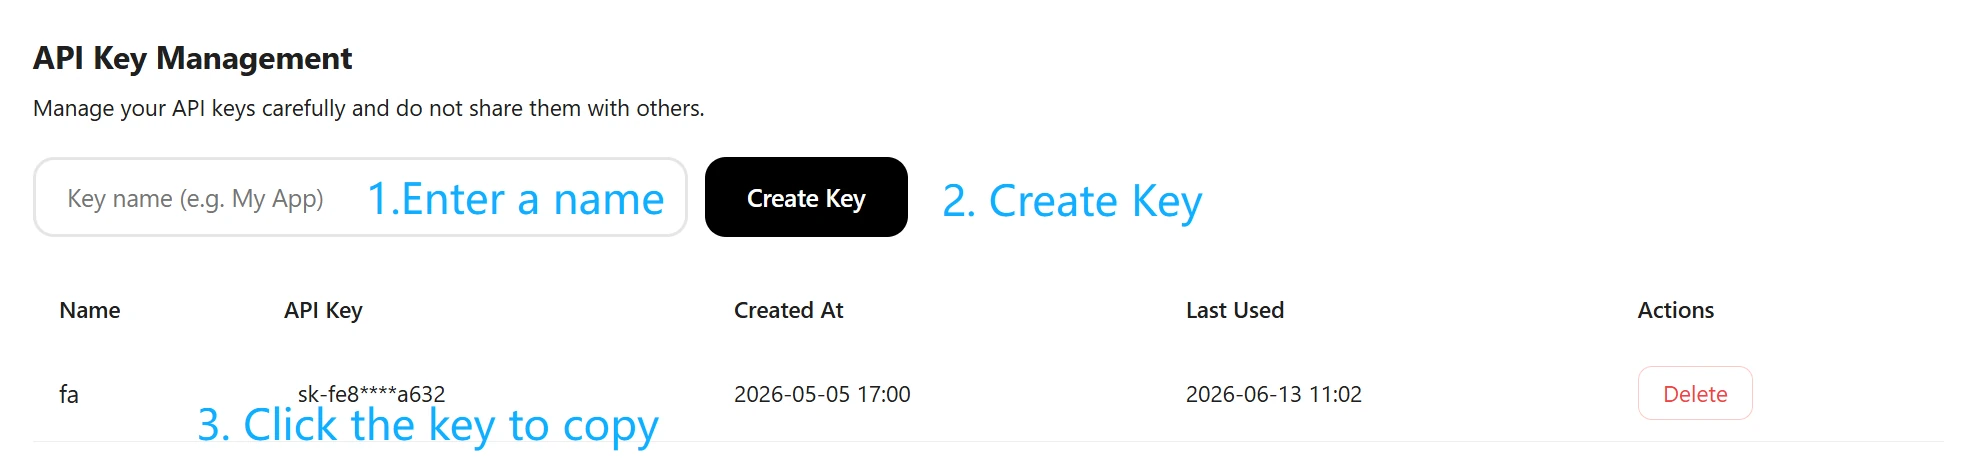
Keep your API key private. Treat it like a password: do not publish it, include it in screenshots, or share it with anyone who should not have access to your account. If a key is exposed, delete it in TheMiniTech and create a replacement.
Step 5: Paste the API key into SeaTryon
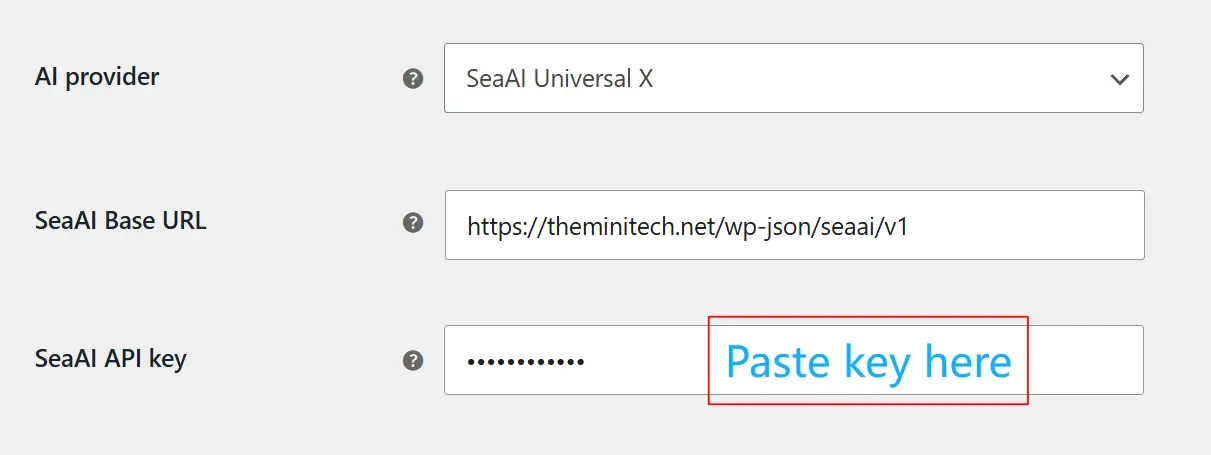
- Return to WooCommerce → Settings → Products → Virtual Try-On.
- In AI provider, select TheMiniTech. Depending on your SeaTryon version, the option may be labeled SeaAI Universal X.
- Leave the provider Base URL at its default value unless SeaTryon support gives you a different endpoint.
- Paste the copied key into the SeaAI API key field.
- Click Save changes.
Step 6: Confirm the AI connection
After saving, confirm that WordPress displays the Your settings have been saved message. SeaTryon is now enabled at the store level and connected to the selected AI provider. You can continue by enabling and configuring virtual try-on for individual WooCommerce products.
Troubleshooting the SeaTryon AI connection
- The API key is rejected: copy it again from TheMiniTech and make sure no spaces were added before or after the key.
- The Profile link opens the login page: sign in to TheMiniTech first, then return to the profile page.
- The provider option looks different: TheMiniTech may be labeled SeaAI Universal X in your SeaTryon version.
- Virtual Try-On is not available on a product: confirm that the global setting is enabled and then configure the feature for that product.