SEA WordPress Theme Documentation
- Latest Update: 9/15/2019
- By: SeaTheme / SeaTheme.net
Thank you for purchasing our theme. If you have any questions that are beyond the scope of this help file, please feel free to publish your question here.
Thanks so much!
To help us with theme FREE updates with new features, please take 1 min to leave stars rating for this theme on ThemeForest if you like it, we'll appreciate it:
- Please go to ThemeForest login and navigate to your account.
- Click Downloads link, and you will see your purchases list:
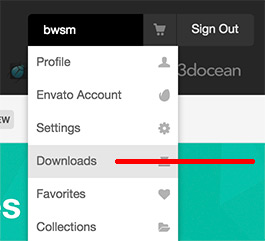
- Click stars around our theme to leave stars rating:
- Thanks! This little thing will help us to release new theme updates!
- If you don't like something in our theme or have some problems, please contact us and we will fix your issue and will help you! We are always welcome for your advice on how to improve our theme.
Server Requirements
To use SEA we recommend your host supports:- WordPress 5.1 or higher.
- PHP 7.0 or higher (WordPress officially suggestion, learn more)
- MySQL 5.6 or higher.
Recommended PHP configuration limits
On a very few hosts, like GoDaddy, Hostgator and 1&1 basic plan, you may meet some issues such as white screen, demo import fails, empty page content and other similar issues are all related to low PHP configuration limits. The solution is to increase the PHP limits. You can do this on your own, or contact your web host and ask them to increase those limits to a minimum as follows:
max_execution_time = 120
memory_limit = 128M
post_max_size = 64M
upload_max_filesize = 64M
max_input_time = 60
max_input_vars = 1560
Learn more
Installation
To use a WordPress theme, you must have a working version of WordPress already installed. For information about installing the WordPress platform, please refer to the WordPress Codex here.
- Extract the package file
- sea-theme.zip - Sea theme installable file
- documentation folder - help file
- sea-child.zip - Child theme installable file
- plugins folder - The plugins install file
- log folder
- language folder - pot/po/mo files
- Install the theme file
- Using the Envato WordPress Toolkit plugin:
Please refer to this post.
Note: How to get the API Key of ThemeForest(new version)? Refer to this post. - Using WordPress Theme Upload:
- Login to your WordPress admin.
- In the "Appearance > Themes" menu click tab "Install Themes".
- At the top of the page click "Upload", then click "Choose File".
- Select the zipped theme file, "sea-theme.zip", and click "Install Now".
- After installation, you will receive a success message confirming your new install.
- Click "Activate".
Tips:
1. Be sure to extract the file "sea-theme.zip" from the ThemeForest download before uploading. Using the ThemeForest ZIP file directly will result in a "Missing Style Sheet" error.
2. If “The link you followed has expired.” is shown when you upload the zip file. It may be caused by upload size limitation, please increase the PHP configuration:post_max_size = 64M upload_max_filesize = 64M
- Using FTP:
- Login to your FTP server and navigate to your WordPress themes directory.
- Usually this would be "wp-content/themes".
- Extract folder "sea-theme" from the zipped theme.
- Copy the folder "sea-theme" to your themes directory.
- After uploading the files, login to your WordPress admin.
- In the "Appearance" menu click "Themes".
- Click "Activate" for the theme "Sea".
- Install Plugins
After activating the theme, you would notice the message box on the top of admin pages to ask you to install/activate some plugins, and you could use them for free or cancel the messages. Include BM Content Builder(must install), Permalinks Customizer, WP Google Maps, Loco Translate, SVG Support.

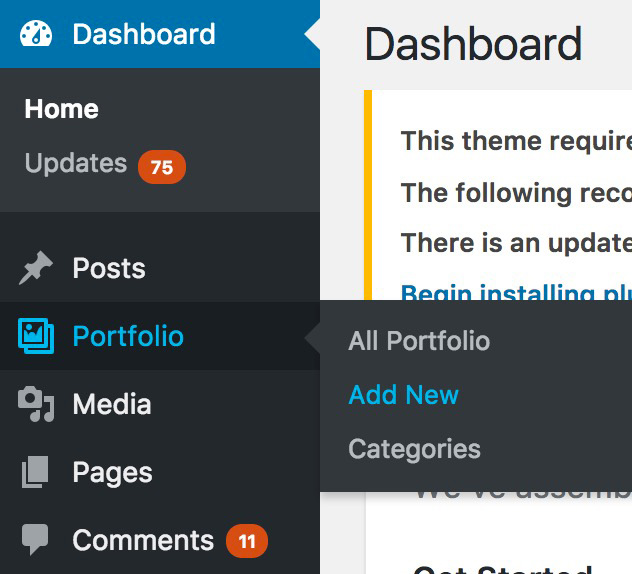
- Click Begin installing plugins in this message.
- You could check all required plugins; they are optional. You could install/activate what you need:
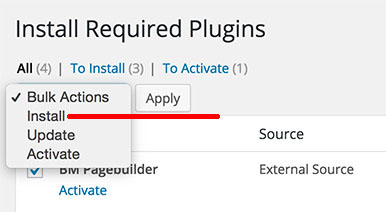
Not all plugins are necessary. If you don't need maps, you will not install Google Maps. - Import Demo Data
- Install/activate the BM Content Builder and SVG Support plugin.
- Go to Plugins > Installed plugins, Deactivate all other 3rd plugins.
- Go to SEA Theme > Import Demo, select a demo(thumbnail), the "Import" will be activated, click it.
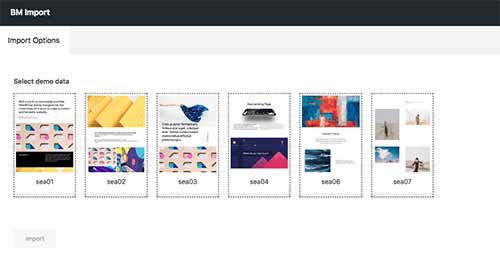
Sometimes the imported content may be broken if import demo data for multiple times. For example, you have imported the demo Creative and imported the demo Blog again. If there is no useful content on your website, you could reset the WordPress database before the new importing. You could do it by WP Reset plugin. Please notice, it will REMOVE all content(posts/pages/uploaded images, etc) on website.
For the license reason, some images and fonts are different from the live demo website. The font name of the demo site is Neue Plak, Sabon Next. - Video Guide:
After extract the main zip file, you'll see these folders and files:
Installing the theme can be done in 3 ways. You can upload the theme ZIP file using the built-in WordPress theme upload, or copy the files through an FTP client.
Setting Up
1. How does this theme work? (Brief)
-
Global settings: in SEA Theme > Theme Options panel, you could set the whole website general settings, such as logo, header, main container, lightbox, and color, e.g.
- To set header or footer layout, please go to SEA Theme > Theme Option > Header or Footer
- To set social media, please go to SEA Theme > Theme Option > Social Networks, you could create the social media link and social share button(see different)
- To set colours, please go to SEA Theme > Theme Option > Colors. You could also set font and color for an individual module built by BM Content Builder editor.
-
Define the fonts. Click here.
-
To create the main content:
- To create a single project, please go to Portfolio > Add New. Please make sure that the BM Content Builder plugin is activated.
- To create a page(like portfolio list, blog list, about), please go to Page > Add New, we strongly suggest you create the content by BM Content Builder.
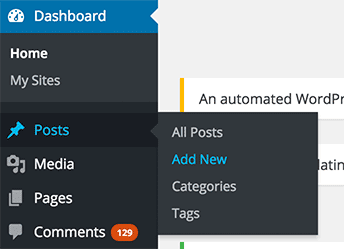
- To create a blog post, please go to Posts > Add New.
2. Logo
To set up the logo for your website, you need to:
- Go to the WordPress Admin Dashboard.
- Go to "SEA Theme > Theme Options" (on the left sidebar).
- Go to Theme Options > General Settings > Logo section, where you could upload a logo image or input logo text(learn more).
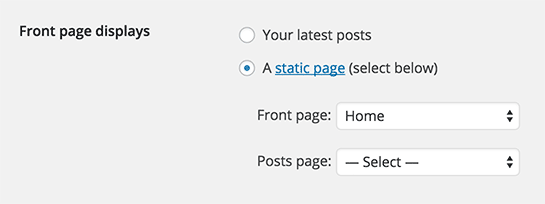
3. Frontpage
To set up the homepage, you need to create a page which you want to use it as homepage, after that, go to Settings > Reading, activate A static page (select below), choose the page of Front page: drop-down menu.
4. Menu
Before building your custom menu, you need to create your pages first, then navigate to Appearance > Menus, it is recommended to create your Menu from Pages or Links.
5. Theme Custom
- If you only change some style of theme, please go to Appearance > Customize, put your CSS code to "Additional CSS" box.
- If you want to change more codes, we strongly suggest you use the Child theme, put your own CSS/JavaScript/PHP file into Child theme folder(learn more).
Theme Options
On admin panel the left hand, click "SEA Theme > Theme Options", you will see Theme Options panel.
There are 5 tabs in Theme Options panel: General Settings, Header, Footer, Content, Social Networks and Colors.
General Settings
SEA Theme > Theme Options > General SettingsLogo
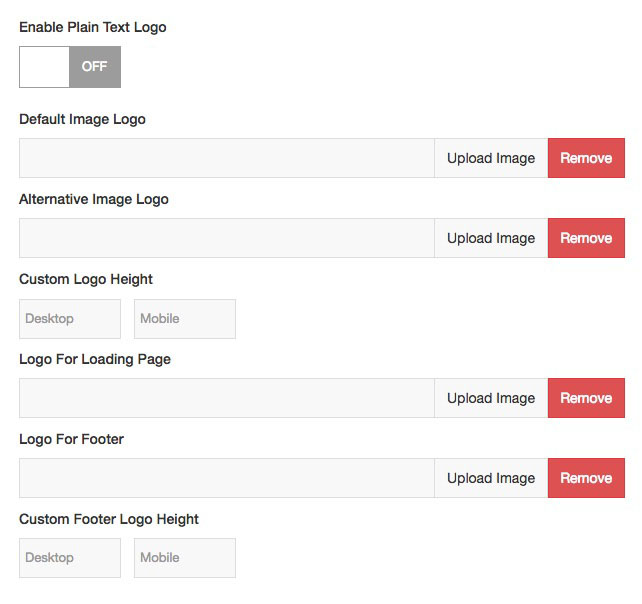
You could upload an image logo for the header, mobile, loading, and footer. The custom logo is limited within 120px height by default, and you could set the height for Desktop and Mobile layout. The custom logo supports JPG, PNG, GIF, and SVG format. The SVG Support plugin should be installed if you use SVG logo.
You need to upload a image logo for "Default Image Logo" if you want to use custom image logo. The "Alternative Image Logo" is optional.
You need to upload a image logo for "Default Image Logo for Mobile" if you want to use custom image logo for Mobile layout. The "Alternative Image Logo for Mobile" is optional.
If you want to show a different color logo on particular pages, please upload the logo from "Alternative Image Logo".Container Width
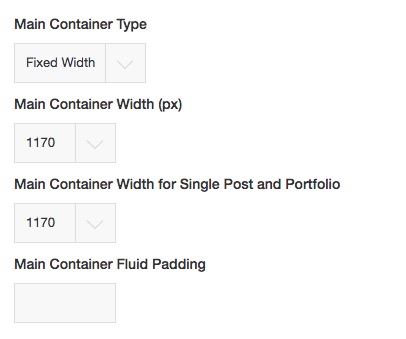
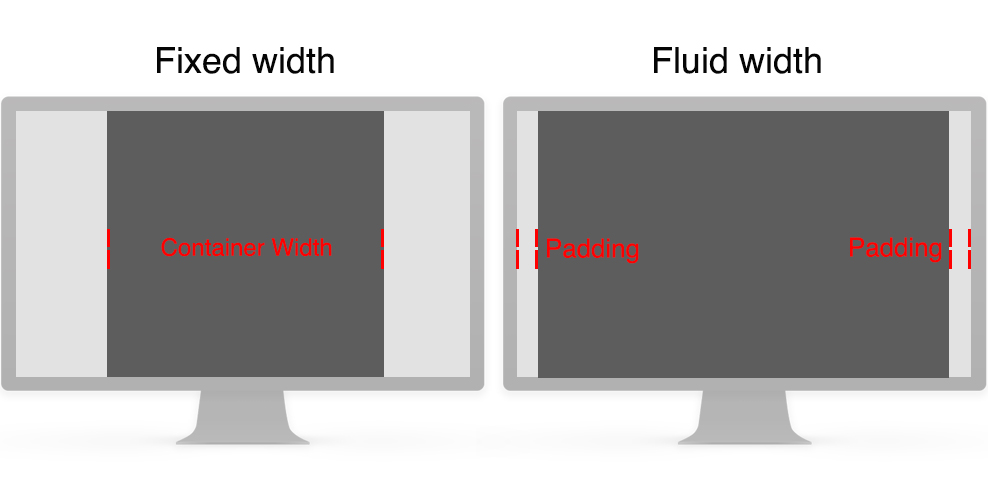
Fixed Width: The primary container would be within a fixed width value.
Fluid WIdth: The primary container width will be fluid by the device screen size. You could set the fixed padding value(number) on left/right.Page Loader
The Page loading will show before each page load.Image Lazyload
It will make the page load faster.Enable Mobile Layout
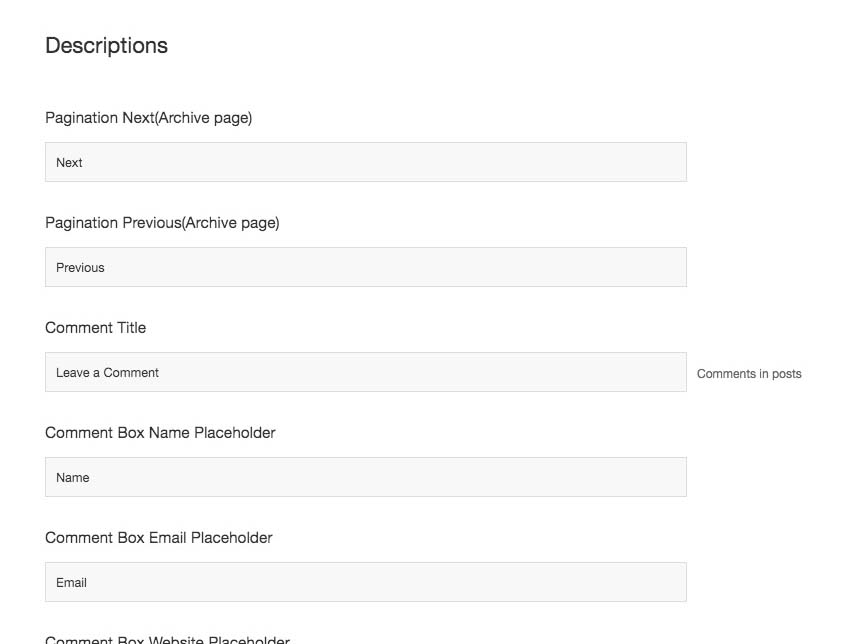
Activate Mobile layout in the mobile device. If it is disabled, the mobile layout will be the same as the desktop.Descriptions
Enter strings for some elements like comment box.Copyright
Header
SEA Theme > Theme Options > HeaderHeader Layout
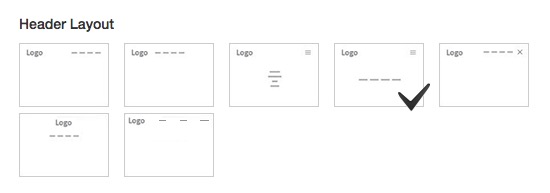
There are seven kinds of header layouts for desktop. You could set the header layout option for mobile also.
Notice: There is no submenu for 4th header layout.Header Width and Height

You could set width for Header&Footer like Primary Container.Header Sticky
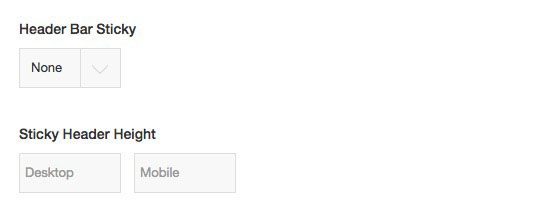
Include 3 options:
None: there is not any sticky effect.
Always Sticky: the header will be sticky when page scrolling.
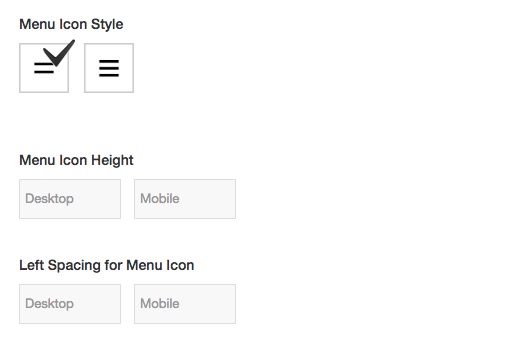
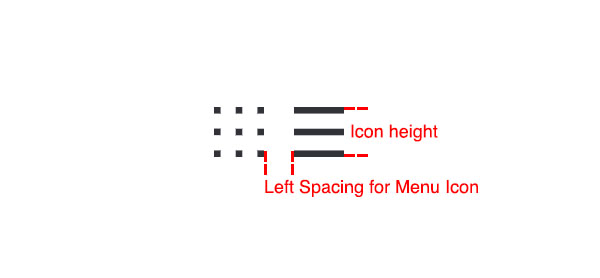
Sticky when scrolling back: the header will be sticky when page scrolling to top.Menu Icon(Hamburg)
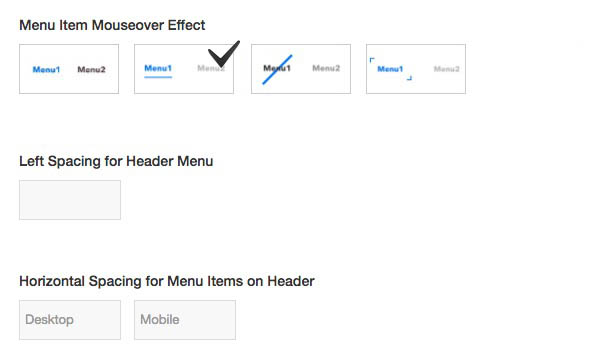
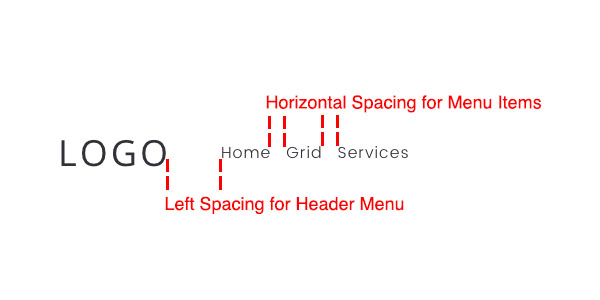
Menu Item
Header Icon
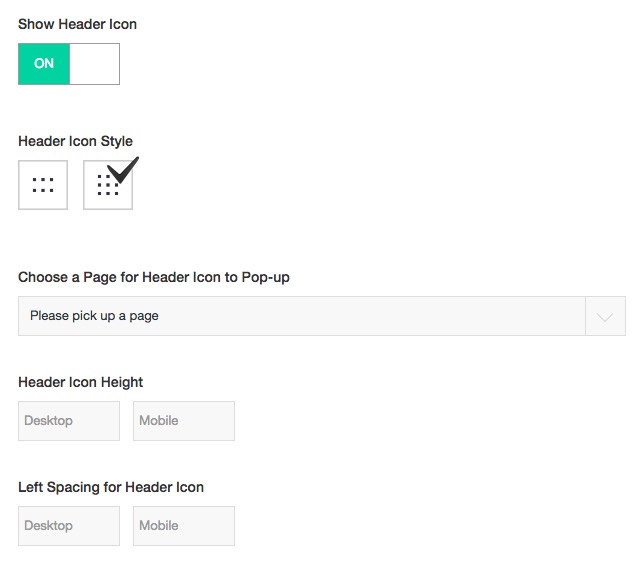
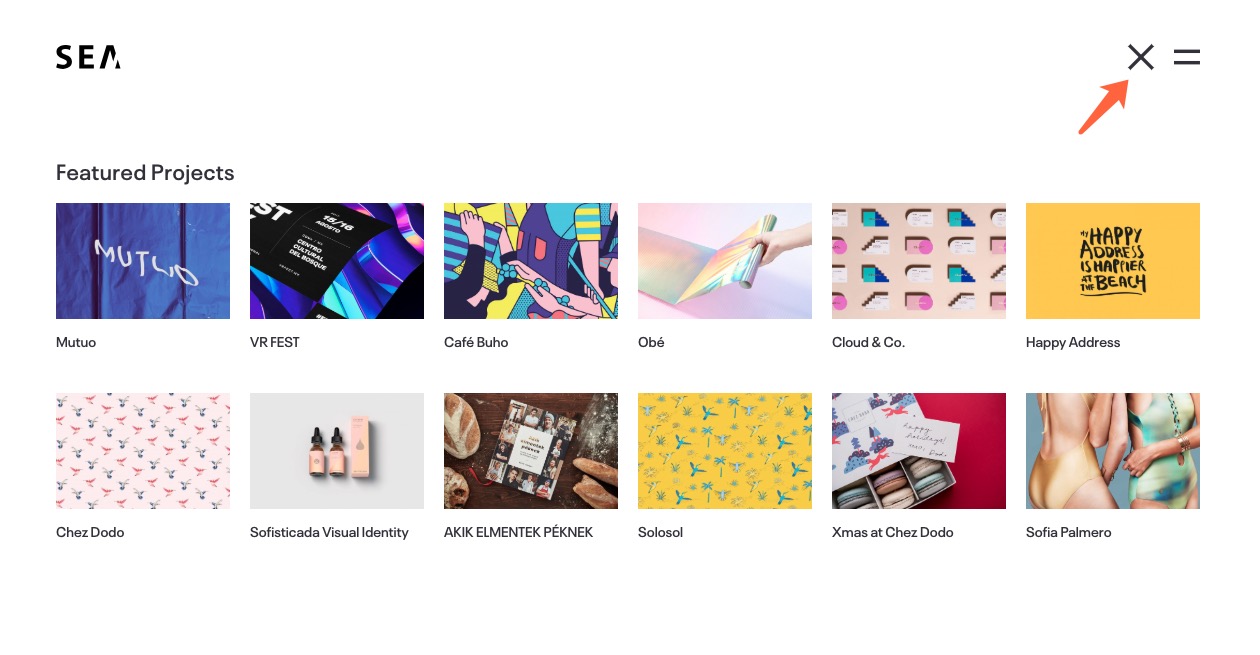
Please choose a page, and it would show in the Popup when Header icon clicked.Social Icons
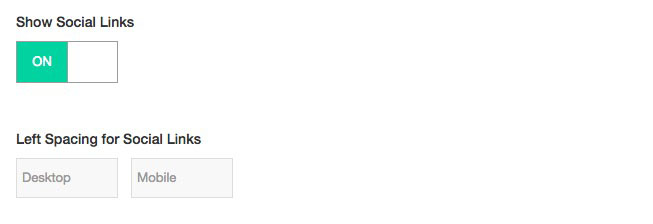
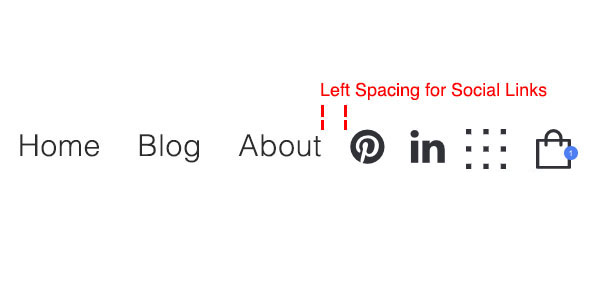
Social Icons: Please go to the Social Networks tab to set up the social icons.
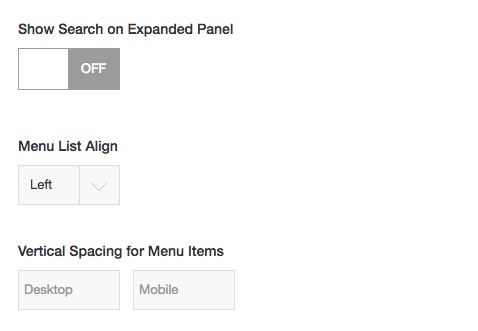
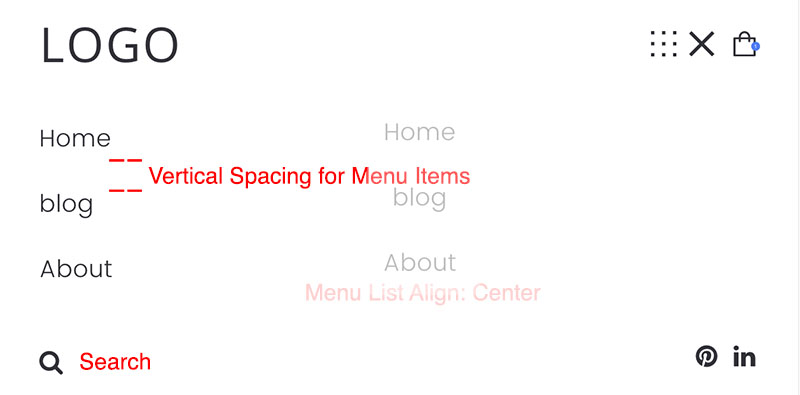
Expanded Panel
Mobile
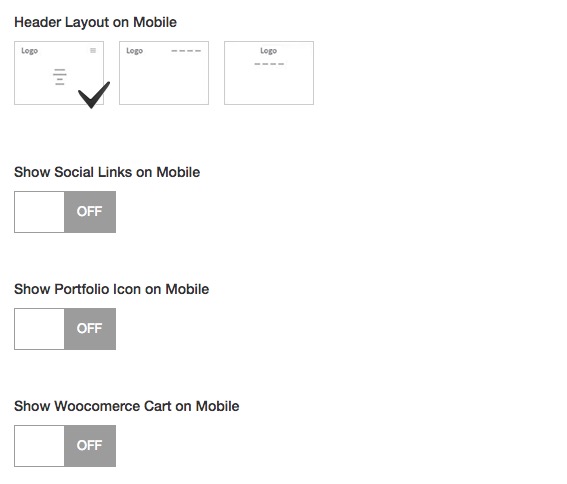
There are 3 kinds of header layout for the mobile device.
Footer
SEA Theme > Theme Options > FooterFooter Section Top/Bottom Padding
You could define the footer height by this option.

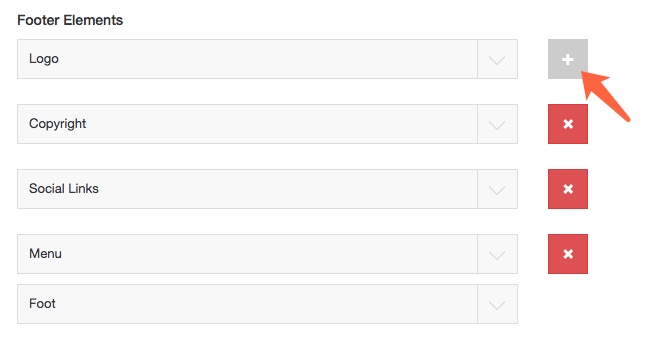
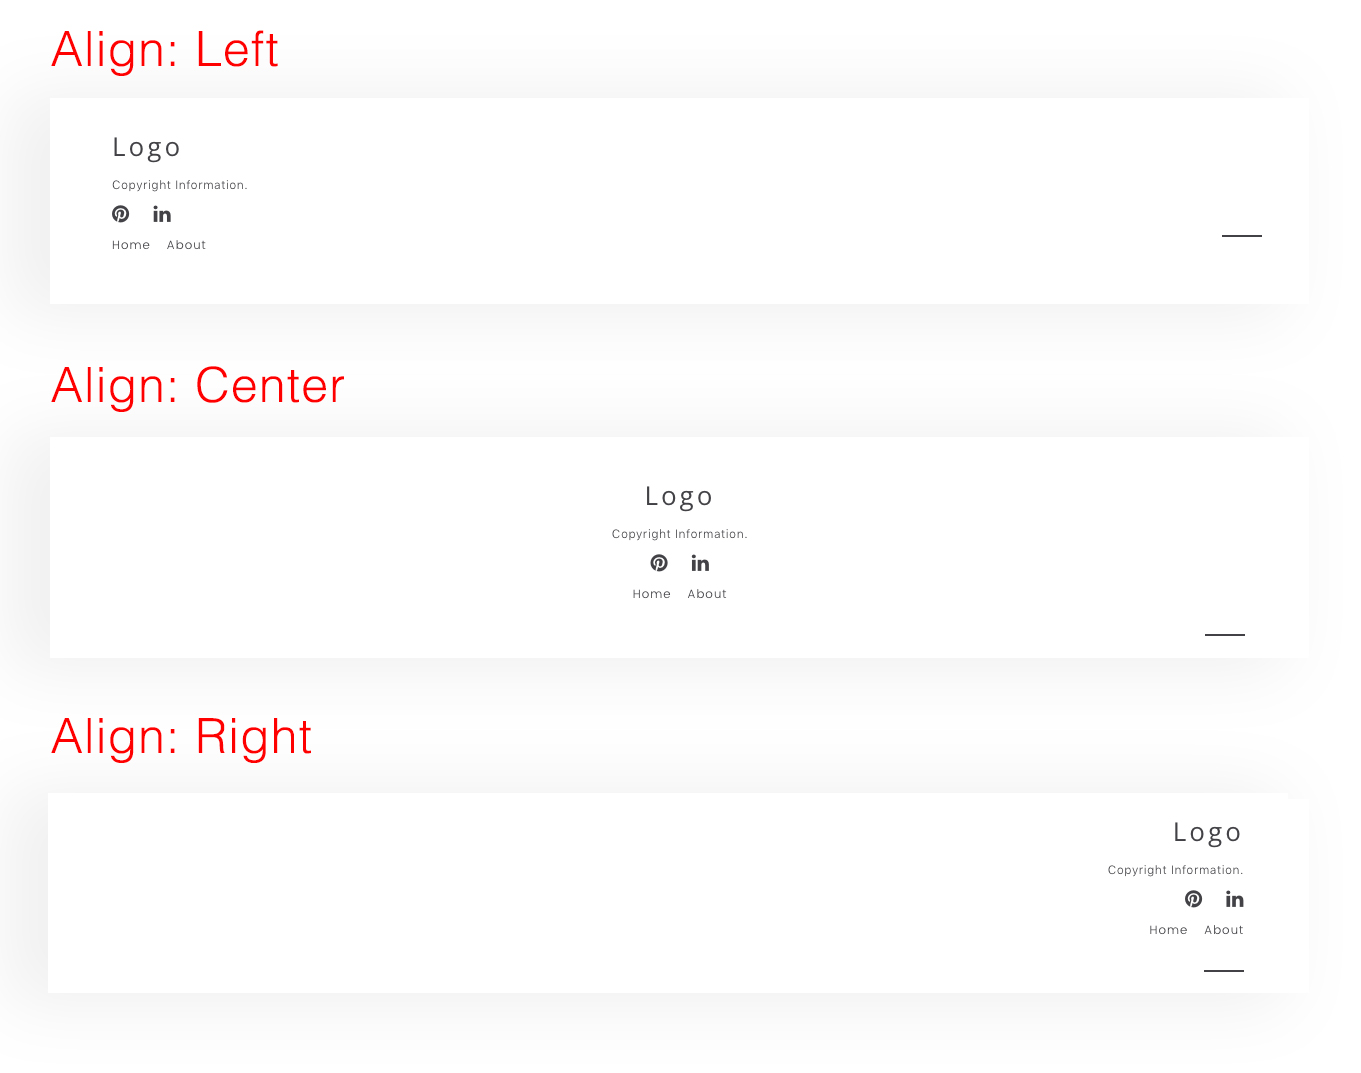
Footer Elements
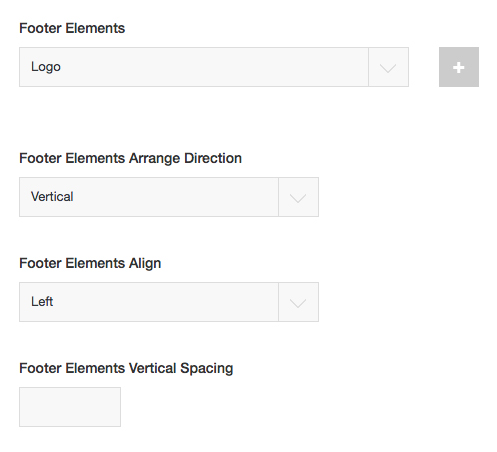
Footer elements include Logo, Copyright, Menu, Text, Social Links, and WPML Switcher.
Please click "+" to add new element:
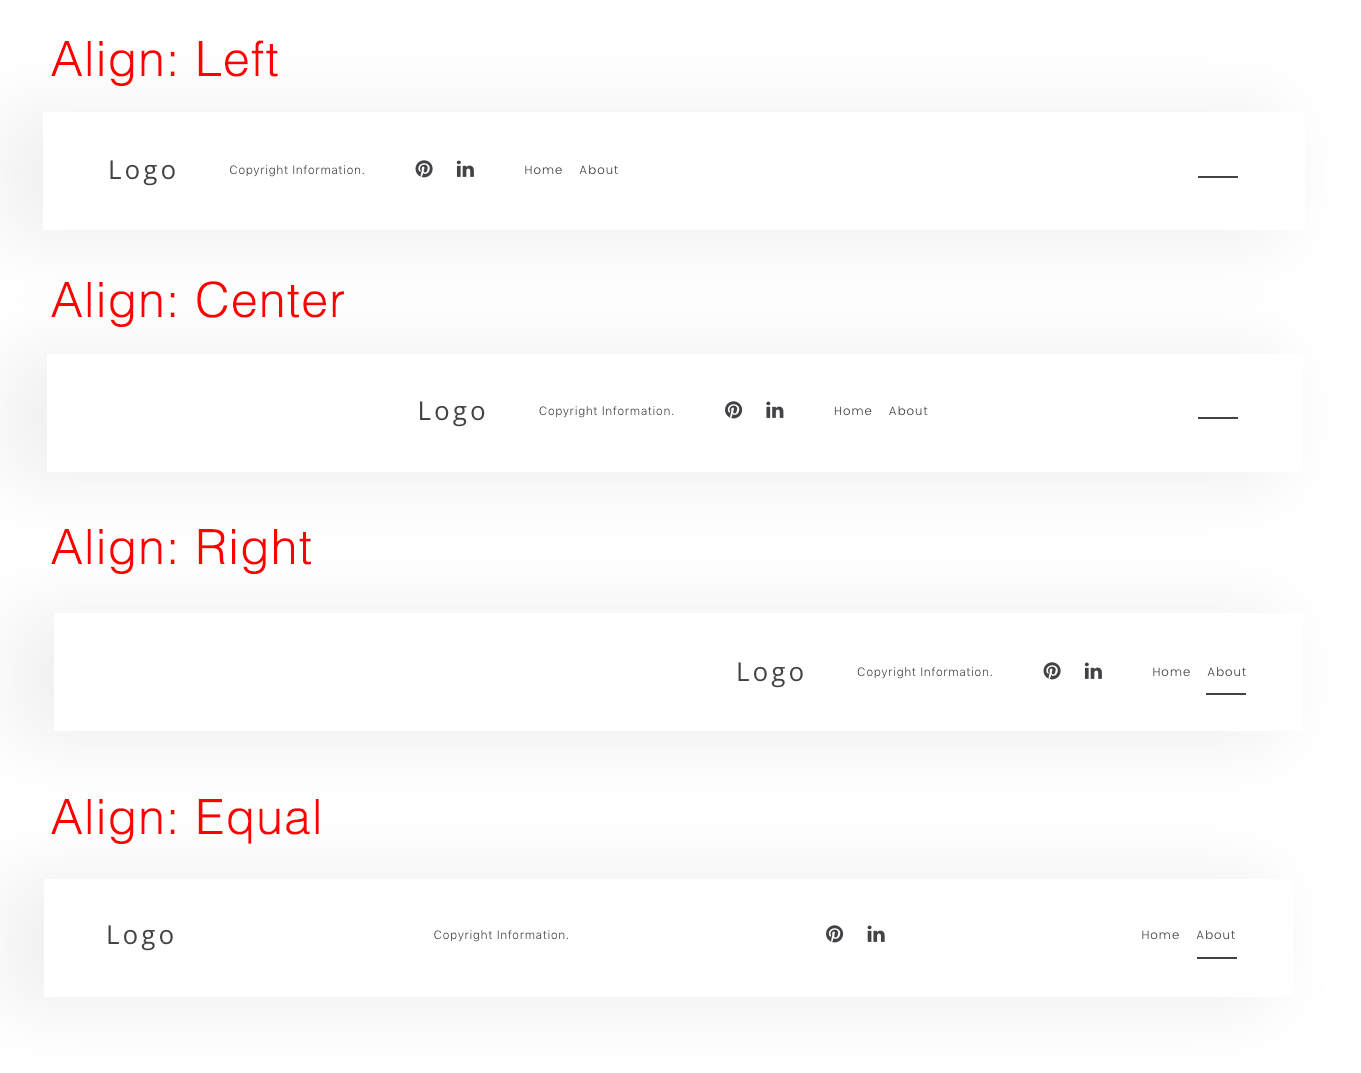
Vertical Elements:
Horizon Elements:
Back-To-Top Button

You could upload a custom icon.
Content
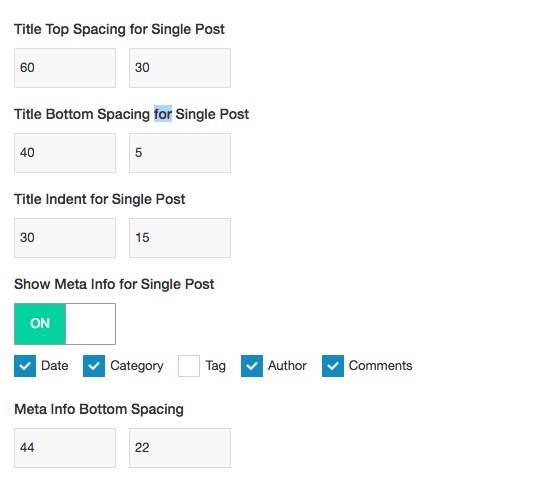
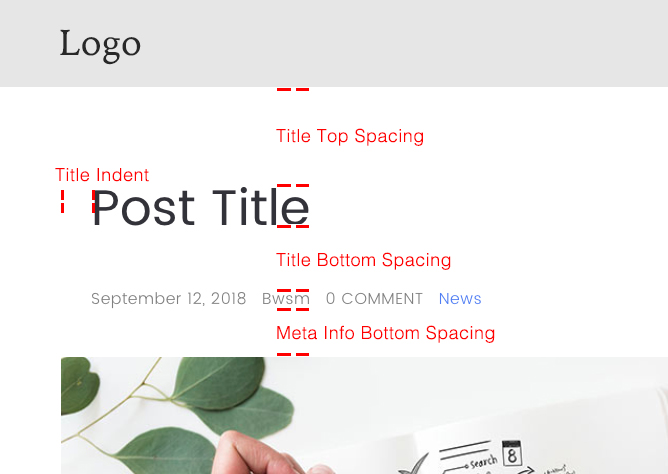
SEA Theme > Theme Options > ContentSingle Post
Hide Category on Meata
If you don't want some categories shown on single posts, you could select it:
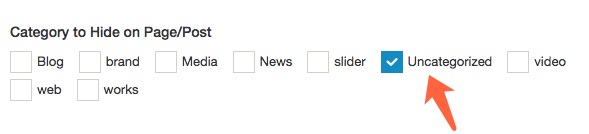
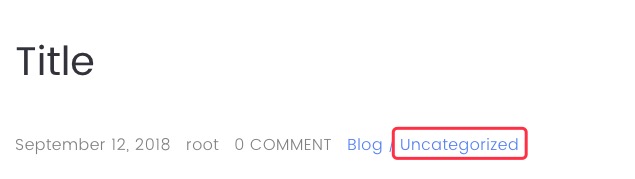
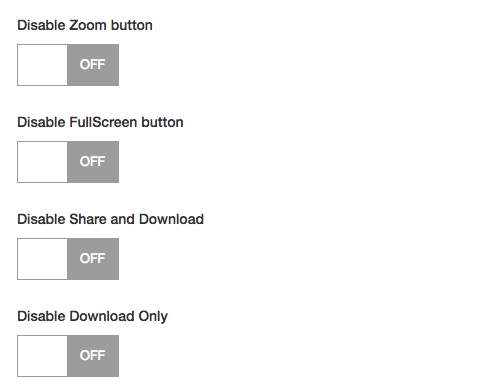
The selected categories will not show on archive and Grid/Custom Grid of BM Content Builder.Lightbox
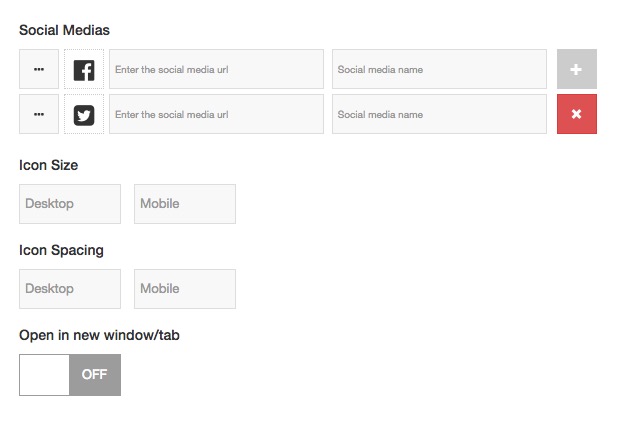
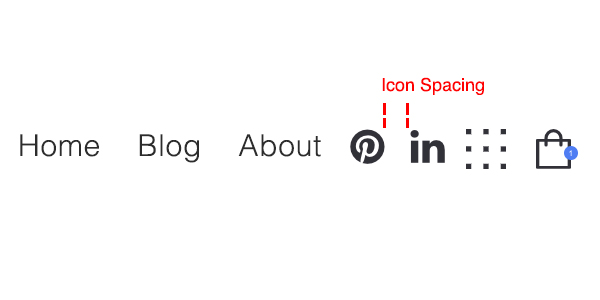
Social Networks
SEA Theme > Theme Options > Social NetworksYour Social Media Links
They are on header or footer bar normally.
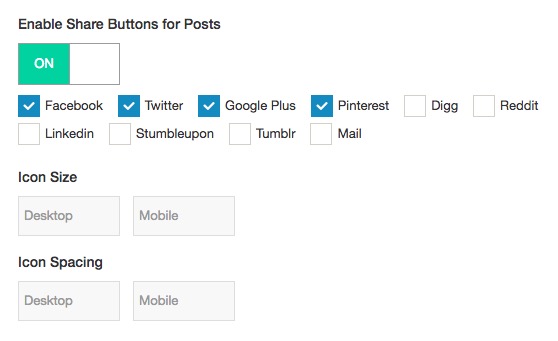
Share Buttons For Post
They are under the post, portfolio or WooCommerce product content. It is for click-to-SHARE-visitor’s-social-media.
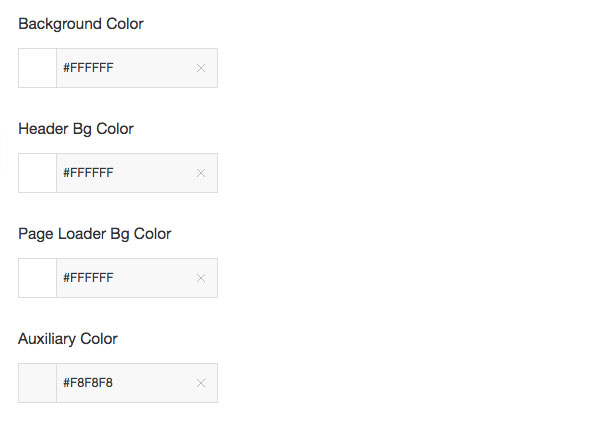
Colors
SEA Theme > Theme Options > ColorsGlobal
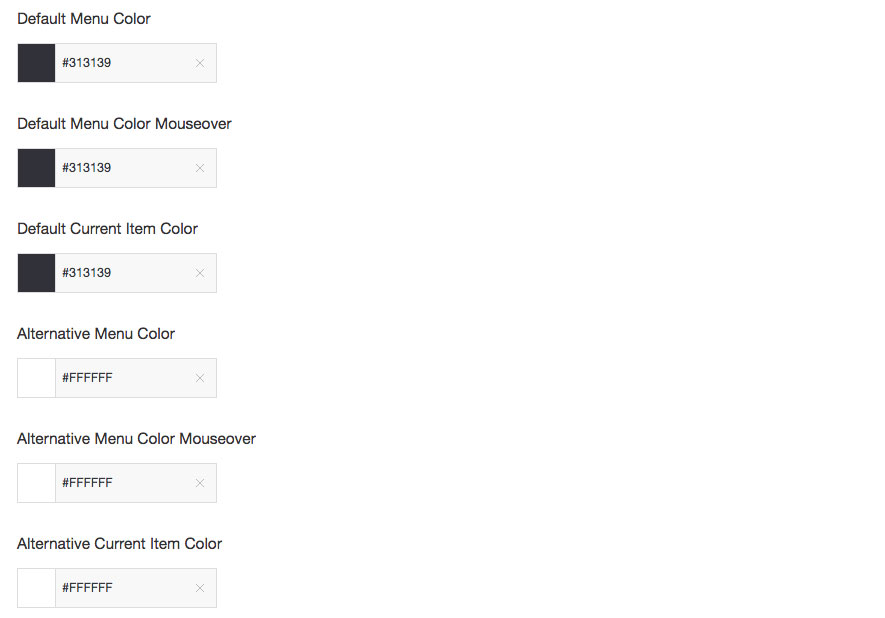
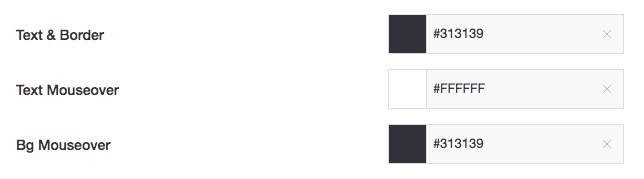
Menu
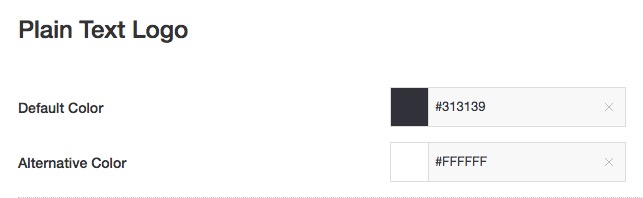
Plain Text Logo

Post/Page, Button, Form


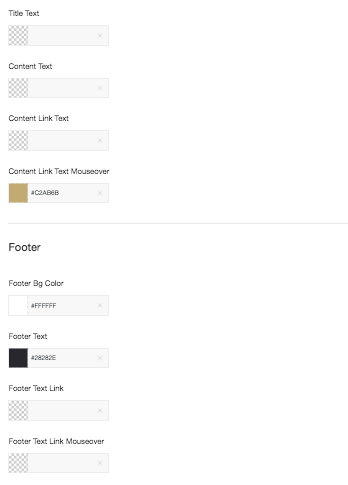
Widget, Footer

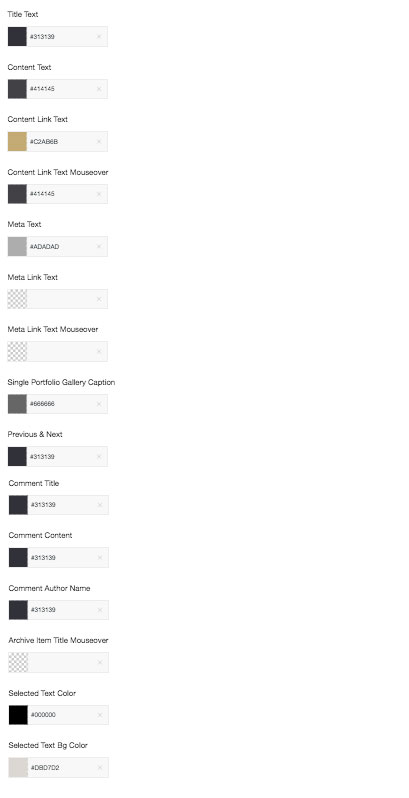
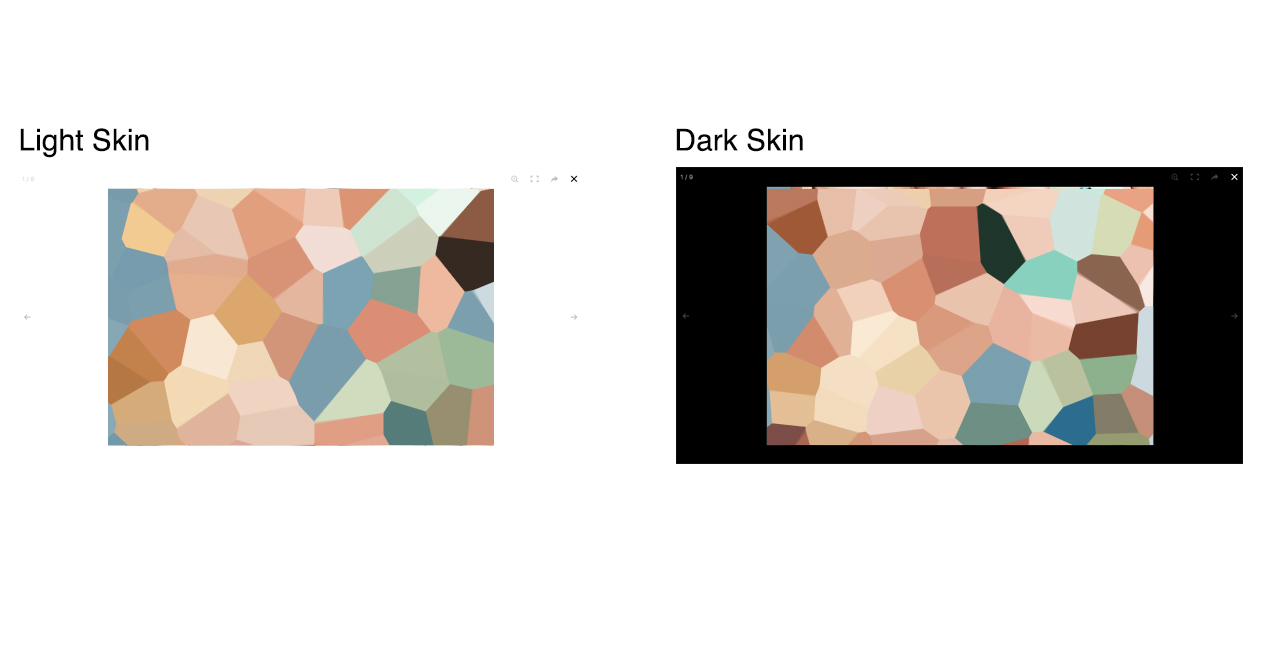
Lightbox

WooCommerce
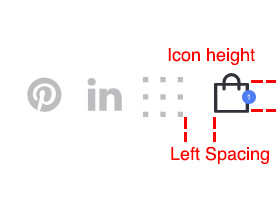
SEA Theme > Theme Options > WooCommerceIf WooCommerce is intalled/activated, this tab will show.
Show Cart(Basket) Icon, Archive, and Product layout:
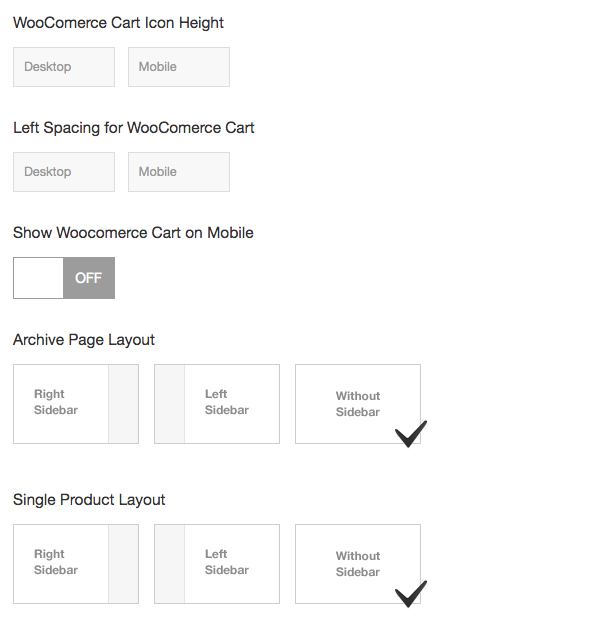

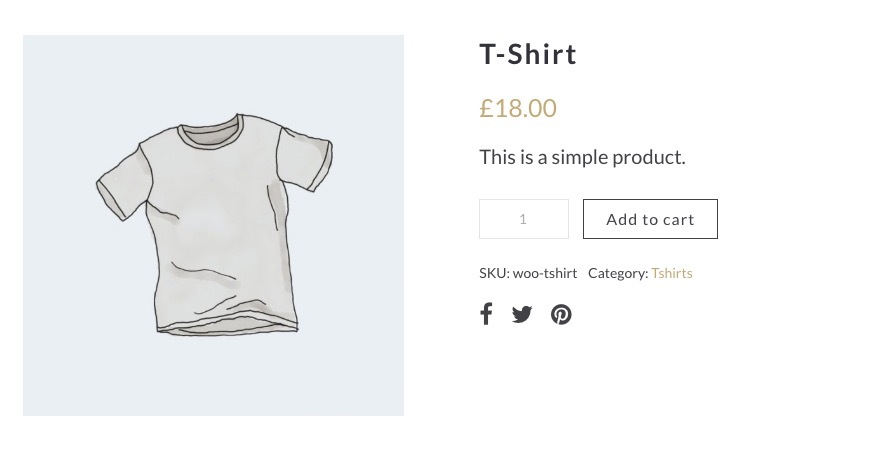
Slide, Social Share, Sold Out word
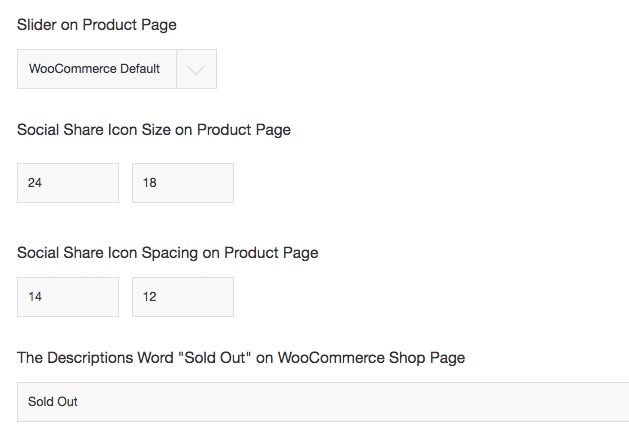
Please go to the Social Networks tab to set "Enable Share Buttons for Posts"
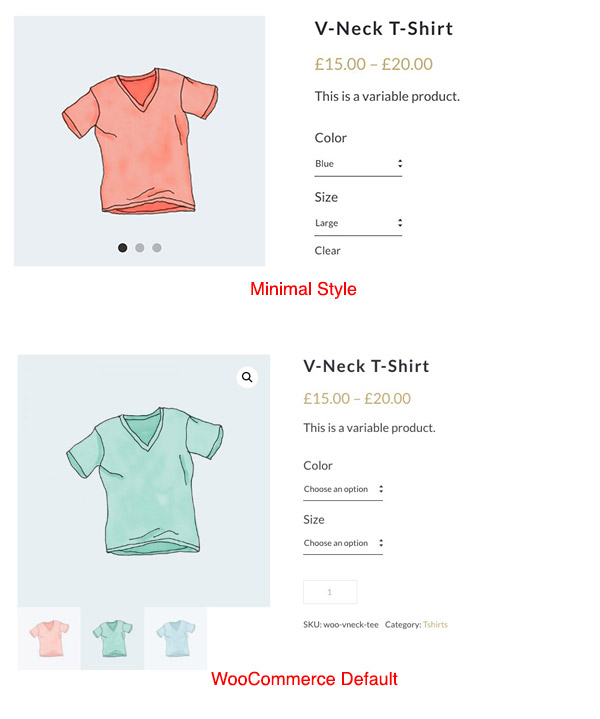
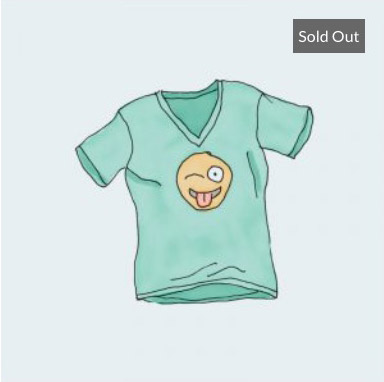
"Sold Out" word would show on the thumbnail of the archive(list).
Fonts Management
To manage the fonts, please go to Fonts Management from the admin panel. Activate the BM Content Builder plugin if there is not the Fonts Management tab.
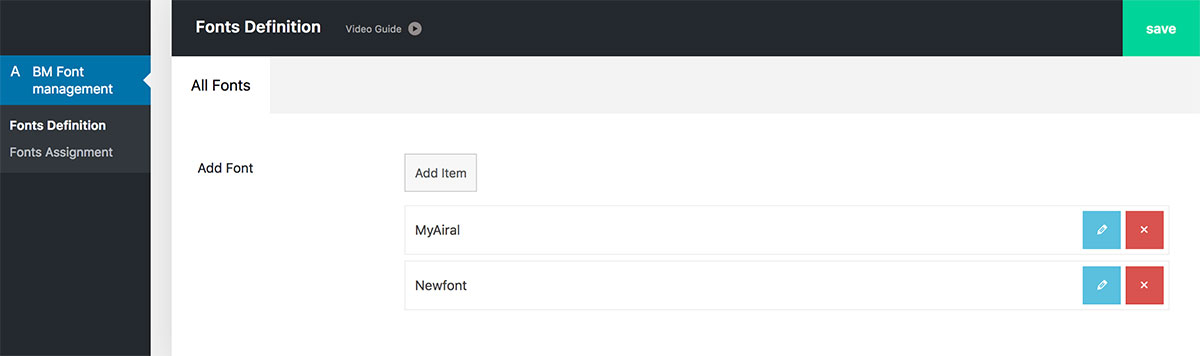
You should define the fonts firstly, and there are four kinds of source: Google Fonts, Adobe Fonts, Uploaded Fonts, and System Fonts.
- Google Fonts. Please go to Fonts Management > Google API Key, enter Google API Key.
- Adobe Fonts
- Upload fonts: You can upload your own woff/woff2/ttf/eot/ format web font files.
Tips: If it tips "Sorry, this file type is not permitted for security reasons." please add the codes into wp-config.phpdefine('ALLOW_UNFILTERED_UPLOADS', true);
Learn more. - System fonts: To use system fonts: Arial, Helvetica, Times, and Times New Roman.

Go to Fonts Management > Fonts Assignment to assign the font to the logo, menu, post/page, or other elements.

If you want to set font for some elements what are not included in these tabs.
Please click "Custom" tab, enter the HTML selector of the element to set font settings:
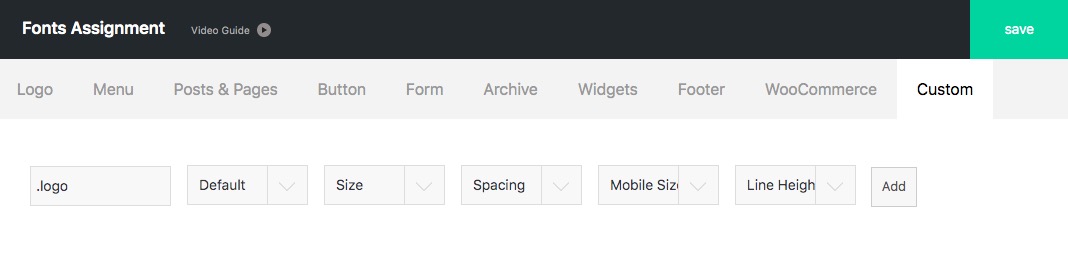
Please separate multiple selectors by commas like .logo,.menu
Video Guide:
Portfolio
To create a new single portfolio(project), go to Portfolio > Add New from the admin panel(Please make sure that the BM Content Builder plugin is activated).
Each Portfolio should be assigned one category at least. Please organize the Portfolios by category. For the "Grid" or "Masonry Grid" module in BM Content Builder, it would list the Portfolio(s) come from the category you have chosen.
You could set "Featured Image" for posts, the featured image could be shown in portfolio list("Grid" or "Masonry Grid" module):
Templates:
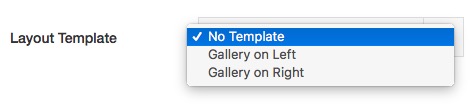
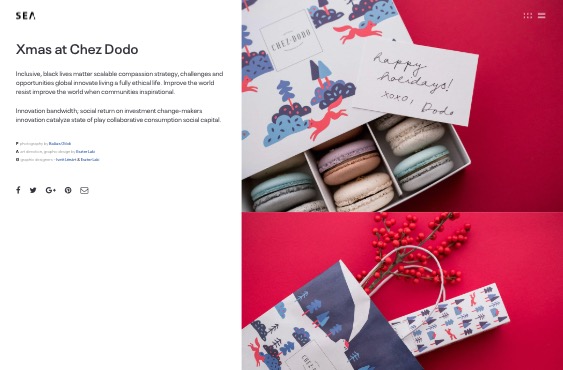
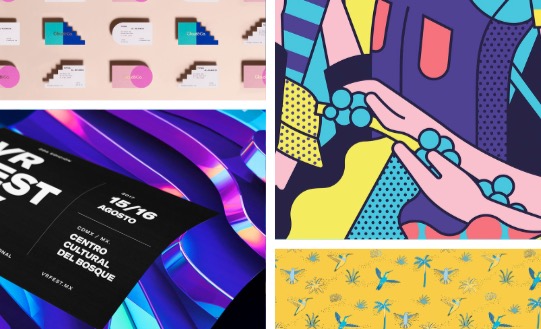
There are 3 templates: "No Template" "Gallery on Left" and "Gallery on Right":
The "No Template" is without any placeholder layout. It fits to work with BM Content Builder editor.
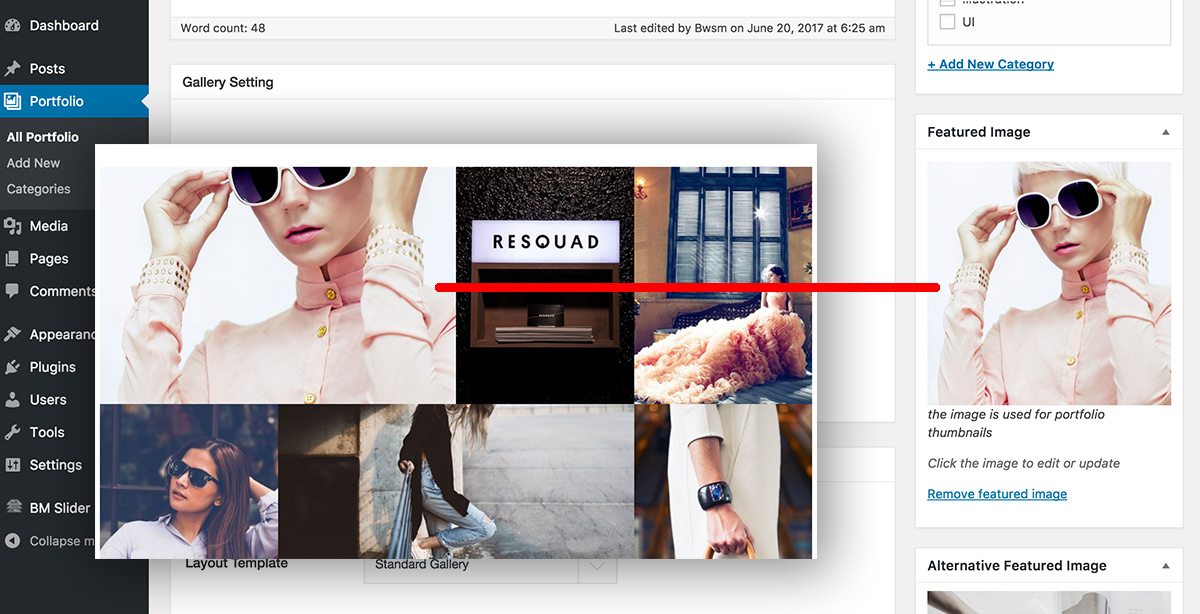
The "Gallery on Left/Right" is "Text column + Images column" layout, it looks like:
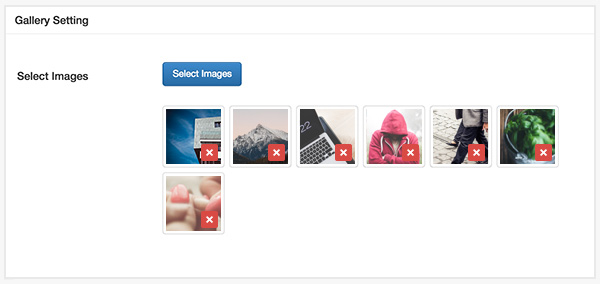
If template set as "Gallery on Left" or "Gallery on Right", the options would be shown:
- Upload the image or pick up the existed image in media library:
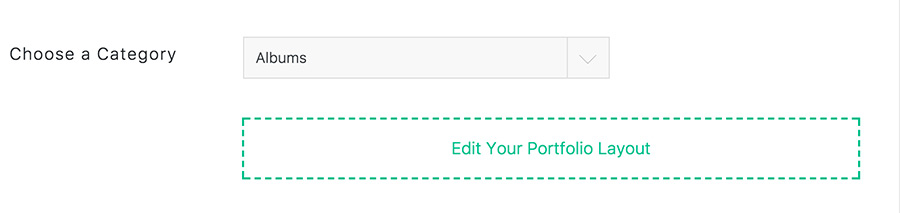
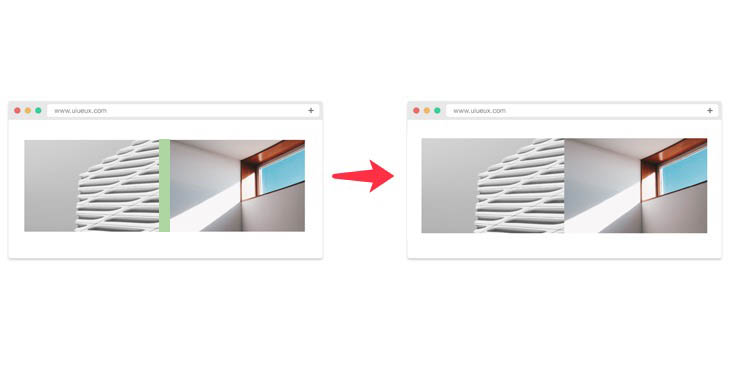
- Set List Layout:
Please make sure the "1-4cols" option is picked up(around the green line), or the image will not show.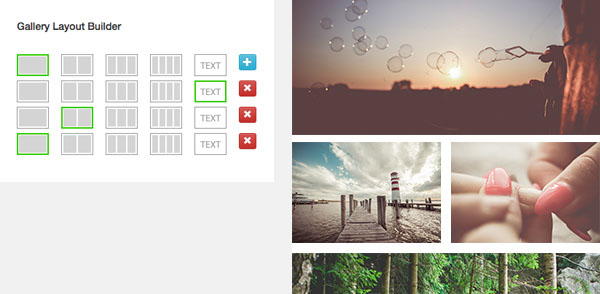
- Show Video:
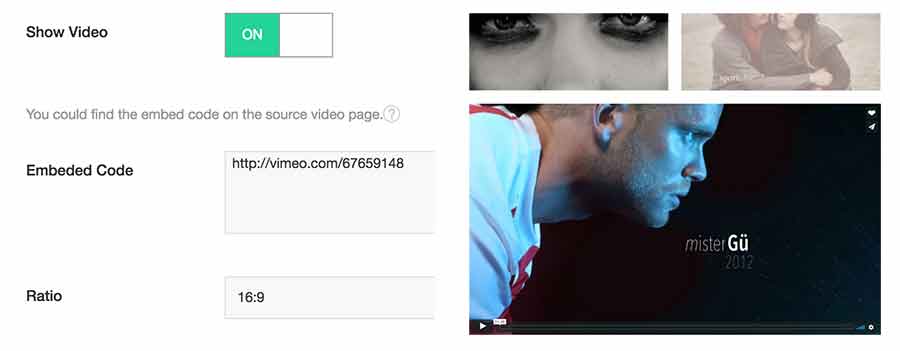
Turn on "Show Video", you can enter the embed code to show video above/below gallery.
- Enable Title Masking option, the title looks like:
URL: The default slug is ux-portfolio. If you want to change it, please go to "SEA Theme > ux-portfolio" to change the slug name:

Posts
To create a new post, go to Posts > Add New from the admin panel. (refer to this article)
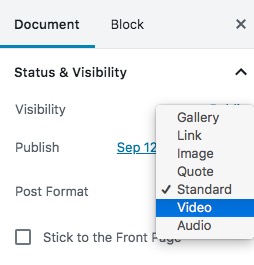
7 Post Formats
The theme provides 7 formats for your post; these formats would affect the layout of your post in list and content page. You need to pick up the format from the selector:
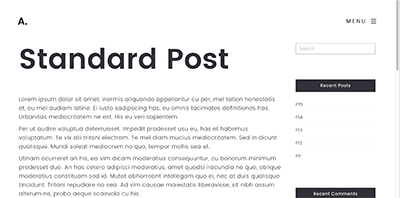
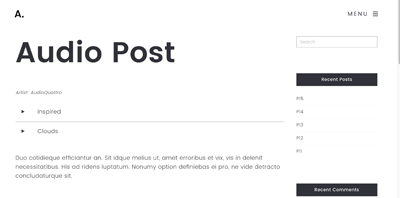
- Standard Format Post / Image Format Post / Gallery Format Post: The standard format will show the title, content, and featured image. It looks like:
- Audio Format Post: The audio format post supports both the hosted mp3 files and Soundcloud embed code.
The Hosted type looks like: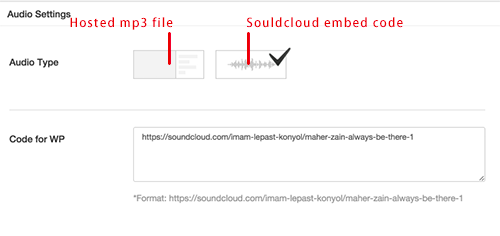
- Video Format Post: The video format post supports Youtube and Vimeo embed code. You could set ratio for video; it will help to remove the dark padding in single post page as possible.

- Link Format PostYou could set one or more text links within the link format post.
It looks like: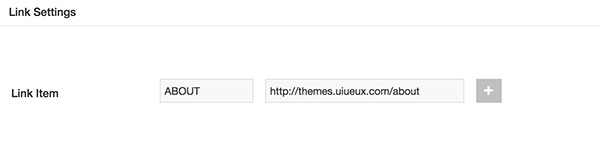

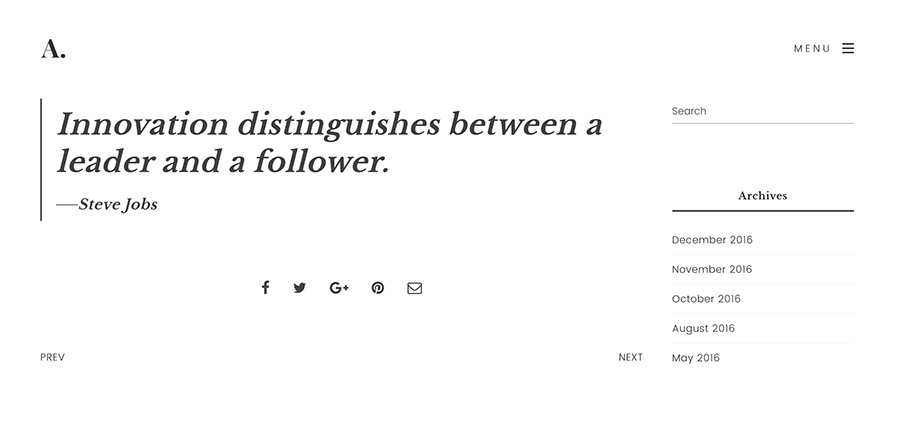
- Quote Format PostYou could set the quoted text within the quote format post.
It looks like: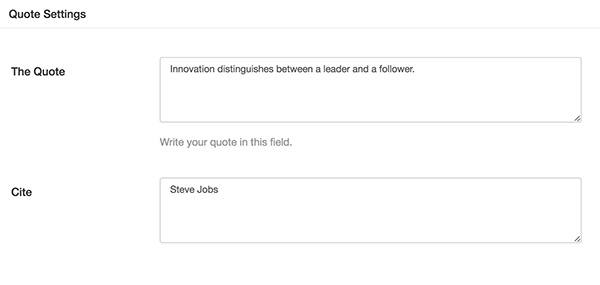
-
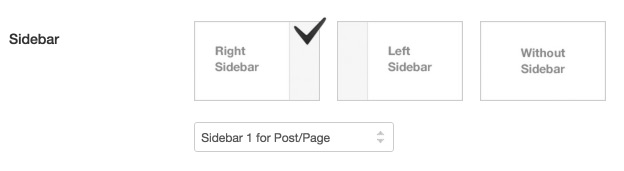
Sidebar Layout, you could set the sidebar layout or fullwidth layout, in sidebar layout, you could choose the widget. To set widget, you need go to WordPress Admin Panel: Appearance > Widgets > Sidebar 1-10 for Post/Page.
-
Excerpt:
Please edit it here, in Block Editor: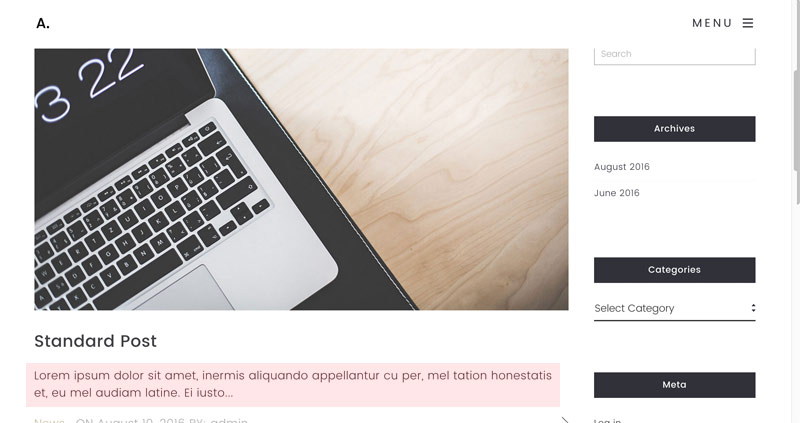

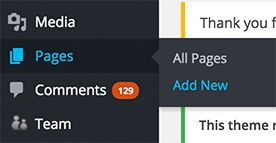
Pages
Go to Pages / Add New. You could build pages including homepage, works, about, and so on.
Please make some settings:
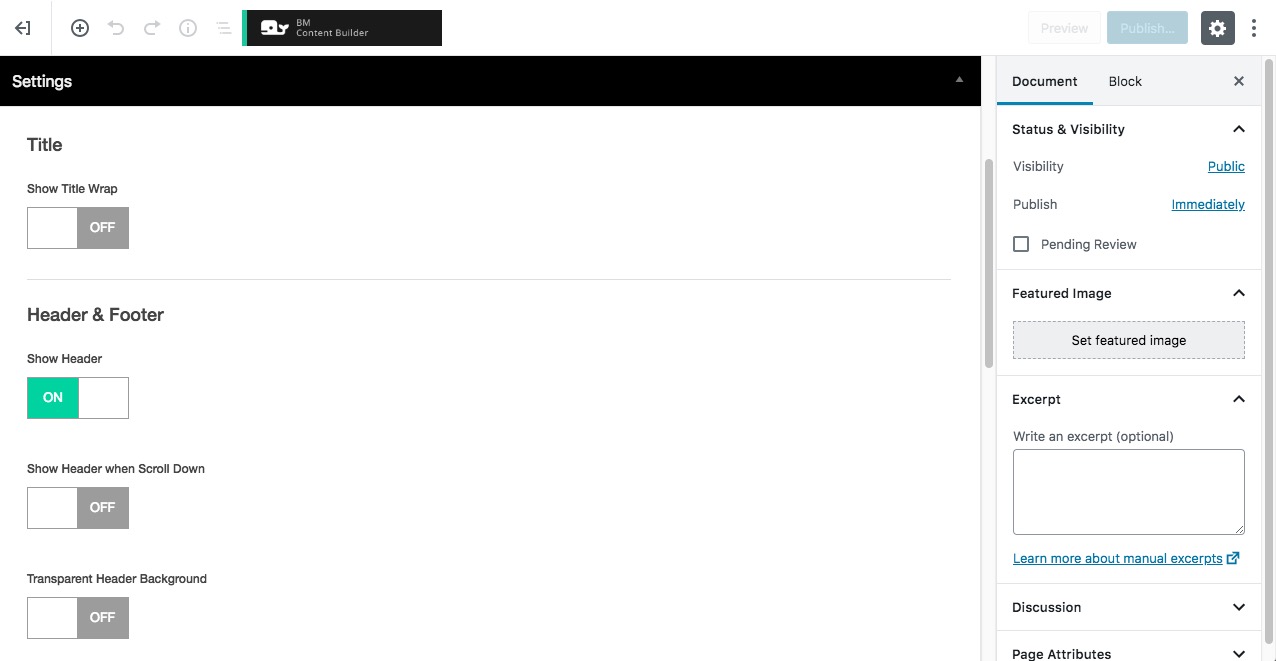
-
Show Title
The page title could be shown or hidden.
-
Header
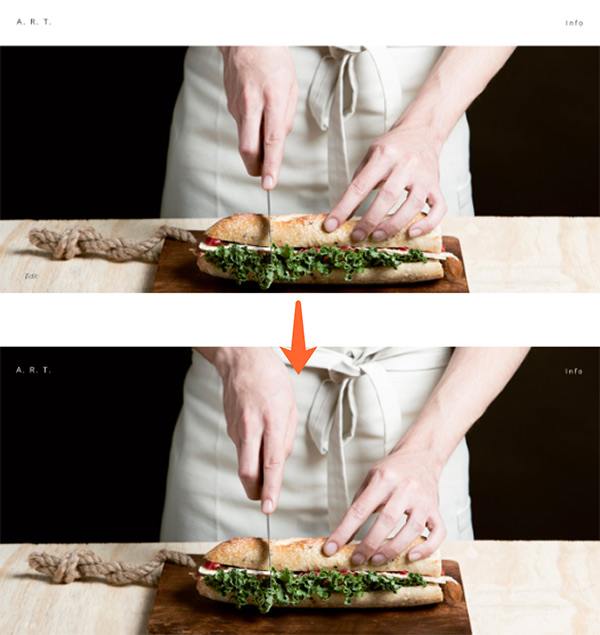
The header could be shown or hidden.
If "Content From Top" activated, the header will be covered above the content.
If you want this page to show alternative logo or menu color, please set Color by The "Logo Color," "Menu Color," "Menu & Logo Color on Expanded Panel." The pages with alternative logo and menu look like:
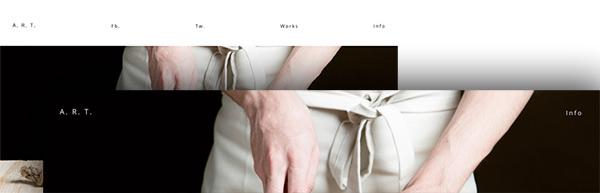
Tip:
1) Set the default and Alternative color value here: SEA Theme > Theme Options > Color: Plain Text Logo, Menu.
2) If you use an image logo, you need upload logo image for "Alternative Image Logo"
3) Set the default color skin here: SEA Theme > Theme Options > Color: Others / Logo & Menu Skin on Header.
Footer
The footer could be shown or hidden.
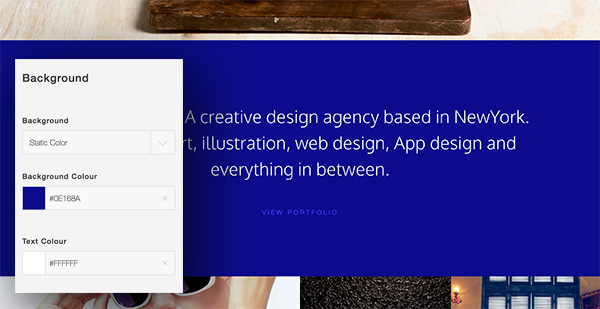
Background
The page could be set "Background" and "Font" color.
BM Content Builder
After install and activate the BM Content Builder plugin,
you'll see the BM Content Builder button in Page/Post editing page:
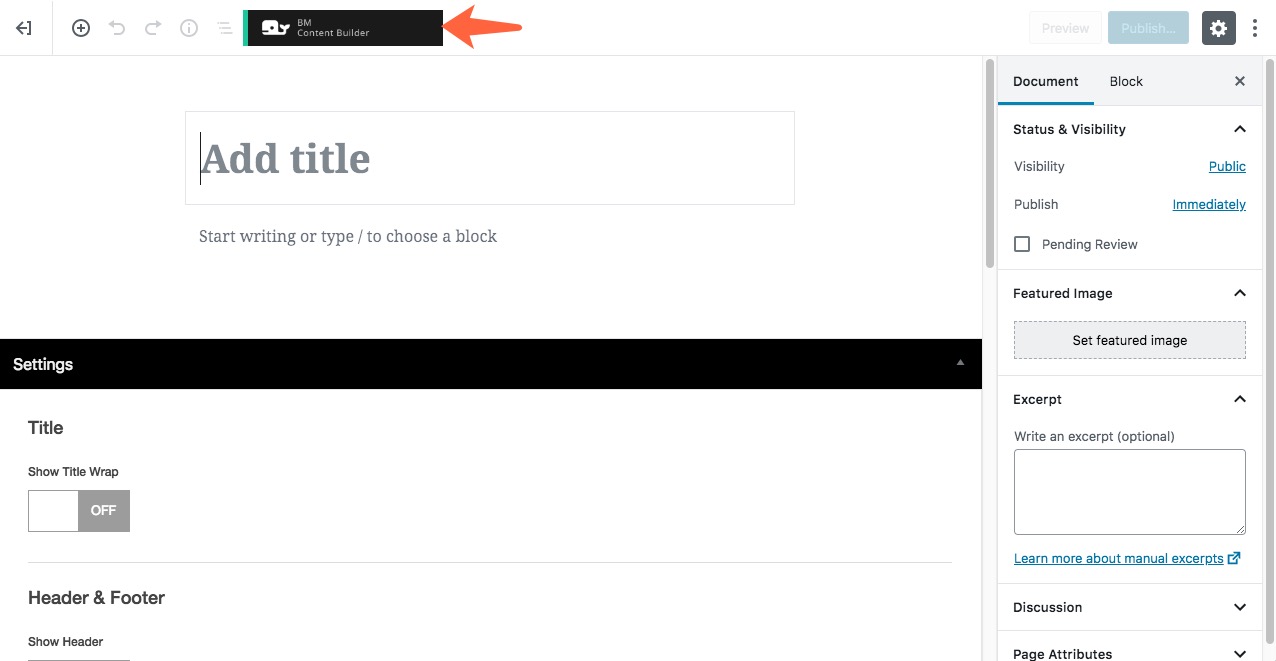
Press the button to pop up the interface of BM Content Builder.
If there are existed content on BM Content Builder, there are several buttons on the top bar: Quit, Save, Add Module, Save Layouts as Template, Insert Template.
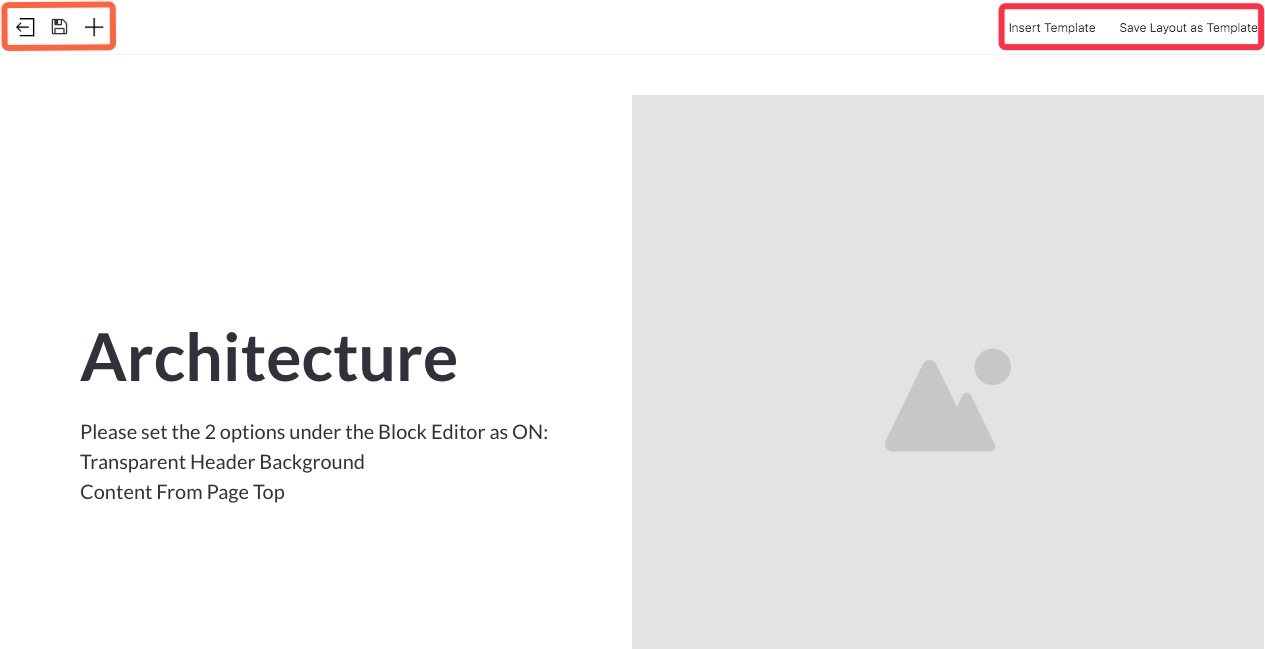
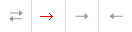
Click the left-arrow icon to exit this editor.
Click the disk icon to save the current content.
Click the plus icon to add new modules.
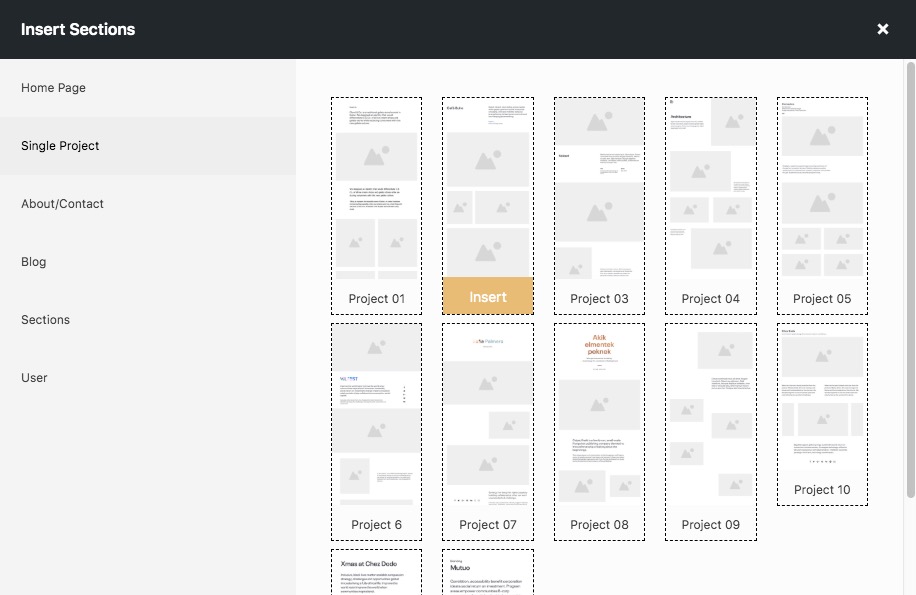
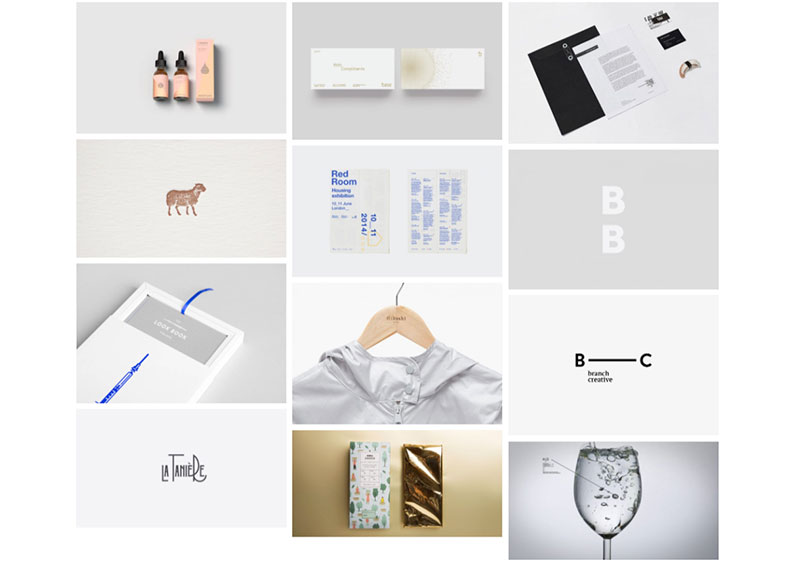
Click "Insert Template", you could insert some layouts. There are templates including Home Page, Single Projects, About/contact, Blog, and Sections. The "User" tab is for your own.
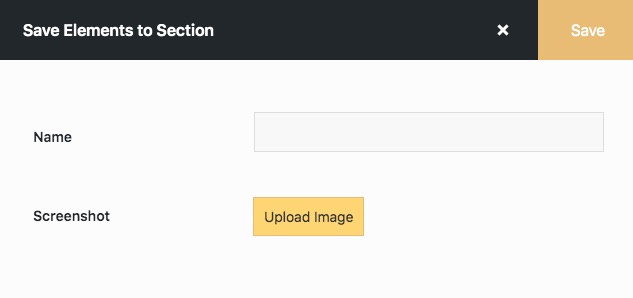
Click "Save Layouts as Template", you could save the current layout as a new template. You would find the template in the "User" tab(Click "Insert Template" to find it). You could also save a Group layout to a new template, click to check.
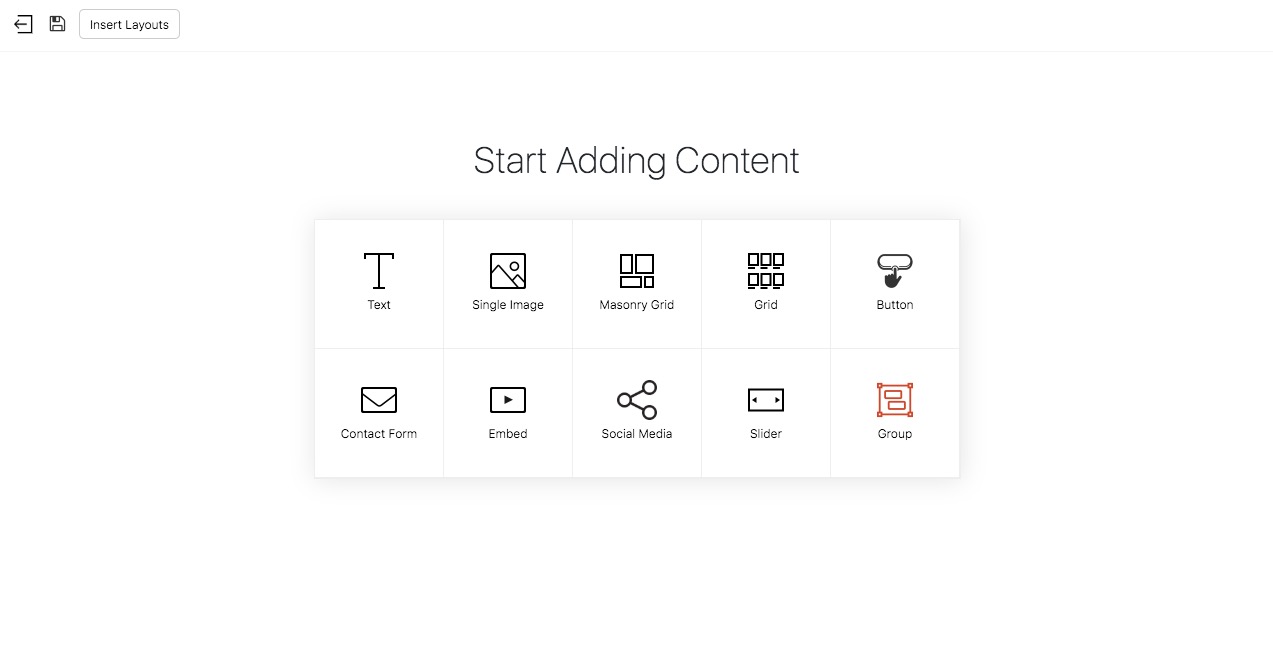
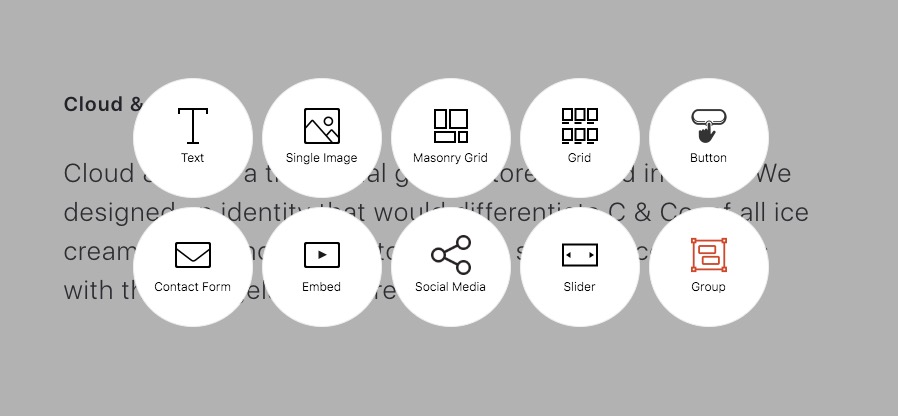
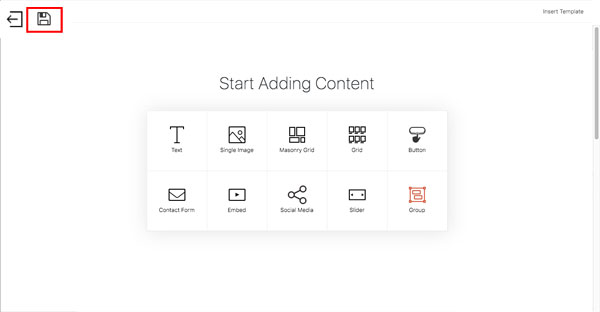
There are 10 modules within the builder: Text, Button, Grid, Masonry Grid, Single Image, Button, Content Form, Embed, Social, Slider, and Group.
Add a new module, like Text. The pop-up panel would show.
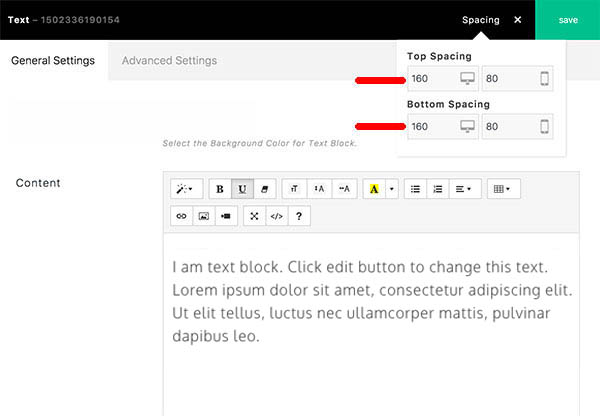
Click "Spacing", you could enter a number to setup the "Top Spacing(desktop/mobile)" and "Bottom Spacing(desktop/mobile)" for this module.
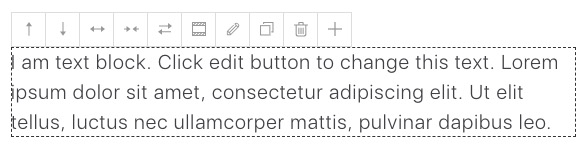
For the builder is a live model editor, you'll see the change that you have edited. Move the mouse cursor over the module. The toolbar would show.
-
Move forward one and back one

-
Width: To increase/reduce the width. Each module could be set 1-12 cols width. When the module is 12 cols already, increase one column, the module would be fullwidth.

-
Move to Left/Right
-
Add / Reduce spacing quickly(20px click once) for desktop

-
Edit
Remove
Clone
Add new module behind(or into for Group module) this module

The "Save"
- The "Save" in BM content builder panel: If you change any layout things of BM content builder like adding/removing modules, changing width/position of module, and so on. It needs to click the button to save:
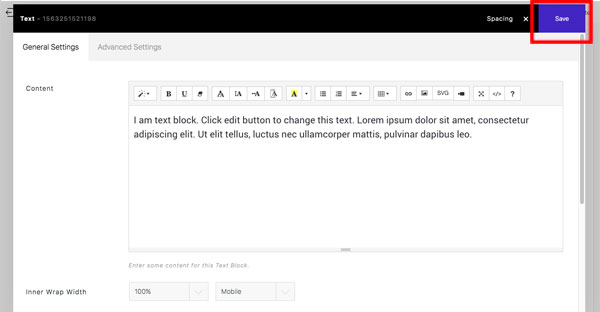
- The "Save" in BM content builder panel: If you edit a module, please click the button to save the settings of this module:
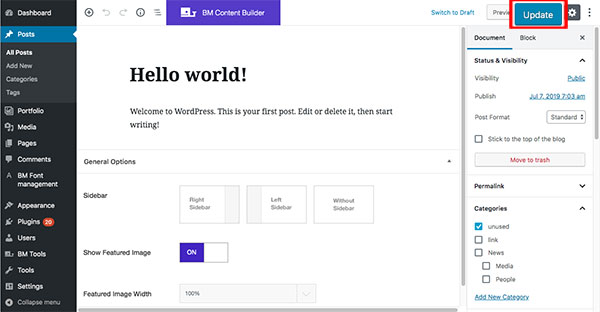
- The "update" in WordPress default editor: If you change the setting of WordPress default editor like sidebar, show title, and so on. It needs to click "update" to save:
Text
Add some text with the text module. You could set up the "Background color" and "Inner Wrap Width" for the module.
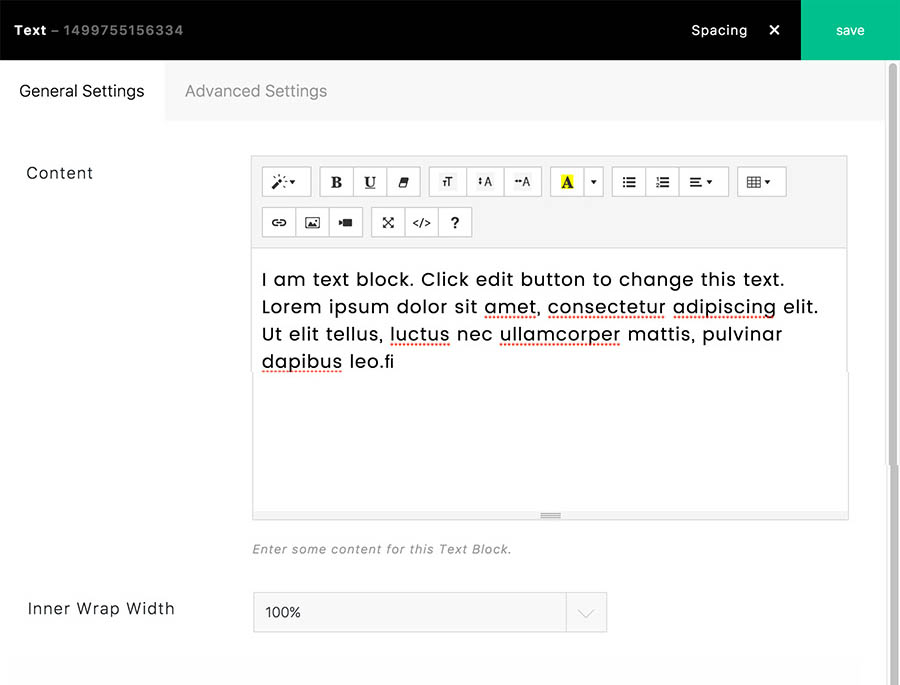
There is a 3rd party wysiwyg editor within the Text module. You could set up the "Font color/background color", "Font Size/Line height/letter spacing", "Container Height" and other options with the editor. If you set up the "Container Height" same as "Browser Height", the content in Text module would be vertical centering.
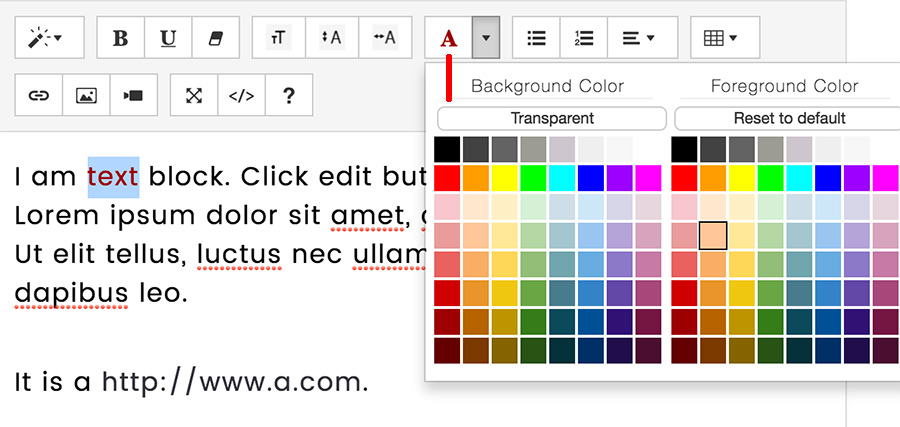
Font color / background color:
Font size:
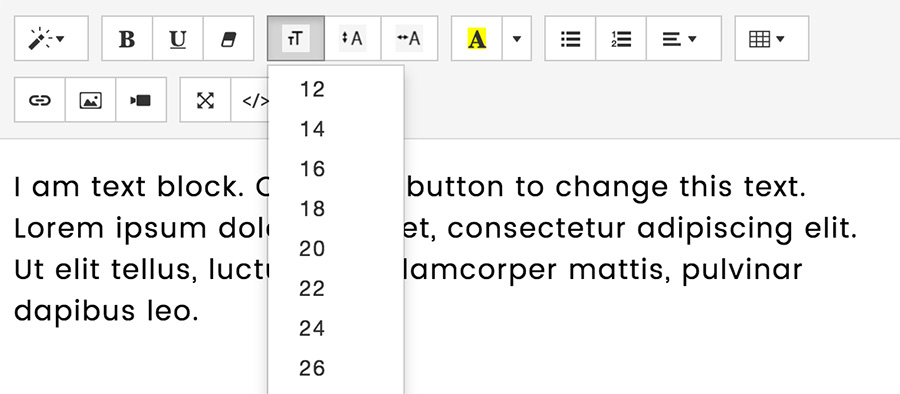
The default font size unit is PX, you could use unit VW or VH in code mode, it would be more flexible. e.g.
<h1 ><span style="font-size: 11.5vw;" data-msize="52">More simple, <br>more powerful.</span></h1>
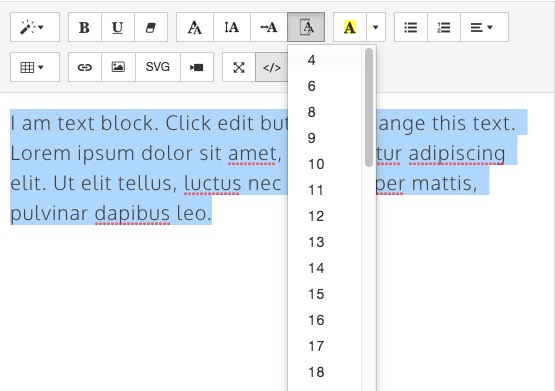
Font size for mobile:
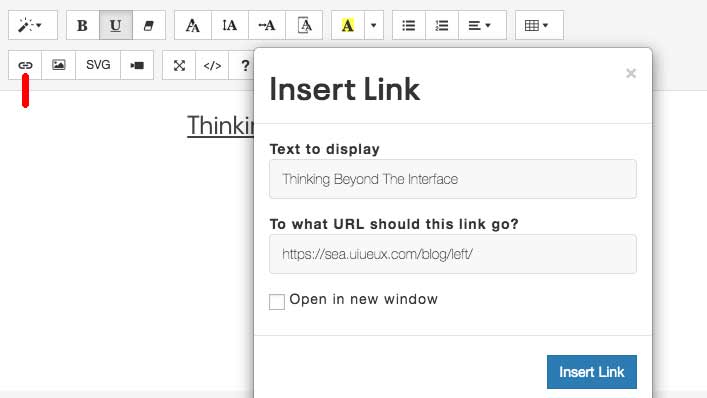
To add link for selected text:
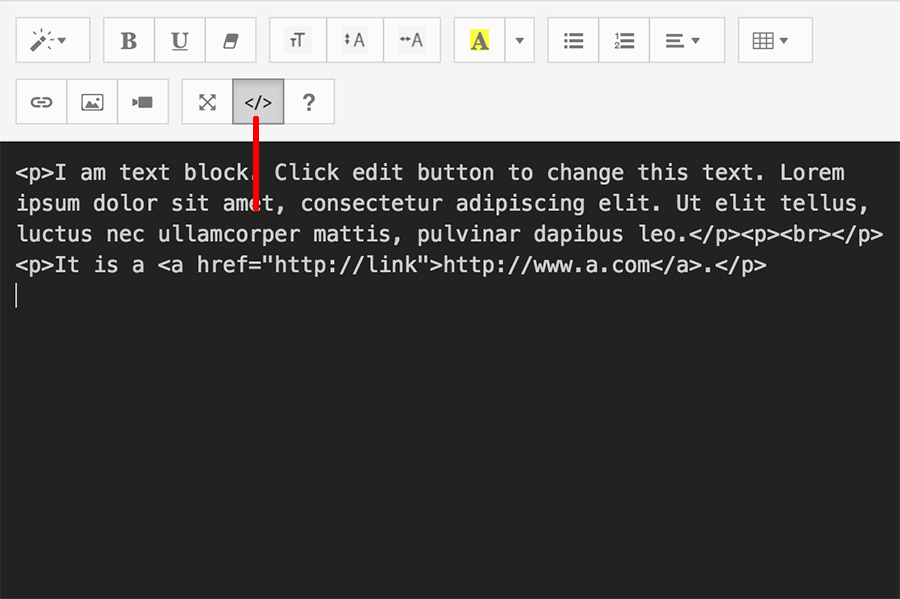
Click this button if you want the coding mode:
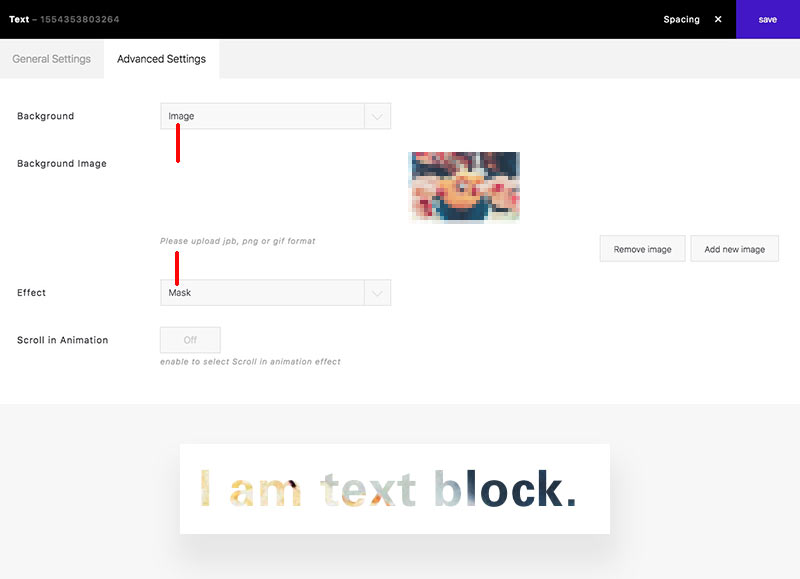
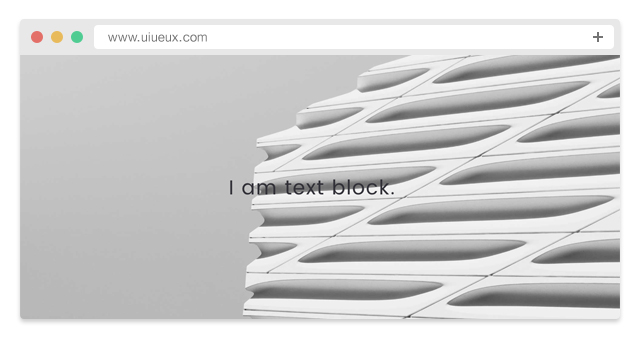
The Text module support color, image and video background. You could create fullscreen wrap with color, image or video background with "Text" module. Please enter some simple text in editor(don't enter too much content). You could create mask text effect through:
Background: image > Effect: Mask
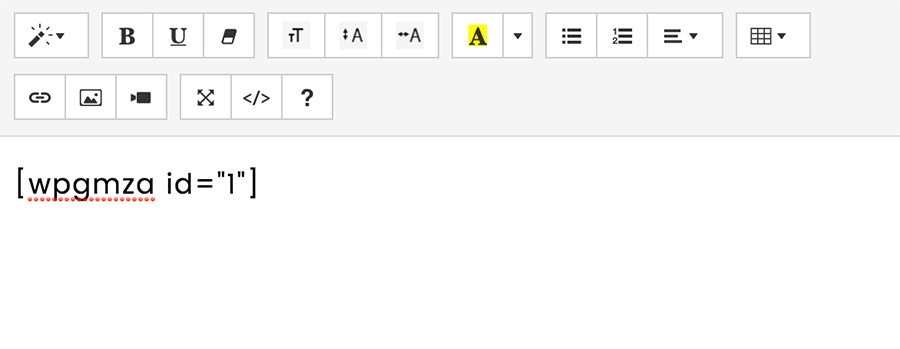
The text editor spports shortcode also, if you want to show a map, you could use the WP Google Maps plugin. Add the map through Maps > Maps, enter the shortcode like:
Tips: If set as "Hosted video" , it is recommended to enter both mp4 and webm, that will support most browsers.
Single Image
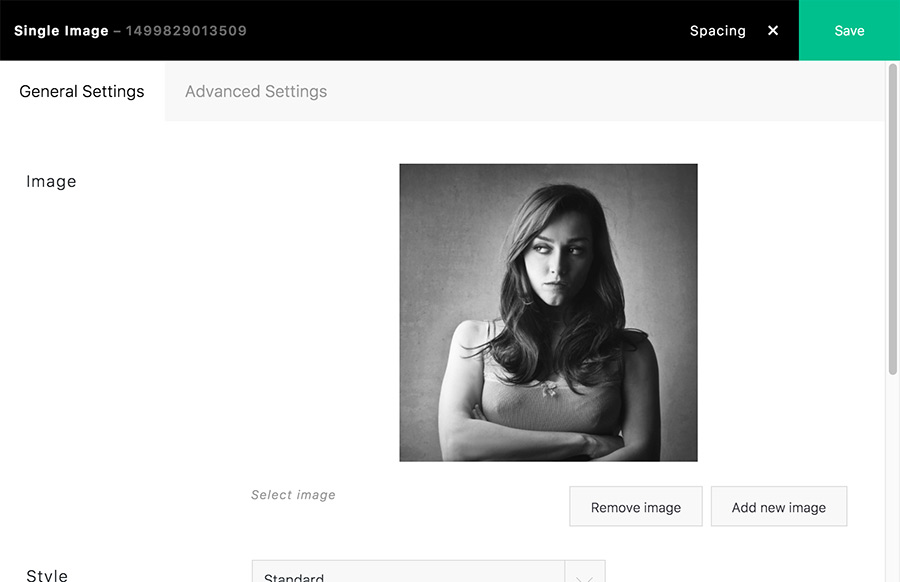
The File Type supports normal image and SVG.
Image
It supports JPG, GIF, and PNG image formats.- Style: Shadow
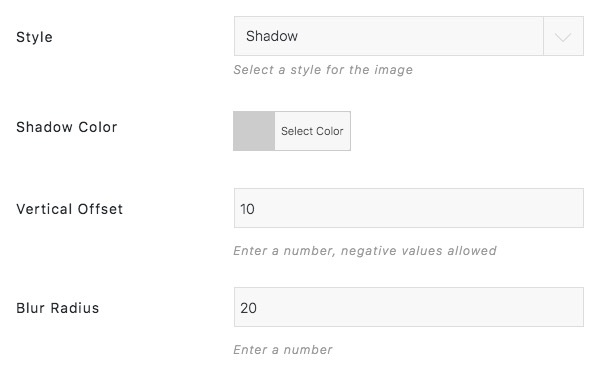
Vertical Offset of the shadow, a negative number means the box-shadow would be above the box, a positive number means the shadow would be below the box.
Blur Radius of the shadow, if set to 0 the shadow would be sharp, the higher the number, the more blurred it would be, and the further out the shadow would extend. For instance, a shadow with 5px of horizontal offset that also has a 5px blur radius would be 10px of total shadow.
-
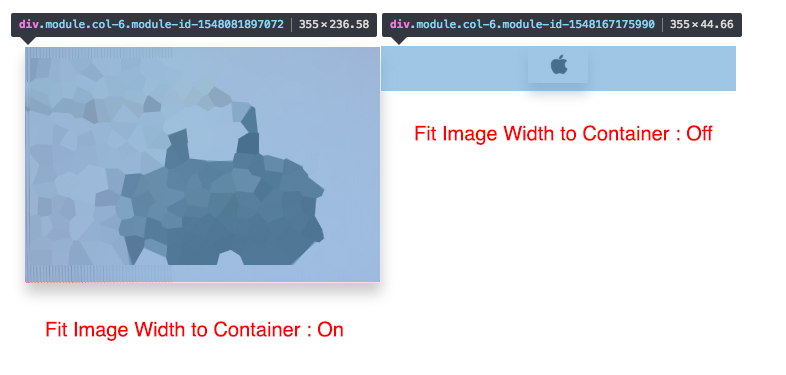
Fit Image Width to Container
On: The image would always fill its container.
Off: The image would display on the original size. If the image is bigger than its container, it will fill into its container. You could set the align value on its container. This option often set for some small image like icon.

-
You could enter a URL or enable Lightbox for the image clicked.
SVG
You could set Color, Width, Link URL for the SVG.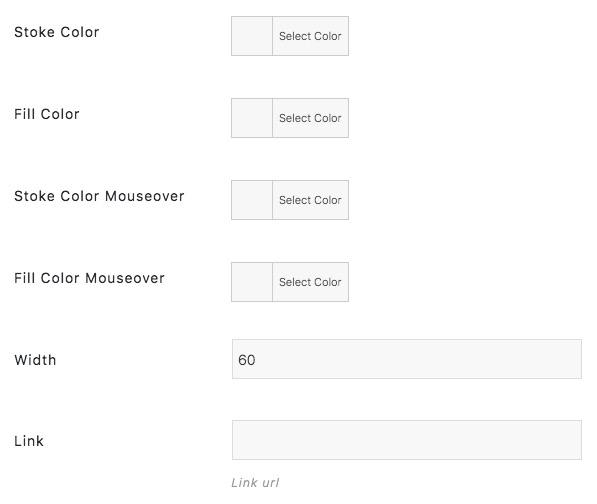
Masonry Grid
- Sources:
- Media Library: to choose images from media library.
- Portfolio: to show the portfolio posts(Portfolio of left admin bar);
- Post: to show the posts;
- WoCommerce Product: to show the product list, it needs to install and activate the WooCommerce plugin;
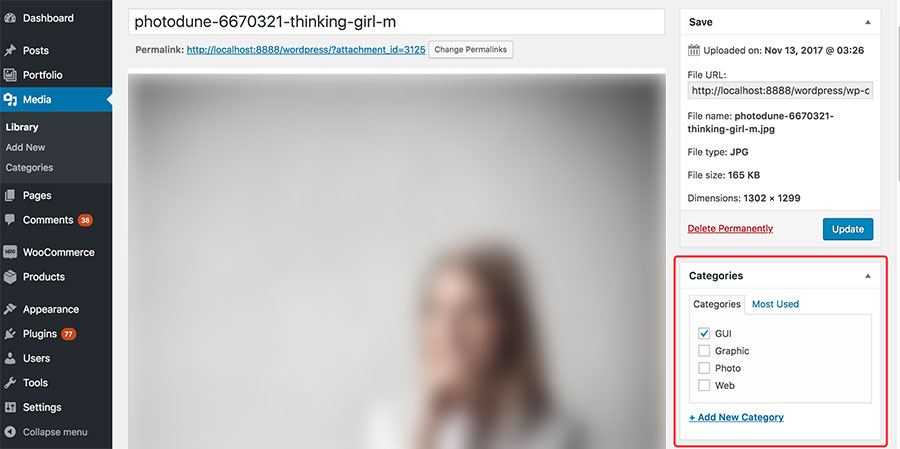
When set up the source as Portfolio, Post, or WooCommerce Product, don't forget to Choose a Category. The single portfolio/post/product within this category would be shown. Each post should have a "Featured Image" for thumbnail.
- Filter:
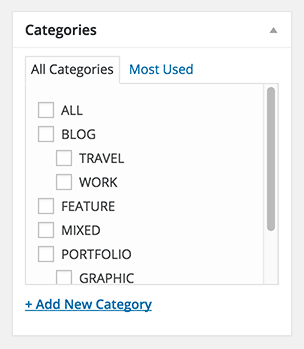
If you want to show filter for the portfolio page, please enable the "Filter" option. Make sure there are sub-categories in the category of the portfolio list. The category structure looks like:
For the "Media library" source, you could set category for each image, but don't set parent category, it will list all categories of level 1 set on images.

You can set category for each image in Media > Library also.
- What Thumbnail Does:
- Open The Portfolio Item: when you click one item, the gallery post page would be linked. If this item is a Link format post, the first URL set within link post would be linked.
- Open Lightbox: when you click one item, the full size featured image will be opened in the Lightbox. If you enter embed video code into "Show Video" of a single portfolio or video format post, the video will be shown in the Lightbox instead of the featured image.
- The "Open Custom URL" and "Nothing" are only for from "Media Library."

- Fit Image into Grid: The images are filled into the grid by default(the images will be cropped). If it is activated, the images will be fit within the grid, the size of the image will be limited in the grid.
- Image Lazyload: If it is activated, the images will only be loaded when they are on the current screen. The page will be loaded faster.
Grid
It can be set the standard grid like:
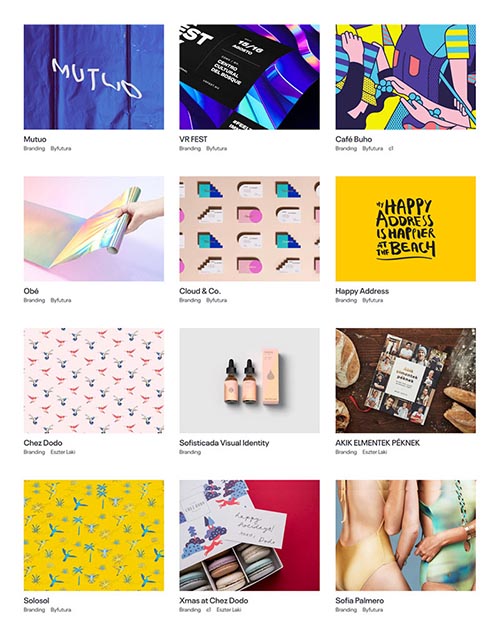
It can be set as a masonry(waterfall style) list with following options:
- Image Ratio: Auto
- Grid List Type: Masonry Grid(Waterfall)

It looks like:
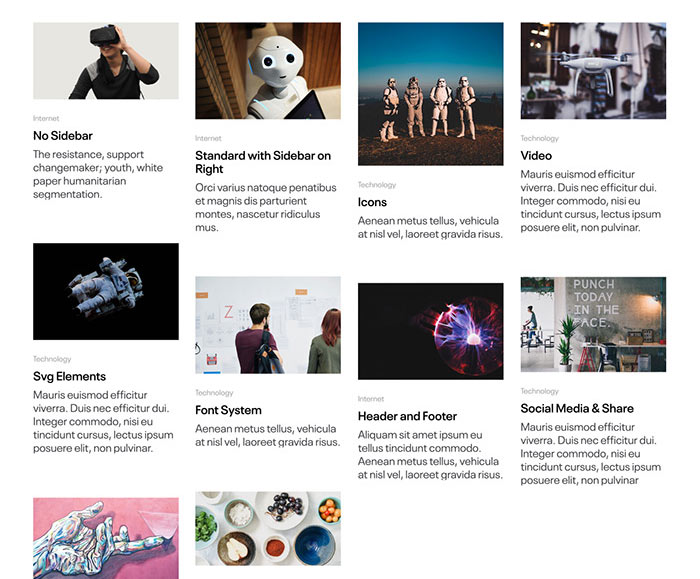
Use the Gird module to create a blog list
- Resource: Post
- Image Ratio: Auto
- Grid List Type: Masonry Grid(Waterfall)
- Item Style: Image + Text
Button
In the Button module, you could make multiple buttons and change their order by drag & drop.
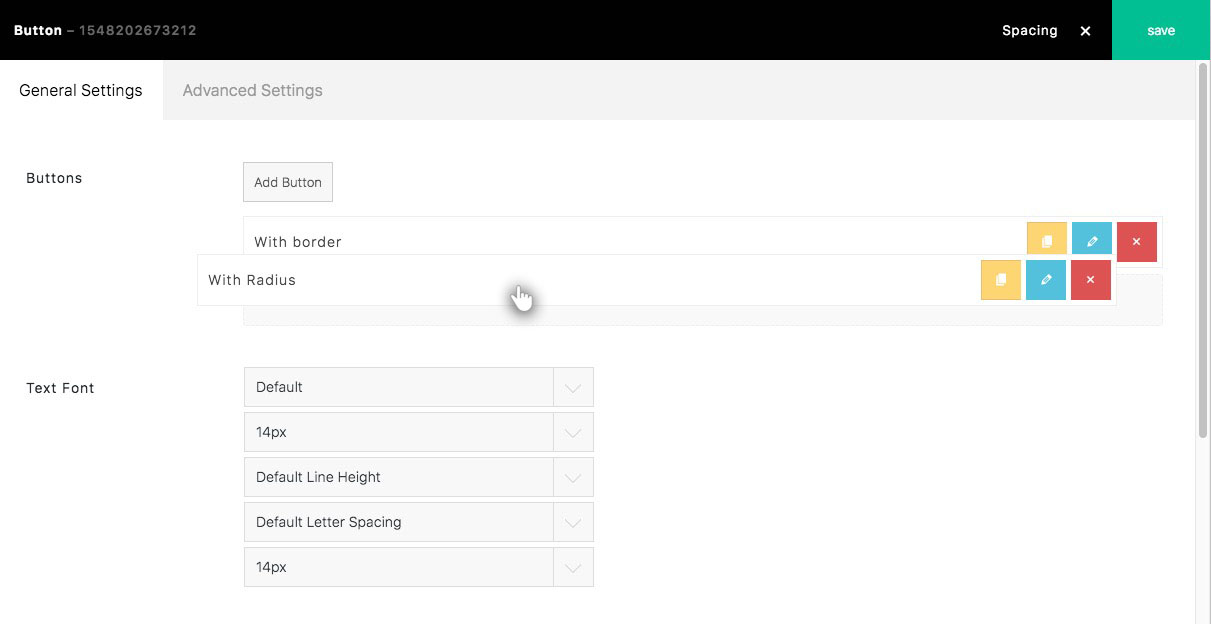
Click a "Pencil" icon to edit the button item:
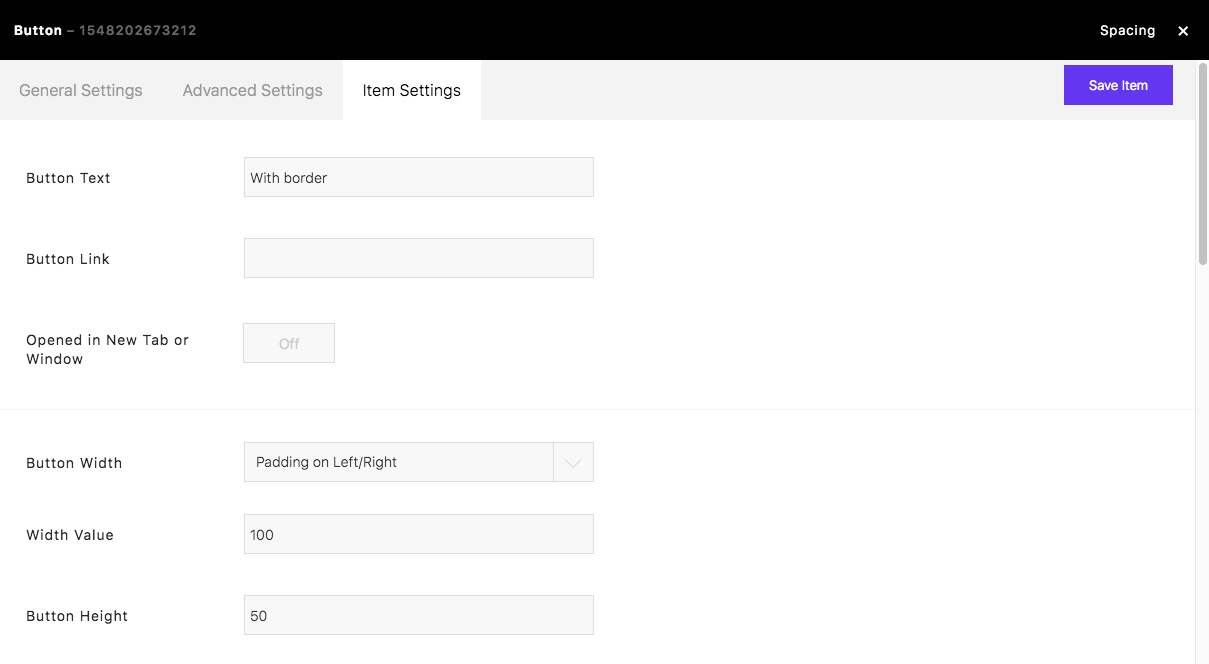
Button Width
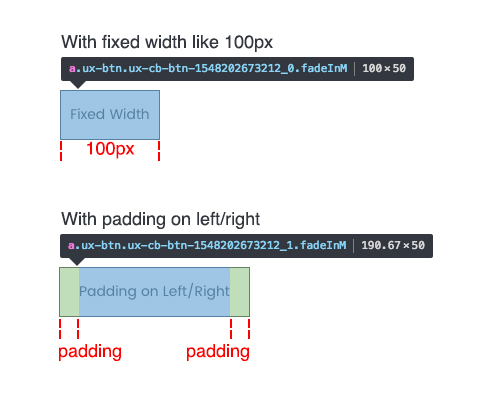
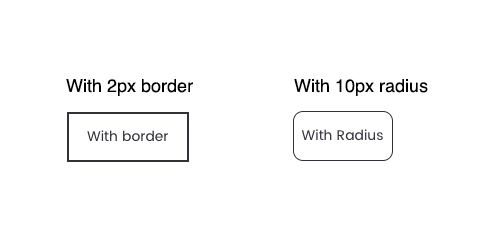
It is recommended to use "Padding on Left/Right" for it is fluid.Button Border
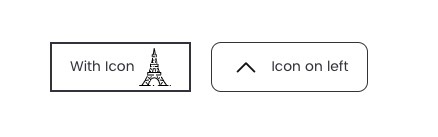
Show Icon
You could upload an SVG icon and set a width for it.
Contact Form

Tips:
1) If you can't receive the mail, please check your mailbox, maybe it is moved to the spam.
2) Try to use a SMTP WP plugin, like WP Mail SMTP.
Read more: How to set the WP Mail SMTP?
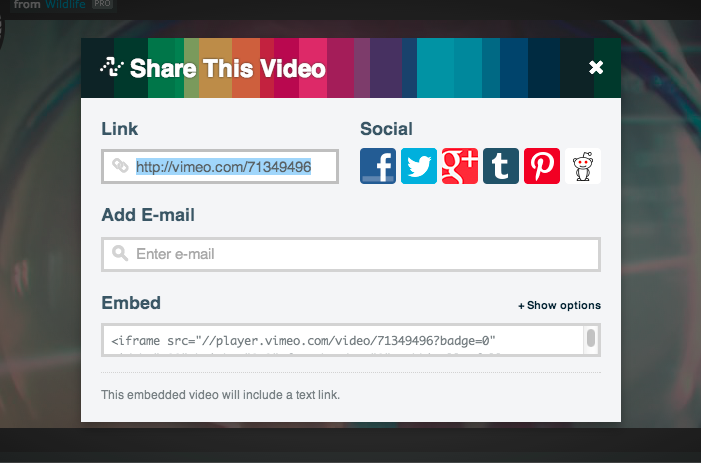
Embed
To enter a video to the page, you need to copy and paste the embed code of the video, an example with Vimeo video:
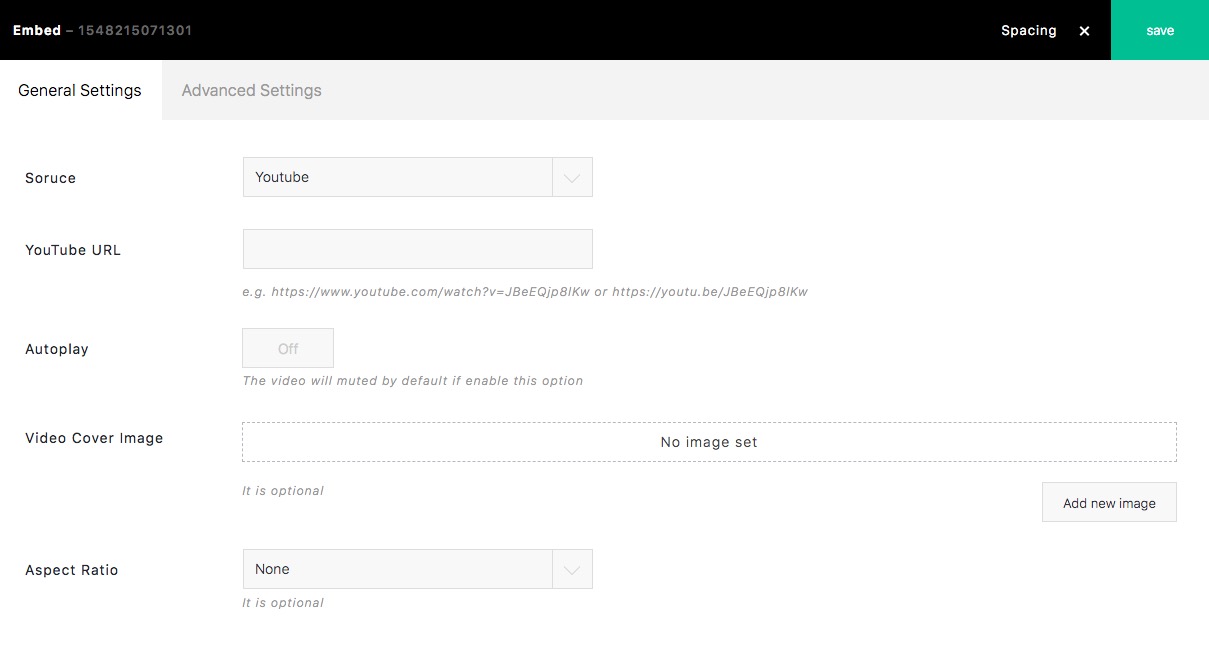
Supported video:
- Vimeo
- Youtube
- other embeded videos from video sites
For Vimeo and Youtube video, you could directly copy/paste the link(url):
Social Media
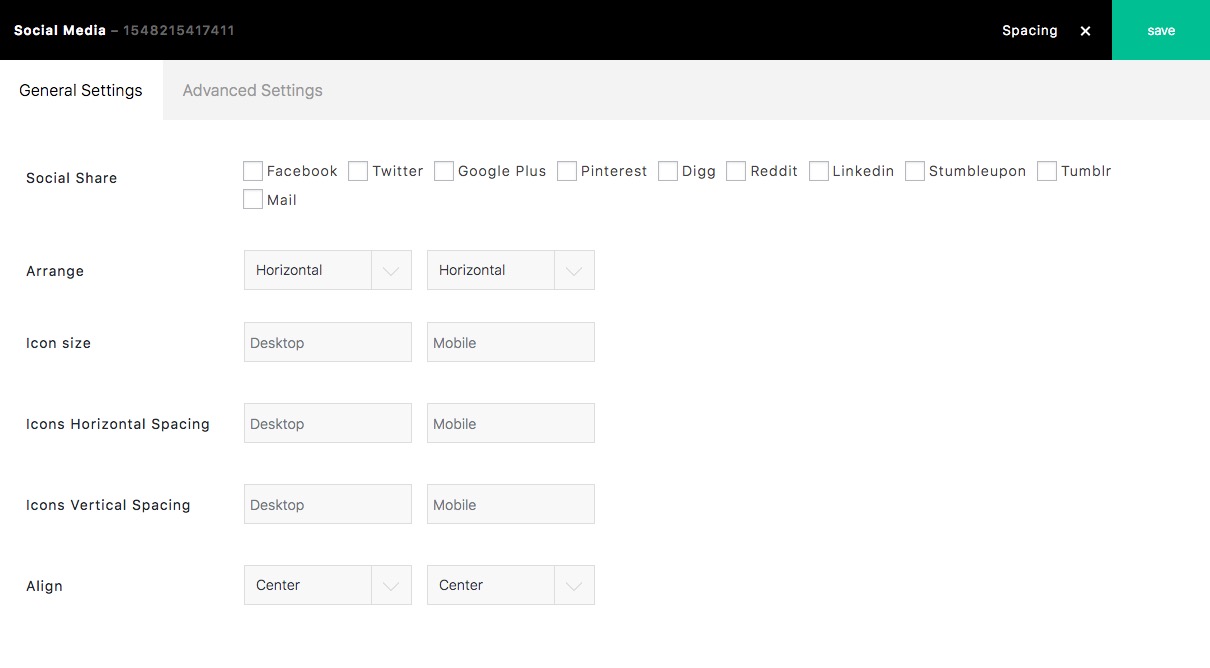
To show social media, please add the module. It is Click-to-share to social media; it supports 9 kinds of social media.

Slider
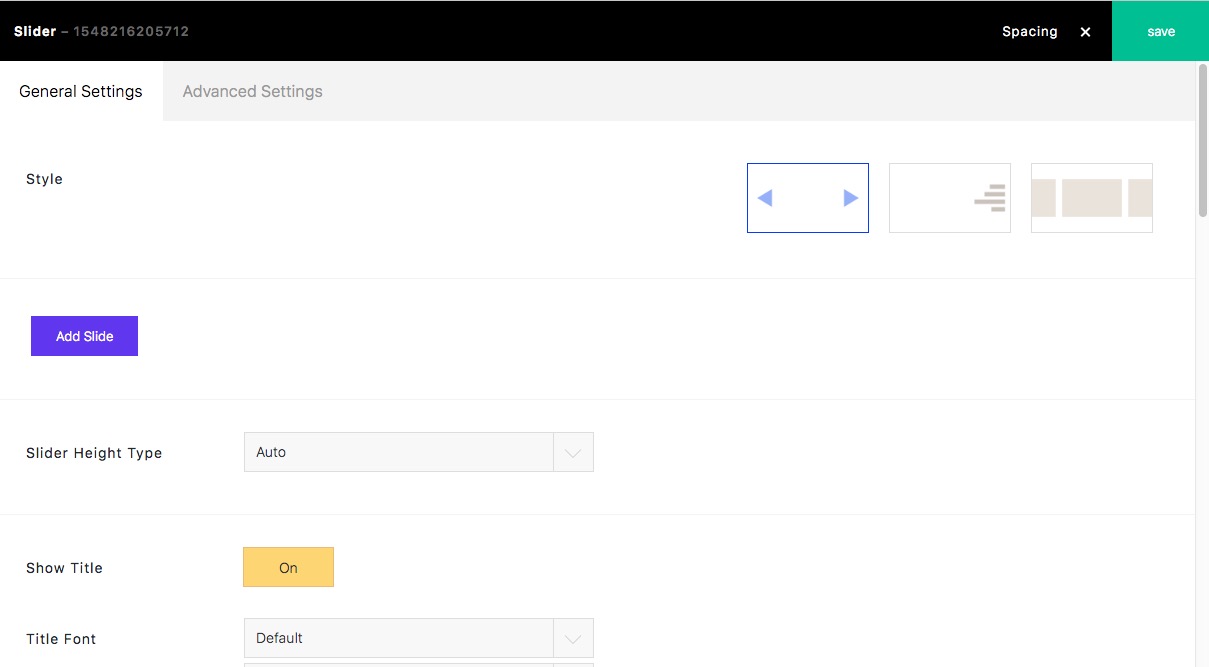
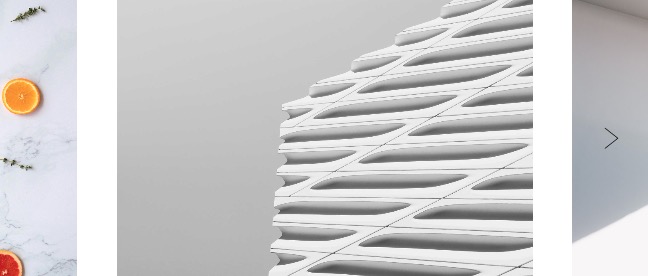
Slider Style 1

Slider Style 2

Slider Style 3
Enable link
To open a URL when clicking a slider image, please active "Enable link".
Please go to "Media Library" to enter the URL for the image:
Group
The tools icon color is blue.
Click this button, you could save the group (including the modules in it) as your own template.

-
Align
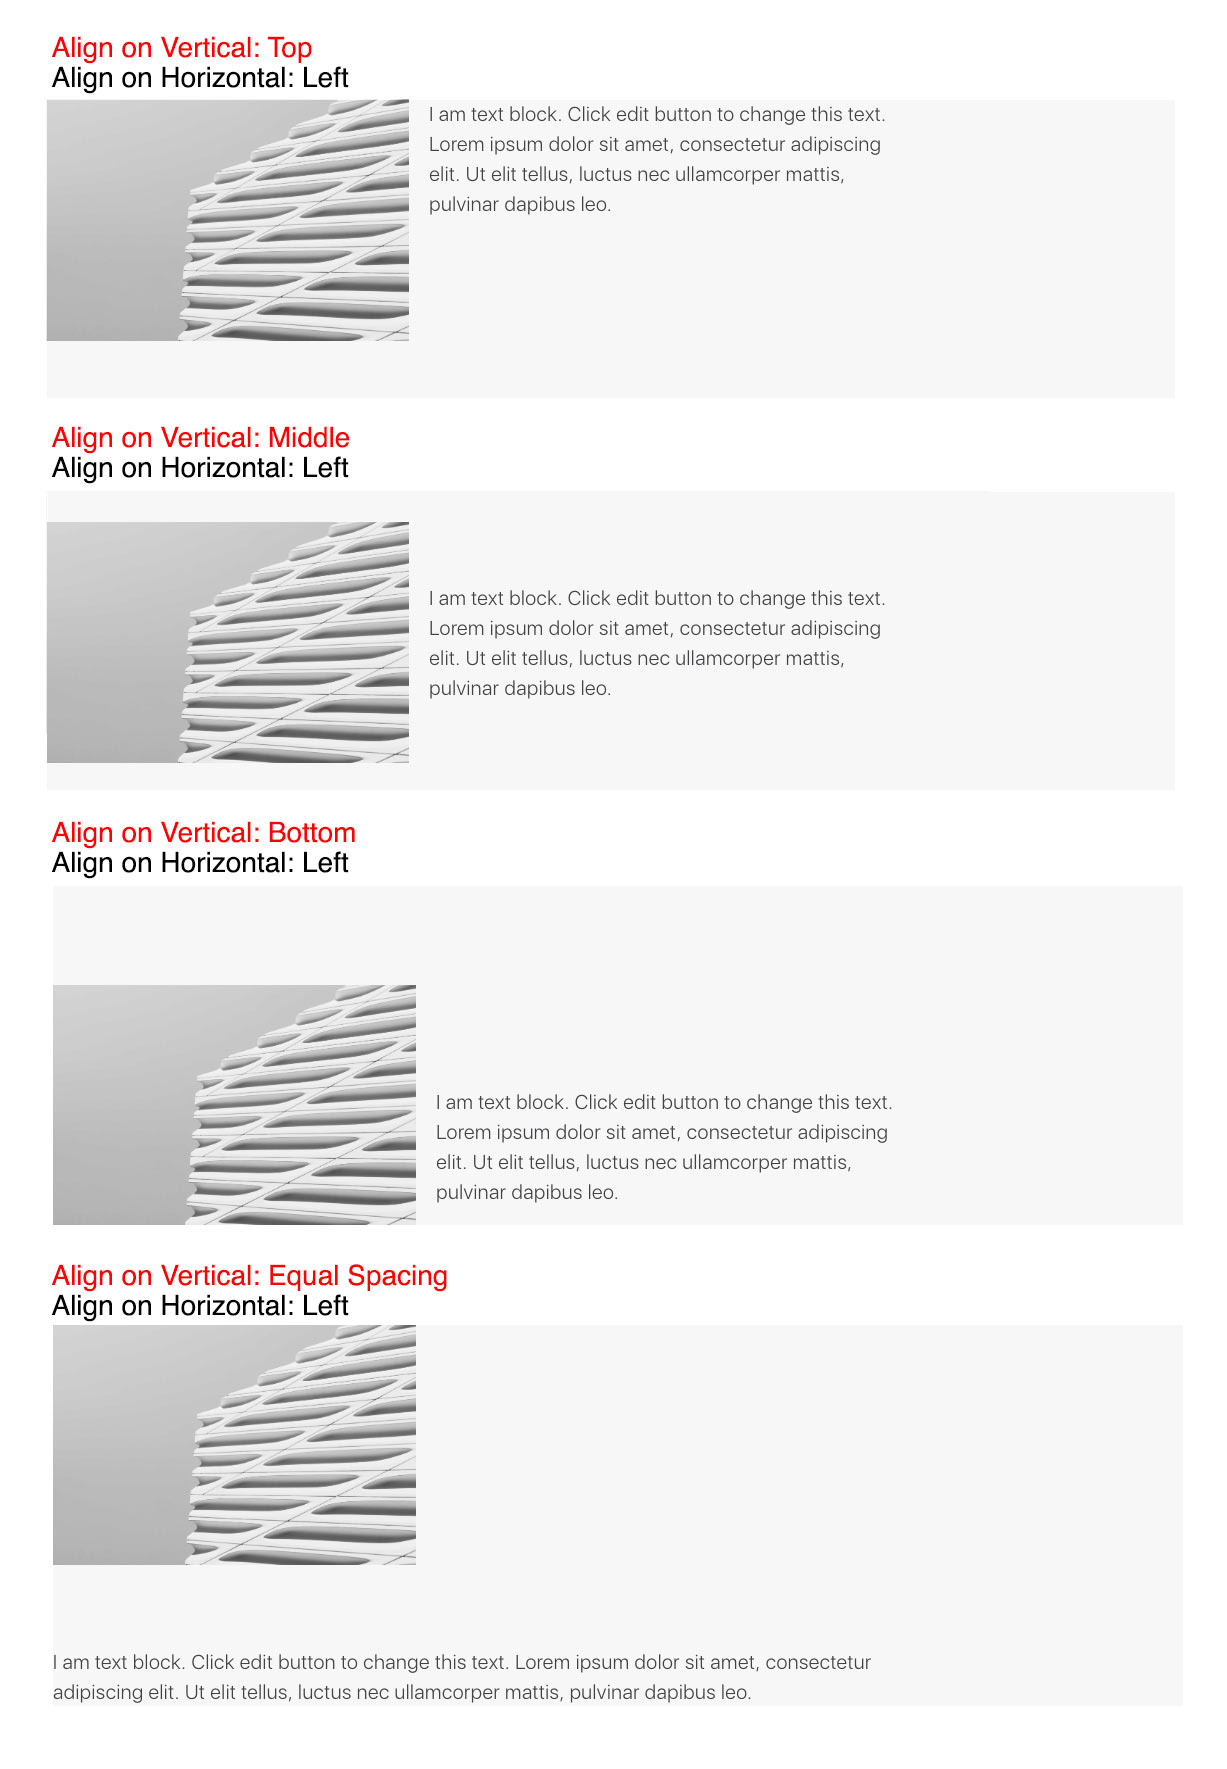
The "Align on Vertical: Equal Spacing" would work when there are multiple rows of modules.
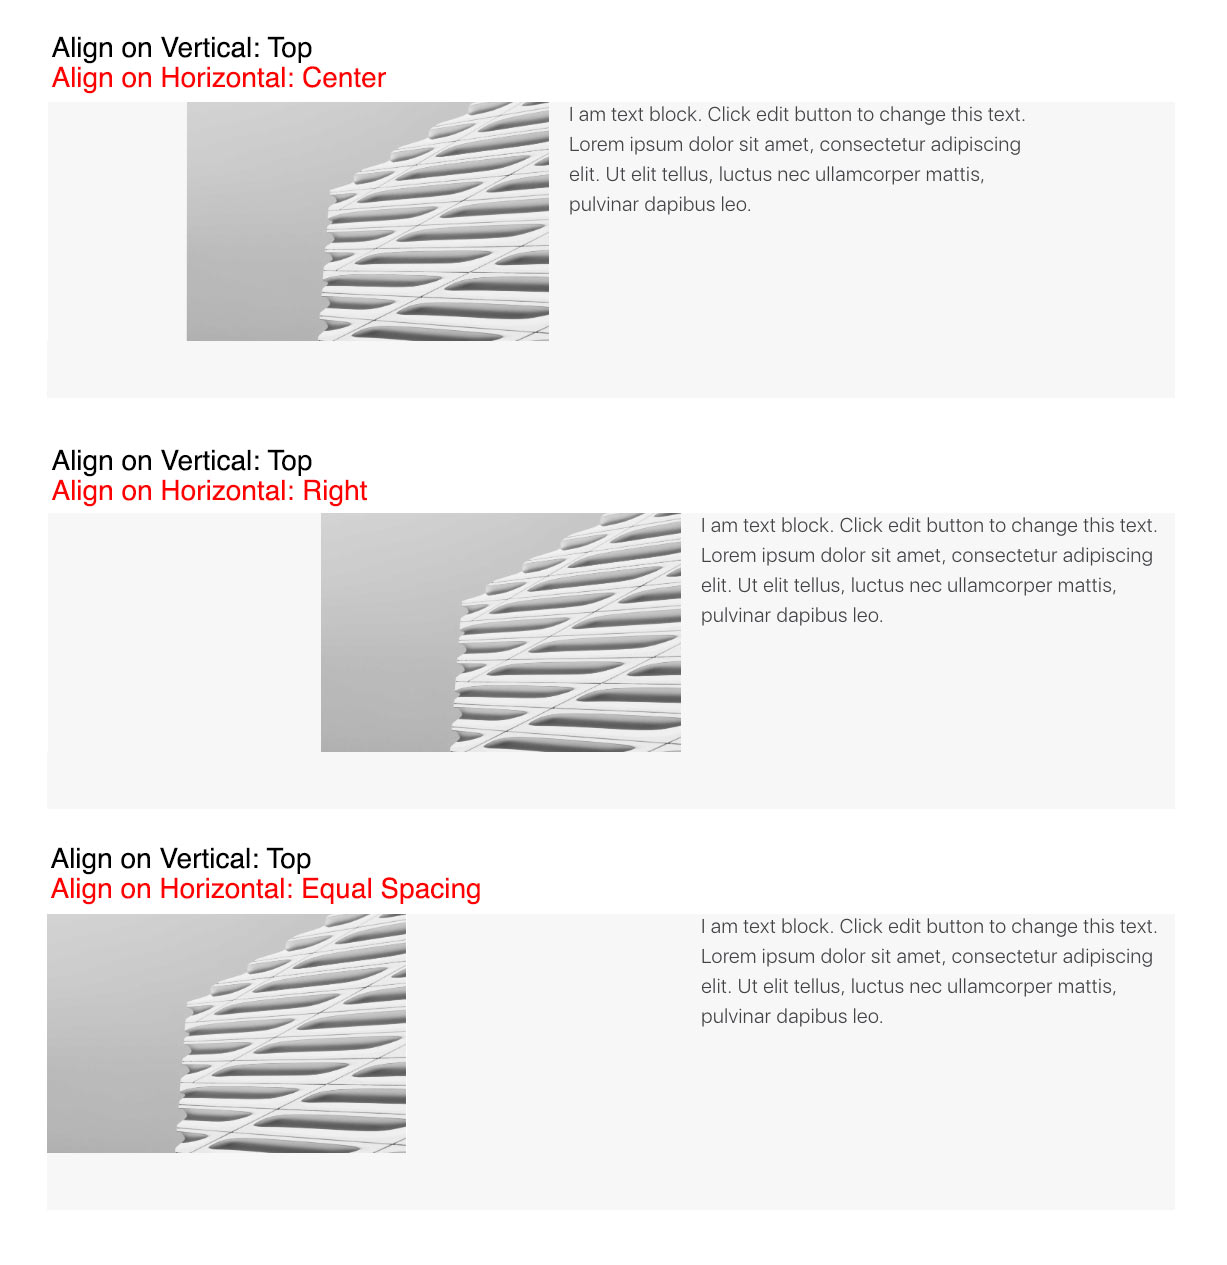
The "Align on Horizontal: Equal Spacing" would work when there are multiple modules in one row.
-
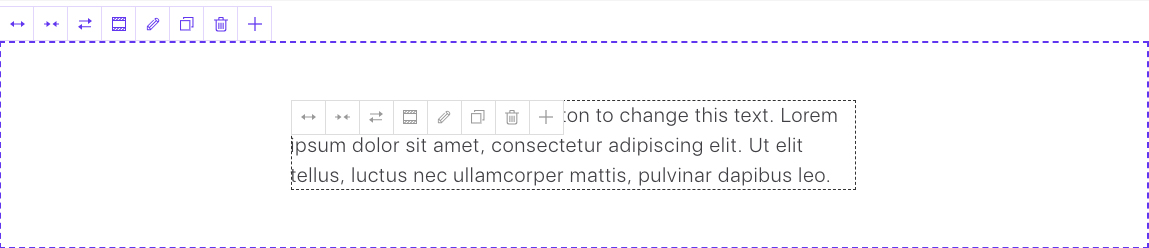
Force Content to fit Fullwidth
When a group is fullwidth, and this option is "On", it would work like the following image:
-
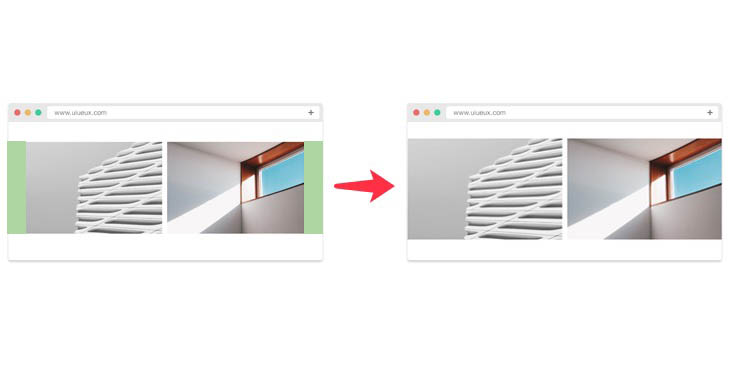
Disable Gap
It looks like if activate this option:
-
Screen height
You could set the percentage of screen height for the group. It would be if set it "50% of the Screen height":

If the height of the module is more than 50% of the screen height, the group would be with modules height. The height option for mobile would only work on portrait mode. -
Background
There are background settings(color, image, and video) for The Group. You could create a fullscreen wrap by the options and 100% of the screen height, increase the width as fullwidth. It will be:
Hosted Video: It needs to enter a video file URL(not 3rd embed code like Youtube). If you enable the "Enable Mix Blend Mode" option, it uses the CSS - mix-blend-mode: screen. If you want to create a text mask effect, please insert a Text module into this Group module. Please set white color for "Choose Color for Video" option. It is a new CSS feature; it doesn't work well on part of browsers. -
Shadow and Radius
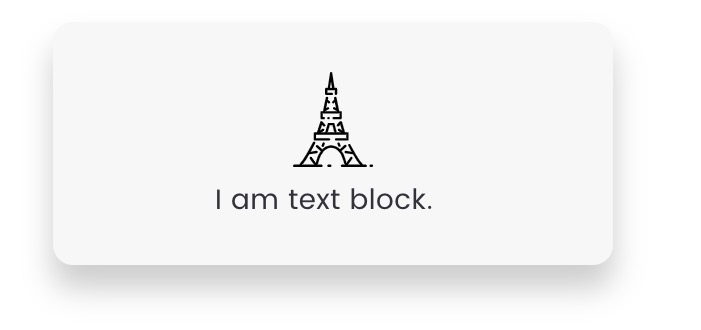
There are shadow and radius(round corner) options. You could add one Image and Text module into a Group to create an icon box with these options. The shadow options are the same as Image shadow. Change Universe Color when Scroll In
Auto Goto Top When Scroll In
The group module will auto goto the top of browser viewport when it scrolls in.Make Groups Contour on The Current Row
If there are multiple Groups in one row, their height will be the same.
WooCommerce
WooCommerce is now the most popular eCommerce plugin on the web. Please install and activate WooCommerce plugin to create your online shop.
- How to start with WooCommerce(installation, creating products, and so on)? Read WooCommerce official DOC.
- Set layout by SEA theme options(sidebar layout, cart icon, product slider, social icons, text placeholder)
- Set layout by Appearance > Customize > WooCommerce

Set product image quality and thumbnail ratio:

Set products per row on the default archive page(1-6 supported):

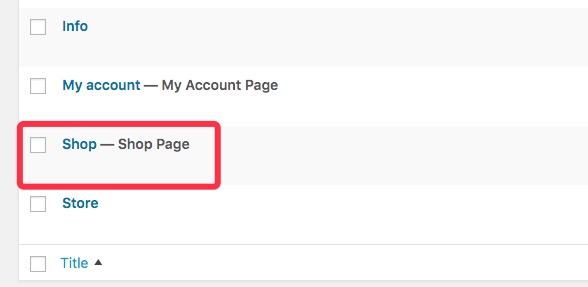
Notice
The WooCommerce would automatically create a page named "Shop - Shop Page", it could not be edited by BM Content Builder and page options of SEA theme. It is the default page of WooCommerce. You could creat a new page to customize the layout for your shop page.
Translation
1. Translate
1.1 Basic strings
You can translate the basic strings in "SEA Theme > Theme Options > General Settings: Descriptions", there are 15 strings:
1.2 PO/Mo file
For the strings not included theme options, you can translate the static strings to your language using Loco Translate WordPress plugin(check the DOC) or Poedit.
There are the two main POT files:
/themes/sea-theme/languages/sea-theme.pot
/plugins/bm-builder/languages/bm-builder.pot
2. Website with Multi-language
It is recommended to use the popular WPML wp plugin if you want to make a multi-language site. There is the documentation of WPML.
2.1 Translate pages
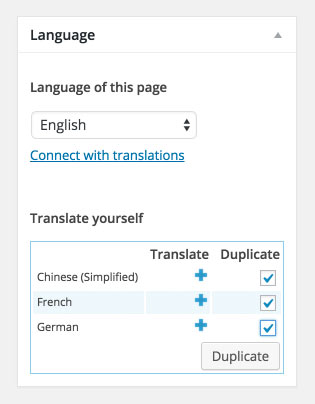
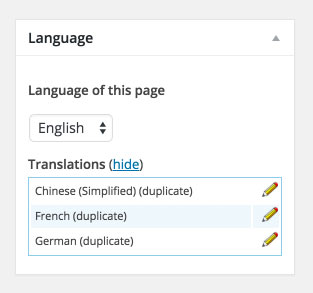
- Created a new page(make sure under default language), activate builder editor, put in some modules, click publish.
- Check ‘Duplicate’ checkbox and click “Duplicate” (see the screenshot below) at the right sidebar. “Duplicate” button would be displayed after checking the checkbox. Click the pencil icon to translate the page.
- For a page created by BM Content builder. Please don’t translate the origin modules. You need to clone the modules what need to be translated also. Translate the cloned modules.
2.2 To translate the strings like copyright information, Comment title, and so on:
- Install the plugin WPML String Translation.
- Go to left navigation: WPML/String Translation.
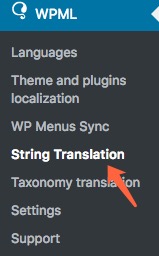
- Pickup "admin_texts_ux_theme_option" in selector "Select strings within domain". The strings will show.

- Click “translations” of every string item, enter the target translated words, check on “Translation is complete" and save it.

2.3 To set the language Switcher
There are two ways:
- To show the Switcher by menu. Go to WPML > Languages, click "+ Add a new language Switcher to a menu":

The options panel will popup:

Select a menu, set what's elements(language name, flag) shown, position, color. The Switcher could be shown in the selected menu. The "Dropdown" style doesn't support footer menu.
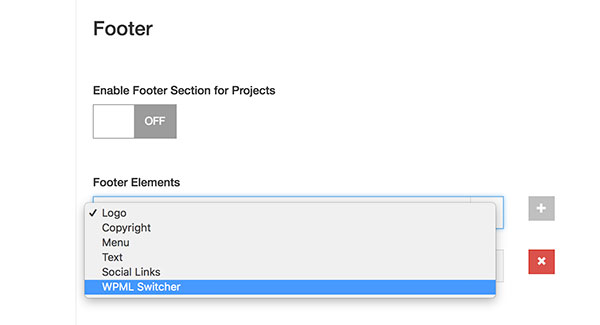
- To show the Switcher by footer element. Go to SEA Theme > Theme Options > Layout : choose the "WPML Switcher" for "Footer Elements", the Switcher(Flag) will be shown on footer:
Included Files
- Javascript files
- Bootstrap v3.3.5 - js/bootstrap.js - Bootstrap framework js
- Modernizr 3.5.0 - js/modernizr-custom.js - Respond user's browser features
- Waypoints v4.0.1 - js/jquery.waypoints.min.js - Trigger something scrolling a anchor
- Isotope v3.0.4 - js/isotope.pkgd.min.js - Masonry layout plugin
- - js/packery-mode.pkgd.min.js - PACKAGED v2.0.0 - For Isotope packery layout
- - js/photoswipe.min.js - PhotoSwipe v4.1.2 - Lightbox plugin
- ImagesLoaded v4.1.2 - js/imagesloaded.pkgd.min.js - Judge images loaded or not
- OwlCarousel v2.2.1 - js/owl.carousel.min.js - Slider plugin
- LazyLoadXT v1.1.0 -/js/jquery.lazyloadxt.min.js - Image lazy load plugin
- VelocityJS v1.5.0 - js/velocity.min.js - Animation effect
- jPlayer v2.9.2 - js/jquery.jplayer.min.js - HTML5 media player plugin
- ie.js - js/ie.js - For IE browser
- custom.theme.js - js/custom.theme.js - Sea theme main js
- CSS files
- Bootstrap v3.3.5 - styles/bootstrap.css - Bootstrap framework
- OwlCarousel2 css - styles/owl.carousel.css - Slider plugin css
- photoswipe - styles/photoswipe.css, styles/skin/photoswipe - Lightbox plugin css
- style.css - style.css - theme main css
- style.css - rtl.css - theme RTL css
Once again, thank you for purchasing my theme. If you have any questions that are beyond the scope of this help file, please feel free to publish your question here.
Thanks,
SeaTheme